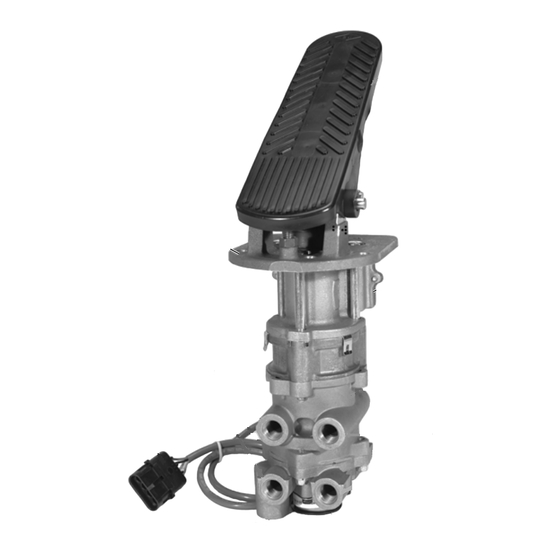
BENDIX E-10PR RETARDER CTRL BRAKEVALVE Руководство - Страница 6
Просмотреть онлайн или скачать pdf Руководство для Блок управления BENDIX E-10PR RETARDER CTRL BRAKEVALVE. BENDIX E-10PR RETARDER CTRL BRAKEVALVE 8 страниц. Retarder control brake valve

11. A small washer (26) will be found in the cavity of the
lower side of the primary piston (11).
12. Remove the large and small o-rings (23 & 25) from the
relay piston (24).
13. Remove the retaining ring (28) securing the primary inlet
and exhaust valve assembly (29) in the upper body and
remove the valve assembly.
CLEANING AND INSPECTION
1. Wash all metal parts in mineral spirits and dry.
2. Inspect all parts for excessive wear or deterioration.
3. Inspect the valve seats for nicks or burrs.
4. Check the springs for cracks or corrosion.
5. Replace all rubber parts and any part not found to be
serviceable during inspection, use only genuine Bendix
replacement parts.
ASSEMBLY
Prior to reassembling, lubricate all o-rings, o-ring grooves,
piston bores, and metal to metal moving surfaces with Dow
Corning 55 o-ring lubricant (Bendix piece number 291126).
Note: All torques specified in this manual are assembly
torques and can be expected to fall off, after assembly is
accomplished. Do not retorque after initial assembly
torques fall.
1. Install the primary inlet and exhaust assembly (29) in
the upper body and replace the retaining ring (28) to
secure it. Be sure the retaining ring is seated completely
in its groove.
2. Install the large and small o-rings (23 & 25) on the relay
piston (24).
3. Place relay piston spring (27) in concave portion of relay
piston (24) and install relay piston through primary inlet/
exhaust assembly (29) into under side of upper body.
4. Install o-ring (14) on adapter (13) and install adapter on
upper body. Install o-ring (10) on primary piston (11).
5. Place screwdriver, blade up, in vise. Insert stem (22)
through the relay piston upper body sub assembly, slide
this assembly over the blade of the secured screwdriver,
engage the screwdriver blade in the slot in the head of
the stem.
6. Place the washer (26) over the stem (22) and on top of
the relay piston (24).
7. Install primary return spring (12) in upper body piston
bore.
6
8. Compress the primary and relay pistons (11 & 24) and
retaining ring into the upper body from either side and
hold compressed, either manually or mechanically. See
the cautionary note under step 7 in the Disassembly
section of this manual.
9. Place the stem spring (9), the spring seat (8) (concave
side up) and lock nut (7) on the stem (22). Torque to 20
- 30 inch pounds.
10. Install coil spring (6), spring seat (5), and retaining ring
(4) .
11. Replace the rubber seal ring (21) on the lower body.
12. Install the 4 hex head cap screws securing the lower
body to the upper body. Torque to 30 - 60 inch pounds.
13. Install the secondary inlet and exhaust valve assembly
(19) on the lower body.
14. Install the screws that secure the exhaust cover (18) to
the lower body. Torque to 20 - 40 inch pounds.
15. Secure the screw (15) holding the exhaust diaphragm
(17) and the diaphragm washer (16) to the exhaust cover
(18). Torque to 5 - 10 inch pounds.
INSTALLATION OF THE RETARDER CONTROL
ASSEMBLY
1. Place the retarder control assembly (1) onto the upper
valve housing (13) making sure it is oriented correctly.
(Refer to marks made on unit prior to disassembly).
CAUTION: Switch damage will result if the plunger
is permitted to slide out of the bore by more than
3/8". Place the mounting bracket onto the top of the
retarder control assembly in its proper location. (Again
referring to marks made prior to disassembly.) Retain
with the three long cap screws (2) and torque to 80-120
in. lbs. Do not use silicone grease in the retarder control
section.
2. Replace the boot by expanding its large diameter into the
recess in the mounting plate and the small diameter into
the recess of the plunger.
3. Connect all air supply and delivery lines to the brake valve
that were previously removed.
4. Plug the connector of the cable assembly into its mating
component from the vehicles power supply. Switch
adjustment will be required if the brake valve or retarder
control has been replaced.
5. Replace the treadle assembly onto the valve. Place the
yellow end of the spring into the hole provided in the
mounting plate. Catch the opposite end of the spring
under the treadle and hold the treadle in place while
installing the pin through the ears of the mounting plate
and the I.D. of the spring. Install the roll pin into its hole
in the bushing on one side of the treadle making sure it
enters its mating hold in the pin of the treadle assembly.
