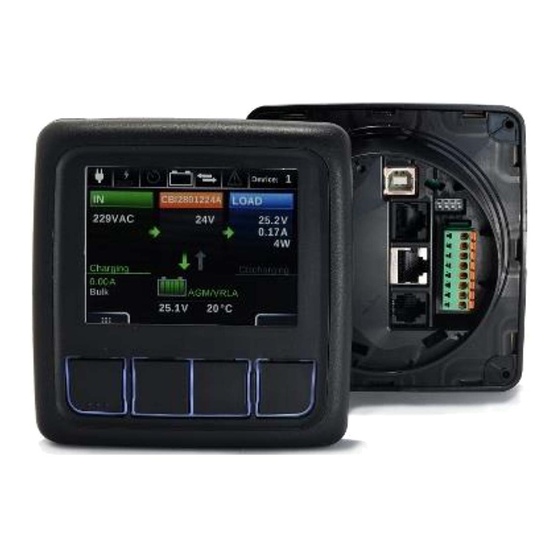
ADELSYSTEM DPY351 Руководство по эксплуатации - Страница 4
Просмотреть онлайн или скачать pdf Руководство по эксплуатации для Монитор ADELSYSTEM DPY351. ADELSYSTEM DPY351 4 страницы. Monitor and control panel for adelbus network

HTTP server from a browser must be made according to the
following syntax: http://ipaddress:portnumber.
As an example, if the IP address is 192.168.1.100 and the
selected HTTP port is 5678 then the following IP string should
be entered in the browser
http://192.168.1.100:5678
The DPY351 supports access using the Virtual LAN protocol. In
the case "VLAN ID" checkbox is not selected the "VLAN ID"
textbox will be hidden and DPY351 will not operate in the VLAN.
If "VLAN ID" checkbox is selected then the "VLAN ID" textbox
should be populated with the ID. The VLAN ID can be set in the
range 1 thru 4094 and it must match that of the VLAN the unit
is operating in.
SNMP v2c
The DPY351 can act as a gateway between an ADELsystem
power device (such as the CBI Size 3 and 4) and a SNMP
manager. An ADELsystem MIB table is provided which consists
of a list of parameters of the connected power device that can
be remotely read, or read-written through the SNMP. Each
parameter, (OID), is mapped one-to-one to a Modbus RTU
holding
register.
Refer
CBIxxxW_Modbus_SNMP_MAP_Revx_y.pdf
description of each RTU holding re gister and the corresponding
OID.
Fig. 4 – SNMP settings
All the fields in the SNMP group of settings allow a maximum of
32 characters, except "System Description" and "System
Location", which allow 255 characters maximum. The "Read-
only community" and "Read-write community" values must
match those of the SNMP environment the unit operates in.
3.4.3
Enabling / disabling the MQTT
MQTT communication allows the DPY351 to connect to the
ADELView System Cloud for the remote monitoring of the
power devices connected to the DPY using Modbus or CAN
bus. It can be enabled or disabled by respectively checking or
unchecking the MQTT radio button. Communication using the
MQTT protocol is enabled by default.
3.4.4
Saving / resetting the customized ethernet
parameters
To save the changes into the DPY351 non volatile memory
press the "Apply" button at the top or at the bottom of the page.
Changes will take effect at the following DPY351 power up.
To clear all the ethernet parameters press the "Reset" button,
then re-enter the data.
4
Functional Use
4.1
Video Link:
https://www.youtube.com/watch?v=hy4V7s5XCQg
Short Version (https://goo.gl/R56vkY)
to
the
document
for
the
Menu
Back
Power On
<
Back
5
Welcome Page
5.1
Notification / Alarm
(Link to Video Explanation)
(https://www.youtube.com/watch?v=hy4V7s5XCQg&t=10s)
Display Configuration "Homepage"
5.2
(https://www.youtube.com/watch?v=hy4V7s5XCQg&t=193s)
5.3
Customize Dashboard
(https://www.youtube.com/watch?v=hy4V7s5XCQg&t=207s)
Customize "Six Values"
5.4
(https://www.youtube.com/watch?v=hy4V7s5XCQg&t=245s)
Customize "Two Values"
5.5
(https://www.youtube.com/watch?v=hy4V7s5XCQg&t=296s)
Customize "Single Value"
5.6
(https://www.youtube.com/watch?v=hy4V7s5XCQg&t=323s)
6
Selection Page
6.1
Monitoring
(Link to Video Explanation)
(https://www.youtube.com/watch?v=hy4V7s5XCQg&t=35s)
6.2
History
(https://www.youtube.com/watch?v=hy4V7s5XCQg&t=57s)
6.3
Alarms
(https://www.youtube.com/watch?v=hy4V7s5XCQg&t=85s)
Device "Advanced config – Pin insertion
6.4
(https://www.youtube.com/watch?v=hy4V7s5XCQg&t=100s)
Devices "Add new devices"
6.5
(https://www.youtube.com/watch?v=hy4V7s5XCQg&t=136s)
Display Configuration "Network menu"
6.6
(https://www.youtube.com/watch?v=hy4V7s5XCQg&t=169s)
Save
Clear
Select
Alarm
Edit
>
Select
