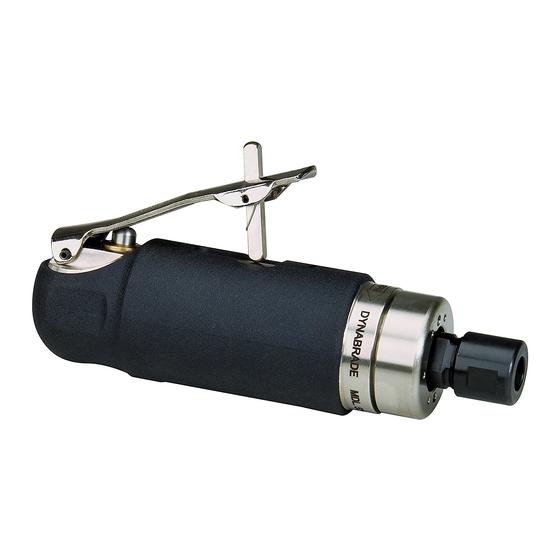
Dynabrade 53811 Эксплуатация и обслуживание - Страница 5
Просмотреть онлайн или скачать pdf Эксплуатация и обслуживание для Шлифовальный станок Dynabrade 53811. Dynabrade 53811 9 страниц. .7 hp

Disassembly/Assembly Instructions
Important: The Dynabrade Pneumatic Power Tool Lifetime Warranty Policy does NOT cover normally wearable parts and products. Before servicing this tool
please contact Dynabrade Inc. or a Dynabrade Subsidiary for information regarding the Dynabrade Pneumatic Power Tool Lifetime Warranty Policy.
Notice: Special repair tooling referred to in these instructions can be ordered from Dynabrade. (See Page 7)
Motor Disassembly:
1. Secure the flats of the motor housing in a vise with aluminum or bronze jaws.
2. Loosen and remove the collet; cap, insert, and any accessory.
3. Remove the 04102 Lock Ring with the 50971 Lock Ring Wrench or use an adjustable pin spanner wrench turning it counterclockwise. Remove Felt
Silencer/Seal and Air Control Ring/Retaining Plate.
4. Pull the motor assembly from the housing.
5. Fasten the 96346 Bearing Separator (2") around the portion of the 01028 Cylinder that is nearest the 01743/01721 Rear Plate.
6. Position the bearing separator on the table of the 96232 Arbor Press (#2) so that the threaded shaft of the air motor is pointing toward the floor.
7. Use a 1/4" dia. flat end drive punch as a press tool and push the rotor shaft out of the 02649 Bearing. Remove the 01185 Vanes.
8. Use the 96213 Bearing Removal Tool and the 96232 Arbor Press (#2) to remove the 02649 Bearing from the rear plate.
9. Secure the vane portion of the 55021 Rotor in a vise with aluminum or bronze jaws.
10. Use an adjustable wrench or the 95262 Wrench (14 mm) to loosen the collet body turning it counterclockwise.
11. Remove the 01008/02375 Front Plate, 01007 Bearing, Shims, and 01010 Spacer.
Motor Disassembly Complete.
Inlet Valve/94535 Muffler Disassembly:
1. Secure the flats of the motor housing in a vise with aluminum or bronze jaws.
2. Use a large flat blade screwdriver or 95900 Split Blade Wrench (sold separately) to remove the 01026 Regulator Plug turning it counterclockwise.
3. Remove all valve components.
4. Use a 2.5 mm drive punch to remove the 01017 Pin and throttle lever.
Rear Exhaust Model 53812 Only:
5. Position the motor housing so that the 94535 Muffler Assembly is pointing up.
6. Use a 17 mm socket wrench to remove the 01578 Inlet Adapter turning it counterclockwise.
7. Remove the 94535 Muffler Assembly.
Inlet Valve/94535 Muffler Disassembly Complete.
Important: Clean and Inspect Parts for Wear or Damage Before Assembling.
Motor Assembly:
1. Secure the vane portion of the 55021 Rotor in a vise with aluminum or bronze jaws.
2. Install the 01010 Spacer onto the rotor.
3. Place .003" (.08 mm) thickness shims into the 01008/02375 Front Plate and install the 01007 Bearing. Slide this assembly onto the rotor.
4. Install the collet body onto the rotor. (Torque to 17 N•m/150 in. lbs.)
5. Check the clearance between the rotor and the bearing plate with a .001" (.03 mm) thick feeler gauge. The clearance should be .001" (.03 mm) to .0015"
(.04 mm). If it is necessary to adjust the clearance, repeat steps 3-5 adding or removing shims. Once the proper rotor/gap clearance is achieved proceed
with the motor assembly.
6. Install the 01185 Vanes (4/pkg.) that have been lubricated with the 95842 Dynabrade Air Lube 10W/NR (or equivalent).
7. Place the 01028 Cylinder onto the assembly so that the air inlet passage will line up with the air inlet passage in the 01743/01721 Rear Plate.
8. Use the 96240 Bearing Press Tool to install the 02649 Bearing into the 01743/01721 Rear Plate. Note: Use the 96240 Bearing Press Tool so that it
touches against the outer race of the bearing.
9. Use the 96240 Bearing Press Tool and the 96232 Arbor Press (#2) to install the bearing/rear plate assembly onto the 55021 Rotor.
Note: The press tool should push against the inner race of the bearing. Important: Carefully press the bearing/rear plate assembly onto the rotor to
achieve a snug fit between the bearing plates and the cylinder. A snug fit will trap the cylinder while still allowing it to be shifted from side to side with a
slight amount of finger pressure. A loose fit will not achieve proper preload of the motor bearings.
10. Align the outer diameters of the front plate, cylinder, and rear plate. Carefully slide the motor assembly into the housing. Align the rear plate inlet slot with
the three inlet feed holes in the housing to insure maximum performance. NOTE: REAR EXHAUST MODEL 53812 ONLY – Align the line-up pin in the
front plate with the groove on the inside of the motor housing. Make sure that the motor is positioned properly so that it fits all the way into the housing
before installing the lock ring.
11. Secure the flats of the motor housing in a vise with aluminum or bronze jaws so that the rotor shaft is pointing up.
12. Install the Felt Silencer/Seal and Air Control Ring/Retaining Plate into the 04102 Lock Ring. After threaded surfaces have been properly cleaned and
primed, apply a small amount of the Loctite #567 (or equivalent) to the threads of the lock ring and install these parts onto the motor housing. (Torque to
34 N•m/300 in. lbs.)
13. Note: Checked the motor for proper adjustment. - With the motor housing still mounted in the vise pull up on the end of the rotor shaft while turning it back
and forth. (Apply 7-10 lbs. force.) Perform the same procedure while pushing down on the rotor shaft with the same amount of force. The rotor should turn
freely without any drag or rub being felt. If a pull rub is felt, increase preload or remove shims. If a push rub is felt, then remove some of the load or add shims.
14. Install the collet assembly.
Motor Assembly Complete.
(continued on next page)
5
