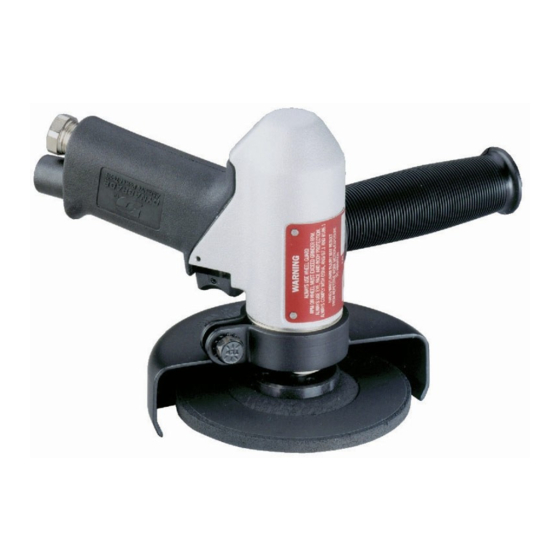
Dynabrade 50340 Краткое руководство по эксплуатации - Страница 4
Просмотреть онлайн или скачать pdf Краткое руководство по эксплуатации для Инструменты Dynabrade 50340. Dynabrade 50340 4 страницы. 4-1/2"–5" pistol grip depressed center wheel grinder

Motor Reassembly:
Important: Be certain all parts are cleaned, properly greased and in good repair before reassembly.
1. Install 01007 Front Bearing into 55026 Bearing Plate. (Note: Shimming may be required in upcoming steps).
2. Install 01010 Spacer on rotor.
3. Install bearing assembly onto rotor and spacer.
4. Secure 55025 Rotor in padded vise.
5. Screw 55034 Adapter onto 55025 Rotor, torque to 17 N•m/150 in. - lbs.
6. Use a .001" thick feeler gauge to set clearance between the 55026 Bearing Plate and 55025 Rotor.
6 a.) If shimming is required, use the 01121 Shim Pack accordingly to shim between the 01007 Bearing and 55026 Bearing Plate to obtain a .001"
clearance between the bearing plate and rotor.
7. Install 01185 Blades (4) onto 55025 Rotor. (Note: Blades should be lubricated with Dynabrade Air Lube P/N 95842 or equivalent before installation).
8. Install 01028 Cylinder over 55025 Rotor and onto 55026 Bearing Plate. Be sure to line up 50767 Pin in 55026 Bearing Plate with hole in 01028 Cylinder
Note: Air inlet holes in cylinder should face away from 55026 Bearing Plate.
9. Press 02649 Bearing into 01743 Bearing Plate.
10. Press bearing and bearing plate onto rotor. Be sure 50767 Pin in 01743 Bearing Plate lines up with hole in 01028 Cylinder.
Important: The fit must be snug between bearing plates and cylinder. If to tight, rotor will not turn freely. Rotor must then be lightly tapped at short end so
it will turn freely while still maintaining a snug fit. A loose fit will not achieve the proper pre-load of the motor bearings.
11. Place motor in vise using flats on 55034 Adapter.
12. Replace any shims that were between back of rotor and governor then screw governor assembly counter-clockwise and torque to 10 N•m/90 in. - lbs.
Tool Reassembly:
1. Place machine housing in soft jaw vise. Be sure not to overtighten to prevent damage.
2. Install motor assembly into housing.
3. Screw 55029 Cover onto housing turning counterclockwise, torque to 28 N•m/250 in. - lbs.
4. Replace 57066 Muffler Body.
5. Replace 56028 Muffler Cap onto muffler body.
6. Apply a small amount of #271 Loctite® (or equivalent) to the threads of 01494 Inlet Bushing. Install inlet bushing into housing, torque 23 N•m/200 in. - lbs.
7. Lubricate motor by applying 2 or 3 drops of Dynabrade Air Lube P/N 95842 (or equivalent) into air inlet.
8. Complete reassembly by remounting 55046 Guard Assembly and 53163 Side Handle.
Tool assembly is complete. Please allow 30 minutes for adhesives to cure before operating tool.
Important: Motor should now be tested for proper operation at 90 PSI. If motor does not operate properly or operates at a higher RPM than marked on the
tool, the tool should be serviced to correct the cause before use. Before operating, place 2-3 drops of Dynabrade Air Lube (P/N 95842) directly into air inlet
with throttle lever depressed. Operate tool for 30 seconds to determine if tool is operating properly and to allow lubricating oils to properly penetrate motor
Loctite® is a registered trademark of Loctite Corp.
All Dynabrade motors use the highest quality parts and metals available and are machined to exacting tolerances. The failure of quality pneumatic motors can
most often be traced to an unclean air supply or the lack of lubrication. Air pressure easily forces dirt or water contained in the air supply into motor bearings
causing early failure. It often scores the cylinder walls and the rotor blades resulting in limited efficiency and power. Our warranty obligation is contingent upon
proper use of our tools and cannot apply to equipment which has been subjected to misuse such as unclean air, wet air or a lack of lubrication during the use of
this tool.
Note: To order replacement parts specify the model and serial number of your machine.
95051 – 3/8" Hex Key
Dynaswivel®
Swivels 360° at two locations which
allows an air hose to drop straight to the
floor, no matter how the tool is held.
•
95460 1/4" NPT
Visit our new Web Site via Industry.Net MROP On-Line: http://www.dynabrade.industry.net
DYNABRADE, INC., 8989 Sheridan Drive • Clarence, NY 14031-1490 • Phone: (716) 631-0100 • Fax: 716-631-2073 • International Fax: 716-631-2524
DYNABRADE EUROPE S.àr.l.,
© DYNABRADE, INC., 1997
Disassembly/Assembly Instructions
Standard Wrenches
Zone Artisanale • L-5485 Wormeldange—Haut, Luxembourg • Telephone: 352 76 84 94 • Fax: 352 76 84 95
Notice
Accessories
96047 Motor Tune-Up Kit:
Includes assorted parts to help
maintain motor in tip-top shape.
E-Mail: [email protected]
(continued)
95304 – 24mm Open-End
DYNABRADE
®
PRINTED IN USA
