Gallagher SMART FENCE 2 Руководство - Страница 4
Просмотреть онлайн или скачать pdf Руководство для Источник питания Gallagher SMART FENCE 2. Gallagher SMART FENCE 2 14 страниц.
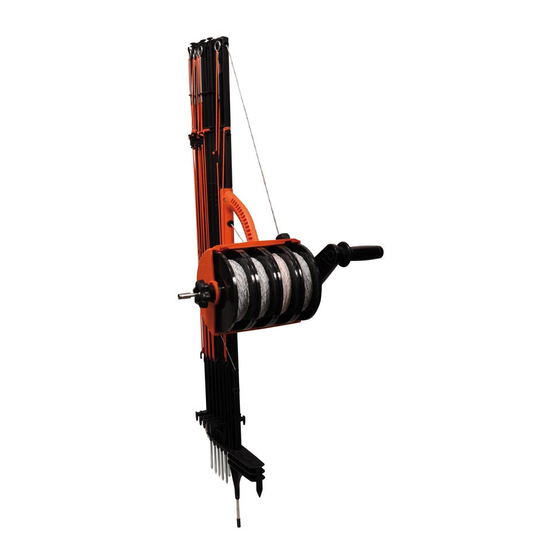
Electrifying the Smart Fence 2
From a
permanent fence:
Attach a leadset* from
the live permanent
fence wire to the metal
crimp on the end post.
Joining two Smart Fence 2 units for longer fences
A) Place unit 1 in the
ground at a 90 degree
angle to the fence line.
Attaching the
Smart Fence 2 to a
permanent fence
Loop a guy rope around
the permanent fence post
and re-attach to the end
post/reel post.
* Leadsets not included. Packaged
with energizers or sold separately.
Maintenance
If a wire breakage occurs, tie the smallest knot possible.
Gallagher recommends tying a reef knot to feed through
the reel system.
If spare parts are required Gallagher provides a full range of SmartFence 2 replacement parts.
Contact your local Gallagher dealer or visit www.gallagher.co to find out more.
6.
From a
portable energizer:
Attach the green
leadset to the earth
stake and the red
leadset to the metal
crimp on the end
post.
B) Place the end post of
C) Join wires by looping
unit 2 into the first post
the top wire of unit 2
holder of unit 1.
around the main post of
unit 1 to create a contact.
NOTE: DO NOT STAND ON
LOWER POST HOLDER
Montage
Fixation de la poignée
Retirer le ruban
Desserrer et
pousser
Réglage du fil inférieur
(a) Dans des conditions de sol sèches et dures, le fil inférieur peut être déplacé à la patte la plus
basse pour obtenir l'espace de fil nécessaire.
(b) Si l'herbe est haute, le fil du bas peut être remonté vers le second passage de fil, en partant
du haut.
(b)
(a)
7mm
(a)
7.