Maico ERO SCAN Краткое руководство - Страница 2
Просмотреть онлайн или скачать pdf Краткое руководство для Медицинское оборудование Maico ERO SCAN. Maico ERO SCAN 4 страницы.
ERO•SCAN
TM
Screening and Diagnostic Version
Conducting a Test
Printing Test Result to Wireless Printer
D-0104938
– Quick Guide
Change Protocol:
To change the selected protocol press CHANGE at the Main Menu.
The Change Protocol display will appear. Use the CHANGE arrow
buttons to change the selected protocol. Press the UP arrow to return
to the Main Menu to begin testing.
Probe Check:
The horizontal bar graph represents the ear canal volume and at the
same time the fitting of the probe. When the probe check is anywhere
in the green area, the ear canal volume is in the target area for testing
to begin. The test will begin automatically if the probe fit is stable.
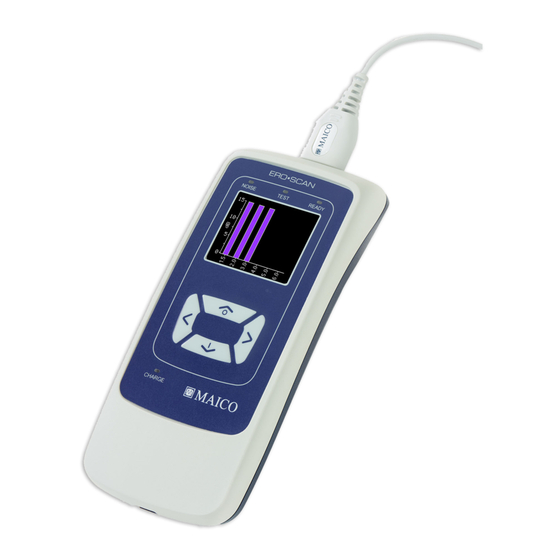
Test Result:
When testing is complete, the Main Menu will appear. The results of the
test are automatically saved in memory as soon as the test is complete.
To view a graphic display of the test results, press the REVIEW button.
Each frequency (DPOAEs) or frequency band (TEOAEs) is indicated by one
column. Each row represents 2 dB of signal-to-noise ratio (SNR). The
display might differ depending on the settings used for the test.
Device Pairing:
To establish wireless pairing, turn on the thermal printer that will be
paired with the ERO•SCAN
, then select DISCOVER to initiate discovery of
TM
ERO•SCAN
available wireless devices. Use the CHANGE buttons to select the
desired device and then use the PAIR button to pair the ERO•SCAN
to the selected device.
From the ERO•SCAN
to enter the device connection screen. Press the CONNECT button
to start printing.
TM
unit. Enter the System Menu in the
instrument Main Menu, press the UP button
TM
2 of 4
TM
12/15