AGS Merlin 1500S Руководство по эксплуатации и установке - Страница 4
Просмотреть онлайн или скачать pdf Руководство по эксплуатации и установке для Детекторы газа AGS Merlin 1500S. AGS Merlin 1500S 8 страниц. Gas & ventilation interlock system
Также для AGS Merlin 1500S: Руководство по установке и эксплуатации (12 страниц), Руководство пользователя (12 страниц)

Merlin 1500S
Gas Interlock System
3
Operation Instructions
3.1
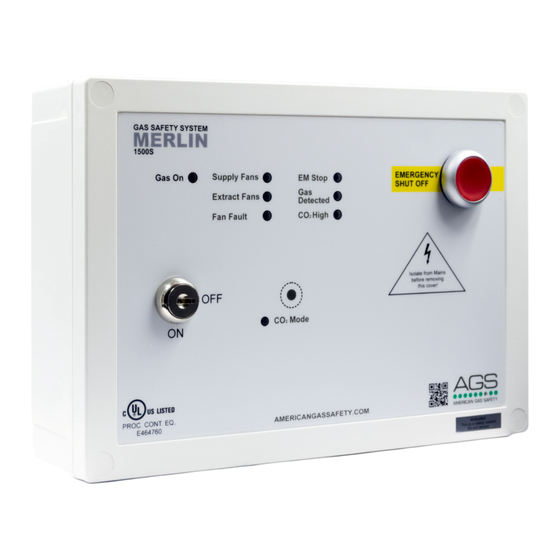
How to turn the system on and off
1. Turn the Fans On.
2. Turn the key switch to on position.
3. To turn the system off, turn the key switch to off position.
3.2
Explanation of LED status
Power LED
When the system is connected to the mains supply, the Red LED of the AGS Logo located in the
bottom right corner of the panel will illuminate. When no power is present, this LED will not light
up.
RED = OK
OFF = No power to 1500S, a loose ribbon connection or the fuse may not be intact.
Gas On LED
When the fans are running at the correct speed and the key switch is turned on, the Merlin 1500S
will open the gas valve and the green 'Gas On' LED will illuminate.
GREEN = Gas On
OFF = Gas Off
Supply Fans LED
Under normal working the LED will illuminate GREEN. If a supply fan fault is detected, the LED will
be flashing.
GREEN = OK
FLASHING = One of the supply fans is not running.
Extract Fans LED
Under normal working the LED will illuminate GREEN. If an extract fan fault is detected, the
will be flashing.
GREEN = OK
FLASHING = One of the extract fans is not running
IF SUPPLY AND/OR EXTRACT FANS LED FLASHES FOR MORE THAN 20 SECONDS, THE Merlin 1500S
WILL SHUT OFF THE GAS.
Fan Fault LED
Under normal working conditions this LED is off. If a fan fault is present for more than 20 seconds,
the LED will illuminate RED.
OFF = OK
RED = the gas supply has been shut off due to a ventilation fault.
IF A FAULT IS FOUND YOU WILL NEED TO CONTACT YOUR SERVICE/MAINTENANCE COMPANY
YOU SHOULD NOT ATTEMPT TO CARRY OUT A REPAIR UNLESS YOU ARE QUALIFIED TO DO SO.
Rev: 03 Date: 08-01-18
User & Installation Manual
LED
4
