Jamar Digital Pinch Gauge Буклет с инструкциями - Страница 3
Просмотреть онлайн или скачать pdf Буклет с инструкциями для Медицинское оборудование Jamar Digital Pinch Gauge. Jamar Digital Pinch Gauge 10 страниц.

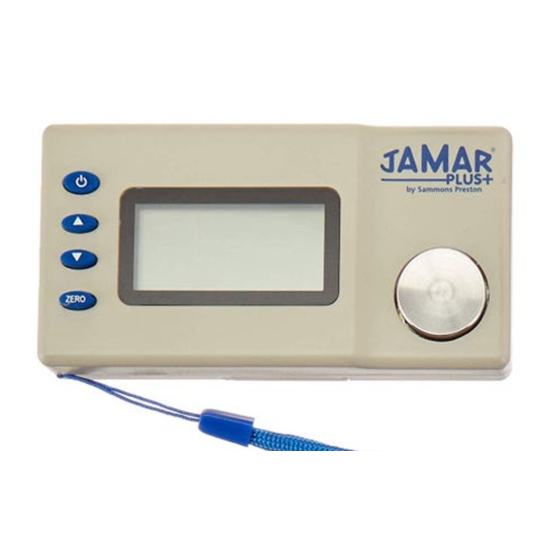
1.Function buttons
1.Function buttons
( 1)
( 1)
Power button:Press one time to turn on.
Power button:Press one time to turn on.
Press again to turn off.
Press again to turn off.
( 2)
( 2)
▲
▲
Up button: Press one time to save the
Up button: Press one time to save the
current record and jump to the last record
current record and jump to the last record
and display the value of that record at time of
and display the value of that record at time of
testing.
testing.
When pressed down for 5-6 seconds, it will
When pressed down for 5-6 seconds, it will
enter the state of unit conversion; the figure of
enter the state of unit conversion; the figure of
KG or LBS will flash in turn when pressed once
KG or LBS will flash in turn when pressed once
again, and will confirm the unit mode when the
again, and will confirm the unit mode when the
power button is pressed again .It will display your
power button is pressed again .It will display your
unit when turned on again.
unit when turned on again.
(3) ▼ Down button: Press one time to save the
(3) ▼ Down button: Press one time to save the
value of this record, skip to the next record and
value of this record, skip to the next record and
display the value of the record at time of testing,
display the value of the record at time of testing,
and display the next record in case of browse-up.
and display the next record in case of browse-up.
(4) ZERO Clear button: Press one time to set the
(4) ZERO Clear button: Press one time to set the
current record to the value of 0.0; continue to
current record to the value of 0.0; continue to
hold down until the emergence of the figure
hold down until the emergence of the figure
AL.CL,and then all the records in the instrument
AL.CL,and then all the records in the instrument
will be reset to 0.0, and it will automatically go
will be reset to 0.0, and it will automatically go
back to the first record number.
back to the first record number.
2. Display screen
2. Display screen
(6) Record number: "1" represent for the first record,
(6) Record number: "1" represent for the first record,
"99" for the 99 records, "0" for the first 100 records
"99" for the 99 records, "0" for the first 100 records
(7) Reading: shows the data of the measurement.
(7) Reading: shows the data of the measurement.
(10) Unit: KG represents for kilogram, LBS for pound.
(10) Unit: KG represents for kilogram, LBS for pound.
3. Testing keys
3. Testing keys
3
3
