Avaya one-X 9611G Краткая справка - Страница 2

Просмотреть онлайн или скачать pdf Краткая справка для IP-телефон Avaya one-X 9611G. Avaya one-X 9611G 5 страниц. Ip deskphones h.323
Также для Avaya one-X 9611G: Технические характеристики (2 страниц), Краткое справочное руководство (4 страниц), Краткое справочное руководство (2 страниц), Руководство (2 страниц), Краткая справка (2 страниц), Краткое справочное руководство (2 страниц), Руководство пользователя (7 страниц), Краткая справка (3 страниц), Краткое справочное руководство (2 страниц), Краткая справка (3 страниц), Краткая справка (3 страниц), Краткая справка (3 страниц), Руководство пользователя (17 страниц), Краткая справка (2 страниц), Краткая справка (7 страниц), Краткое руководство по эксплуатации (2 страниц), Руководство по эксплуатации (9 страниц), Краткое руководство по эксплуатации (6 страниц), Руководство пользователя (20 страниц), Краткая справка (2 страниц)
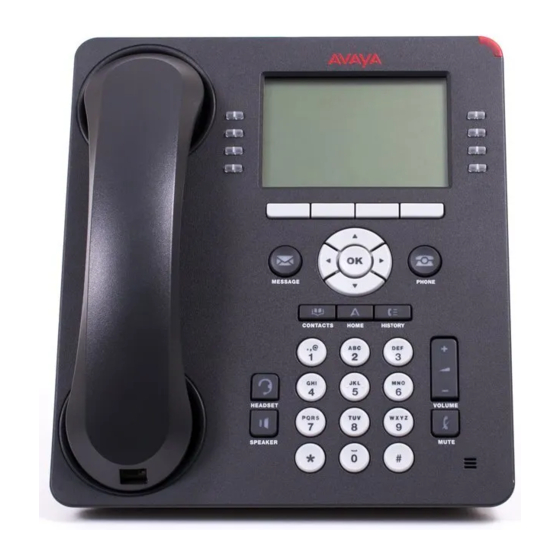
Avaya one-X 9611G Краткая справка
Options & Settings
The Options & Settings menu contains choices for:
• Call Settings
• Application Settings
• Screen & Sound Options
• Advanced Options
Call Settings includes choices for automatically
displaying the Phone screen when you get an
incoming call or when you place a call, turning call
timers on or off, controlling how Redial works, turning
Visual Alerting on or off, and more.
Application Settings includes choices for turning call
logging on or off and for personalizing your button
labels.
Screen & Sound Options includes choices for adjusting
your phone's brightness and contrast, ring pattern, and
button clicks and tones.
Advanced Options includes choices for backing up and
restoring your settings, options, and button labels. You
can also set AGC for your handset, headset, and/or
speaker audio.
Setting redial options
You can set Redial to dial the last number you dialed
or to display a list of the last numbers you dialed.
1. Press Home.
2. Select Options & Settings or Phone Settings.
3. Press Select or OK.
4. Select Call Settings.
5. Press Select or OK.
6. Select Redial.
7. Press Change or OK to toggle between One
Number and List.
8. Press Save.
Adjusting the brightness or contrast of the display
1. Press Home.
2. Select Options & Settings or Phone Settings.
3. Press Select or OK.
4. Select Screen & Sound Options.
5. Press Select or OK.
6. Select Brightness or Contrast.
7. Press Change or OK.
8. Select Phone or an SBM24 Module.
9. Scroll to the right or left to adjust the brightness or
contrast.
10. Press Save or OK.
Turning button click sounds on and off
1. Press Home.
2. Select Options & Settings or Phone Settings.
3. Press Select or OK.
4. Select Screen & Sound Options.
5. Press Select or OK.
6. Select Button Clicks.
7. Press Change or OK to turn sounds on or off.
8. Press Save.
Changing the ring pattern
1. Press Home.
2. Select Options & Settings or Phone Settings.
3. Press Select or OK.
4. Select Screen & Sound Options.
5. Press Select or OK.
6. Select Personalized Ringing.
7. Press Change or OK to see a list of the available
ring patterns.
8. Select a ring pattern to listen to it.
9. Press Play or OK to hear it again.
10. Press Save to make it your ring pattern.
Page 2
Editing button labels
You can change the labels that are displayed for your
extensions, features, and abbreviated dial or speed
dial buttons. For example, you can change the label for
your extension to "My Line."
1. Press Home.
2. Select Options & Settings or Phone Settings.
3. Press Select or OK.
4. Select Application Settings.
5. Press Select or OK.
6. Select Personalize Labels...
7. Press Change or OK.
8. Select the label you want to edit.
Note:
If the label you want to edit is on the Features
menu, scroll right to access the
Features menu, and select the label you want to
edit.
9. Press Edit.
10. Edit the label.
(Press Clear to clear all text fields and start over.)
11. Press Save or OK.
Note:
You may revert back to the default button labels
by pressing Home >Options & Settings >
Application Settings > Restore Default Button
Label .
Programing the SD(speed dial)
1. Press the right arrow key on the Navigation wheel.
2. Navigate down until you see "Abr-Prg".
3. Press the lite button next to the Abr-Prg key.
4. Select the SD you want to program.
5. Enter the number you want to program, either a 4
digit ext. For outside numbers include a 9.
6. Press the # key to save.