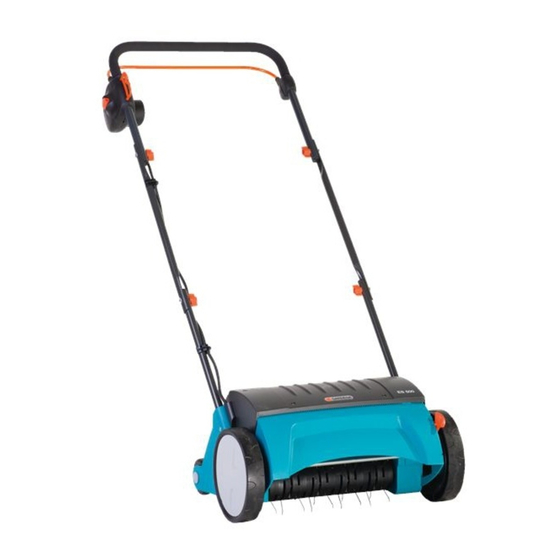
DANGER!
The Electric Lawn Rake does not stop immediately after
the motor has been switched off:
v Never lift, tip or carry the Electric Lawn Rake with the motor
running!
v Never start on solid ground (e. g. asphalt).
v Always maintain the safety distance between the aerator
cylinder and the user as defined by the guide handle.
1. Place Electric Lawn Rake on flat grass surface.
w
2. Keep safety interlock
pressed down and pull starting lever
the upper handle
3
.
The Electric Lawn Rake starts.
3. Release safety interlock
w
.
When in operation, the extension cable
in the direction you are working and to the side of the area to be
worked on.
Always work away from the connection cable.
Blockage Protection: If the aerator cylinder is blocked, e. g. by a for-
eign body, immediately release the starting lever. If the blockage lasts
longer than 10 seconds and the starting lever has not been released,
blockage protection is activated. In this case immediately release the
starting lever. The Lawn Rake can be switched on again after cooling
down for approx. 1 minute.
5. MAINTENANCE
DANGER!
The aerator cylinder can cause injuries!
v Prior to maintenance, unplug from the mains and wait until
the Electric Lawn Rake drum has stopped.
v Wear working gloves for performing maintenance.
Cleaning Electric Lawn Rake:
The Electric Lawn Rake should be cleaned after each time it is used.
DANGER! Risk of injury!
Risk of injury and risk of damage to the product.
v Do not clean the product with water or with a water jet
(in particular high-pressure water jet).
v Do not use hard or pointed objects for cleaning the Electric
Lawn Rake.
v Remove grass and deposits from wheels, aerator cylinder and
housing with a brush.
Adjusting for wear [ Fig. M1 ]:
The Electric Lawn Rake is subject to wear in use due to the way in which
it works.
The more intensively the Electric Lawn Rake is used, the greater the wear
on the spring tines. Hard or very dry ground accelerates wear as does
excessive use of the Electric Lawn Rake.
If the results of your work with the Electric Lawn Rake become increasingly
worse due to knife wear, the aerator cylinder can be adjusted twice.
The aerator cylinder has 4 adjustment positions:
• Transport position
• Aerating position 1
• Aerating position 2:
If the springs are worn (the rake roller is lowered by 3 mm).
• Setting 3:
Second setting for worn springs (the rake roller is lowered by a further
3 mm).
Push wear compensation lever
(14)
move to the position required.
Note: Wear adjustment is not used for height adjustment.
Adjustment of the aerator cylinder without visible wear can
cause damage to the aerator cylinder or overload the motor.
10
(13)
on
0
must always be guided
gently away from the housing and
6. STORAGE
To put into storage:
To save space the Electric Lawn Rake can be folded up by releasing
the wing nuts.
Take care during this process that the cable does not become
trapped.
v Store the Electric Lawn Rake in a dry, closed room to which children
cannot gain access.
Transport:
1. Switch off motor, unplug from the mains and wait until the aerator
cylinder stops.
2. Move the wear compensation to the transport position and raise
the Electric Lawn Rake when transporting it over sensitive surfaces,
e. g. tiles.
Disposal:
(in accordance with RL2012/19/EC)
The product must not be disposed of to normal household
waste. It must be disposed of in line with local environmental
regulations.
IMPORTANT!
v Dispose of the product through or via your municipal recycling collection
centre.
7. TROUBLESHOOTING
Replacing spring tines:
DANGER!
The aerator cylinder can cause injuries!
v Prior to rectifying faults, unplug from the mains and wait until
the aerator cylinder has stopped.
v Wear working gloves when rectifying faults.
If the aerator cylinder is not yet worn but individual springs have broken,
these must be replaced. Only original GARDENA replace ment springs
may be used.
• Replacement spring tines for Electric Lawn Rake
GARDENA ES 500
1. [ Fig. T1 ]: Unscrew two screws
2. [ Fig. T2 ]: Lift aerator cylinder
shaft 2.
3. Pull bearing shell
(17)
off the aerator cylinder
4. [ Fig. T3 ]: Unscrew and remove screw
(19)
bolt
.
5. [ Fig. T4 ]: Remove cover plate
(22)
the spring element holder
.
(21)
6. Push new spring elements
holder
(22)
.
The bores on the cover plate
lie on top of each other.
(19)
7. Push in bearing bolt
in such a way that all 3 bores (bearing bolt
cover plate
(20)
and spring element holder
(18)
8. Screw in screw
.
(16)
9. Push aerator cylinder
on to the drive shaft.
(17)
10. Put bearing shell
on the aerator cylinder
(17)
11. Screw bearing shell
on to the lower side of the housing with the
(15)
screw
without tightening too much.
Problem
Possible Cause
Abnormal noise,
Foreign bodies on the aerator
clattering in the unit
cylinder are hitting the Rake.
Whistling sound
Foreign bodies blocking the
aerator cylinder.
Cogged belt slipping.
Motor will not start
Faulty cable.
The conductor cross-section
of the extension cable is
possibly too low.
Art. 4094
(15)
on the underside of the housing.
(16)
at an angle 1 and pull away the drive
(16)
.
(18)
and draw out bearing
(20)
and spring elements
(21)
from
(20)
and cover plate
on the spring element
(20)
and the spring element holder
(22)
) are on top of each other.
(16)
.
Remedy
1. Switch off the rake, remove
the mains plug from the
socket and wait until the cyl-
inder has stopped rotating.
2. Remove foreign bodies.
3. Check Rake immediately.
v Contact GARDENA Service.
v Check cable.
v Contact your electrician.
(22)
must
(19)
,

