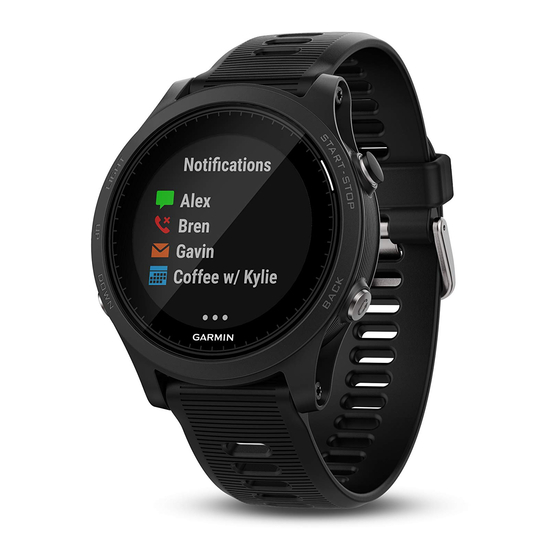
Garmin FORERUNNER 935 Руководство пользователя - Страница 25
Просмотреть онлайн или скачать pdf Руководство пользователя для Смотреть Garmin FORERUNNER 935. Garmin FORERUNNER 935 42 страницы.
Также для Garmin FORERUNNER 935: Руководство пользователя (46 страниц)

Controlling a VIRB Action Camera
Before you can use the VIRB remote function, you must enable
the remote setting on your VIRB camera. See the VIRB Series
Owner's Manual for more information. You must also set the
VIRB widget to be shown in the widget loop
Widget Loop, page
18).
1
Turn on your VIRB camera.
2
On your fēnix device, select UP or DOWN from the watch
face to view the VIRB widget.
3
Wait while the device connects to your VIRB camera.
4
Select
.
5
Select an option:
• To record video, select Start Recording.
The video counter appears on the fēnix screen.
• To take a photo while recording video, select DOWN.
• To stop recording video, select
• To take a photo, select Take Photo.
• To change video and photo settings, select Settings.
Controlling a VIRB Action Camera During an Activity
Before you can use the VIRB remote function, you must enable
the remote setting on your VIRB camera. See the VIRB Series
Owner's Manual for more information. You must also set the
VIRB widget to be shown in the widget loop
Widget Loop, page
18).
1
Turn on your VIRB camera.
2
On your fēnix device, select UP or DOWN from the watch
face to view the VIRB widget.
3
Wait while the device connects to your VIRB camera.
When the camera is connected, a VIRB data screen is
automatically added to the activity apps.
4
During an activity, select UP or DOWN to view the VIRB data
screen.
5
Hold MENU.
6
Select VIRB Remote.
7
Select an option:
• To control the camera using the activity timer, select
Settings > Timer Start/Stop.
NOTE: Video recording automatically starts and stops
when you start and stop an activity.
• To control the camera using the menu options, select
Settings > Manual.
• To manually record video, select Start Recording.
The video counter appears on the fēnix screen.
• To take a photo while recording video, select DOWN.
• To manually stop recording video, select
• To take a photo, select Take Photo.
Activities and App Settings
These settings allow you to customize each preloaded activity
app based on your needs. For example, you can customize data
pages and enable alerts and training features. Not all settings
are available for all activity types.
Hold MENU, select Settings > Activities & Apps, select an
activity, and select the activity settings.
Data Screens: Enables you to customize data screens and add
new data screens for the activity
Screens, page
19).
Transitions: Enables transitions for multisport activities.
Lock Keys: Locks the keys during multisport activities to
prevent accidental key presses.
Customizing Your Device
(Customizing the
.
(Customizing the
.
(Customizing the Data
Repeat: Enables the repeat option for multisport activities. For
example, you can use this option for activities that include
multiple transitions, such as a swimrun.
Alerts: Sets the training or navigation alerts for the activity.
Metronome: Plays tones at a steady rhythm to help you
improve your performance by training at a faster, slower, or
more consistent cadence
Auto Lap: Sets the options for the Auto Lap
page
20).
Auto Pause: Sets the device to stop recording data when you
stop moving or when you drop below a specified speed
(Enabling Auto Pause
, page
®
Auto Climb: Enables the device to detect elevation changes
automatically using the built-in altimeter.
Auto Run: Enables the device to detect ski runs automatically
using the built-in accelerometer.
3D Speed: Calculates your speed using your elevation change
and your horizontal movement over ground
Distance, page
21).
3D Distance: Calculates your distance traveled using your
elevation change and your horizontal movement over ground.
Lap Key: Enables you to record a lap or a rest during the
activity.
Auto Scroll: Enables you to move through all of the activity data
screens automatically while the timer is running
Scroll, page
21).
Segment Alerts: Enables prompts that alert you to approaching
segments.
GPS: Sets the mode for the GPS antenna. Using GPS +
GLONASS provides increased performance in challenging
environments and faster position acquisition. Using the GPS
+ GLONASS option can reduce battery life more than using
the GPS option only. Using the UltraTrac option records track
points and sensor data less frequently
Pool Size: Sets the pool length for pool swimming.
Stroke Detect.: Enables stroke detection for pool swimming.
Power Save Timeout: Sets the power-save timeout setting for
the activity
(Power Save Timeout Settings, page
Background Color: Sets the background color of each activity
to black or white.
Accent Color: Sets the accent color of each activity to help
identify which activity is active.
Rename: Sets the activity name.
Restore Defaults: Allows you to reset the activity settings.
Customizing the Data Screens
You can show, hide, and change the layout and content of data
screens for each activity.
1
Hold MENU.
2
Select Settings > Activities & Apps.
3
Select the activity to customize.
4
Select the activity settings.
5
Select Data Screens.
6
Select a data screen to customize.
7
Select an option:
• Select Layout to adjust the number of data fields on the
data screen.
• Select a field to change the data that appears in the field.
• Select Reorder to change the location of the data screen
in the loop.
• Select Remove to remove the data screen from the loop.
8
If necessary, select Add New to add a data screen to the
loop.
(Using the Metronome, page
feature
(Auto Lap,
®
20).
(3D Speed and
(Using Auto
(UltraTrac, page
21).
2).
21).
19
