Garmin PRO Control 2 HH Руководство пользователя - Страница 7
Просмотреть онлайн или скачать pdf Руководство пользователя для Средство для ухода за домашними животными Garmin PRO Control 2 HH. Garmin PRO Control 2 HH 12 страниц.
Также для Garmin PRO Control 2 HH: Руководство пользователя (12 страниц)

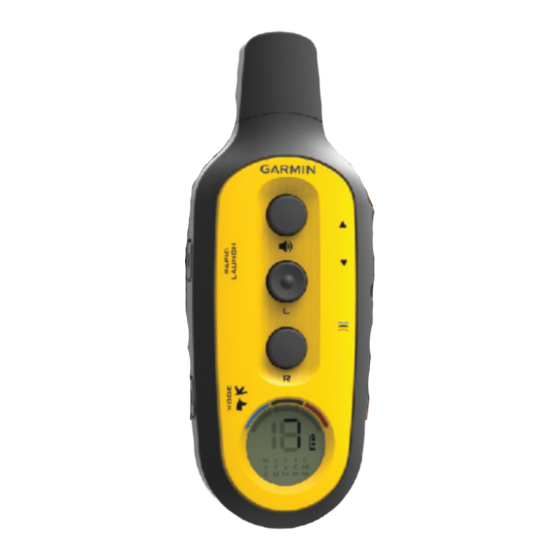
Battery charge level
Selected training mode
Dog Collar Devices
You can use up to three dog collar devices with a single
handheld device. You can select a different training mode and
intensity level for each dog collar device.
Each dog collar device must be paired with the handheld device
before it can be used. During the pairing process, each dog
collar device is associated with a color on the handheld device.
indicates the selected color.
Fitting the Collar on Your Dog
To prevent irritation from the contact points, remove the collar
for at least eight hours out of every 24-hour period.
This device is not intended for human use. Do not attempt to
use on any person.
Do not spray the device or collar with harsh chemicals including
but not limited to flea or tick spray. Always ensure that any flea
or tick spray that is applied to the dog is completely dry before
placing the collar on the dog. Small amounts of harsh chemicals
can damage the plastic components and collar laminate.
In order to properly correct the dog, the collar and device must
fit the dog properly. If the collar is too loose or positioned
incorrectly, corrections may be inconsistent. This can delay or
prevent successful training.
1
Position the device at the front of the dog's neck, with the
status LED facing toward the dog's chin and the contact
points against the throat.
2
Tighten the strap so that it is very snug around the dog's
neck, and fasten the buckle.
NOTE: The collar should fit tightly and should not be able to
rotate or slide on the dog's neck. The dog must be able to
swallow food and water normally. You should observe your
dog's behavior to verify that the collar is not too tight.
3
Wiggle the device to work the contact points through the
dog's coat.
NOTE: The contact points must have contact with the dog's
skin to be effective.
4
If the strap is too long, cut off the excess, leaving at least
3 in. (8 cm) to spare.
TIP: You can mark the hole used to fasten the buckle for
future reference.
Dog Training
CAUTION
Pairing a Dog Collar Device with the Handheld Device
NOTE: If your handheld device and dog collar device were
included in the same package, the devices are paired from the
factory using the black color selection.
1
Turn on the dog collar device and the handheld device.
2
On the handheld device, select
indicates the selected color.
3
On the handheld device, select an intensity level greater than
0
(Changing the Intensity
4
On the dog collar device, hold the power key.
You must continue to hold the power key during the pairing
process.
The device beeps once when you select the power key and
again after five seconds.
5
After the second beep, select a training key on the handheld
device.
The dog collar device turns off and beeps to indicate whether
the devices paired successfully.
Short beep
Devices paired successfully
Long beep
Devices did not pair
TIP: If the devices did not pair successfully, you should verify
the batteries in both devices are fully charged and the intensity
level is set higher than 0.
Selecting a Dog Collar Device
Before you can select and control a dog collar device, you must
pair the dog collar device with the handheld device
Dog Collar Device with the Handheld
Select
to choose the color.
indicates the selected color.
The training keys control the dog collar device associated with
the selected color.
Training Intensities and Methods
You can use several methods to train your dog. The PRO
Control system provides 18 stimulation intensity levels, which
increase sequentially from 1 to 18.
Momentary stimulation: Applies a brief stimulation when you
press the training key, regardless of how long the key is
depressed.
Continuous stimulation: Applies stimulation to the dog the
entire time you press the training key, for a maximum of 8
seconds. Your stimulations should typically be much shorter
than 8 seconds.
Tone: Activates an audible tone the entire time you press the
training key, for a maximum of 8 seconds. A tone can be
used as either a positive or negative training cue, depending
on your training program.
Vibration: Applies vibration instead of stimulation to the dog the
entire time you press the training key, for a maximum of 8
seconds. The effectiveness of vibration may vary based on
the dog's temperament and experience.
Training Modes
The PRO Control system provides several training modes,
which assign different combinations of momentary stimulation,
continuous stimulation, tone, and vibration to the training keys
(Training Intensities and
Methods). The three vertical letters on
the LCD display correspond to the training key functions, from
top to bottom. Some modes provide keys designated for high or
low stimulations for different training purposes. A low stimulation
is perceived by the dog to be less intense than a high
stimulation.
to choose a color.
Level).
(Pairing a
Device).
3
