EarthWay 1001-B Инструкция по сборке Руководство - Страница 3
Просмотреть онлайн или скачать pdf Инструкция по сборке Руководство для Сеялки EarthWay 1001-B. EarthWay 1001-B 7 страниц. Precision garden seeder
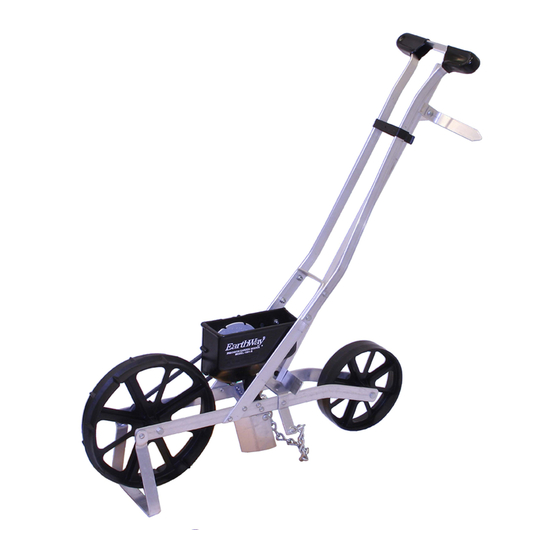
Также для EarthWay 1001-B: Инструкции по монтажу и эксплуатации (5 страниц), Инструкция по эксплуатации (5 страниц), Инструкция по сборке Руководство (8 страниц)
To install the desired seed plate, hold the seed plate at an angle with the bottom against the straight wall in the
seed hopper. Line up the slots against the inside of the seed hopper and rotate it approximately ½" in the "ON"
direction as indicated by the arrow on top of the hopper until the cam action locks the seed plate in place on the
hub. Do not force. OFF or ON directions are also indicated on the seed plates.
STEP 1: Prepare seedbed of garden by tilling soil to a depth of 6 or more inches.
STEP 2: To remove a seed plate, hold plate stationary while rotating PULLEY in direction of "OFF" on plate.
push seed plate off white hub by placing your finger through the hole just above the Pulley.
STEP 3: Utilize the SEED PLATE GUIDE to identify the closest spacing and seed size to your chosen seed.
if more distance is desired between seeds, cover every other seed plate hole as required with tape or fill with
bee's wax.
STEP 4: Pour seeds in the seed hopper. CAUTION: Do not fill the hopper above the center of the seed plate.
NOTE: All the seed, especially small seed, will not be picked up by the plates leaving a small amount in the
hopper. Tilt the seeder to the right as you move down the row to help remove most of the seed if required.
STEP 5: Next set the adjustable planting depth with the wedge-shaped Ground Opener located directly under
the hopper. NOTE: There are graduations in both inches and millimeters on the front angles of the Seed Chute.
Move Ground Opener until top edge is in line with the desired planting depth. Retighten wing nut after
adjustment is made. Check the depth by moving the seeder forward a few inches in soft soil, readjust if
necessary.
STEP 6: Mark out the first row with string and stakes. Lower the Row Marker Shaft and adjust the Row Marker
to the proper width for the next row. Lift the kick stand over the Front Wheel. Be sure the Cover Chain follows
behind the Ground Opener. You are now ready to plant.
STEP 7: To empty any remaining seeds, lower the kick stand and tip the seeder forward until all seeds are
removed. NOTE: When changing seed plates, be sure the seed hopper is completely empty.
NOTICE: KEEP YOUR HOPPER CLEAN AND FREE FROM DUST, SAND, DIRT, AND SEED TREATING MATERIALS.
MAINTENANCE:
You will find one seed plate in place in the hopper, the rest in the box.
1. Any accumulation of dust, dirt, or residue from chemically treated seeds in the seed hopper should be
wiped out with a cloth after each use. A buildup of dirt may cause the seed plate to stick and seeds to pop
out
2. Under certain conditions static electricity may build up on the seed hopper and interfere with planting of
fine seeds. If this situation should occur, wash the seed hopper and seed plate with mild dish washing
detergent, and allow to dry.
OPERATING INSTRUCTIONS