3A Game Electronic Technology PANDORA BOX CX Краткое руководство пользователя - Страница 8
Просмотреть онлайн или скачать pdf Краткое руководство пользователя для Материнская плата 3A Game Electronic Technology PANDORA BOX CX. 3A Game Electronic Technology PANDORA BOX CX 16 страниц. Arcade version mainboard
Также для 3A Game Electronic Technology PANDORA BOX CX: Краткое руководство пользователя (16 страниц)
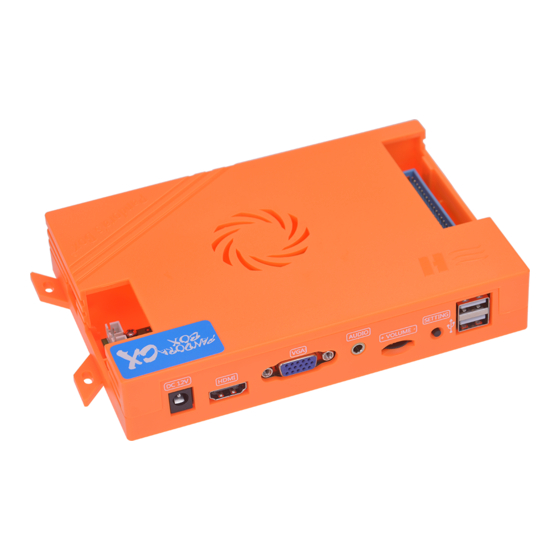
PANDORA BOX CX Arcade Mainboard
4.1 IO Test:
This option is to test the connection status of the coin selector,
joystick and button of the console (picture 7).
4.2 Custom Button:
This option can customize your button habitually uses.
4.2.1 DEFAULT KEY MAP:
console button custom,hold 1P or 2P start button for 3 seconds to enter each
custom state (picture 8) (picture 9), follow the prompts to custom the A-H
button in the game and press 1P start save custom button and return. If you
do not need to customall button,just custom individual button.After custom
individual button you need,press 1P start to complete custom,other buttons
will be assigned auto! Press the 1P start again will save and back to setting
menu.
4.2.2 GAMEPAD CUSTOM:
USB of the mainboard,support 90% of gamepad in the market,the custom is
the same as above.
Caution: CX arcade version 1.0 does not have this feature.
4.2.3 RESTORES DEFAULT CUSTOM BUTTON:
restores the console default button and restores gamepad default! Move up
and down to select,1P start button confirm.
07
This option is mainboard JAMMA connect to arcade
The standard game gamepad can be insert to the
Picture 8
Picture 7
This option has two options,
Picture9