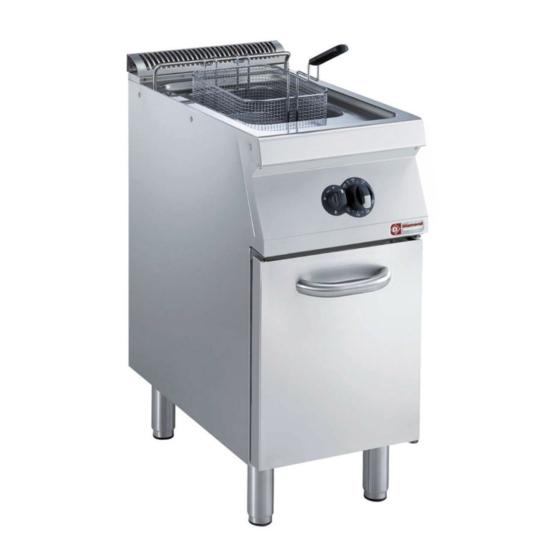
Diamond +7FRED12F0 Руководство пользователя - Страница 9
Просмотреть онлайн или скачать pdf Руководство пользователя для Фритюрница Diamond +7FRED12F0. Diamond +7FRED12F0 15 страниц.
Также для Diamond +7FRED12F0: Краткое руководство по эксплуатации (15 страниц), Руководство (15 страниц)

VI. INSTRUCTIONS FOR THE
USER
1. FRYER USE
General precautions
• Before use, carefully clean any industrial greases from
the tank and baskets, proceeding as follows:
- fill the tank with water and normal detergent and bring to
boil for a few minutes.
- drain through the special cock after lifting the relative
safety protection, and carefully rinse the tank with clean
water.
• The appliance is intended for industrial use by trained
personnel.
• Do not use the appliance empty or in conditions that com-
promise its optimum efficiency. Also, if possible, pre-heat
the appliance immediately before use.
• This appliance must only be used for its expressly
designed purpose; i.e. for frying foods in oil or solid fat.
Any other use is to be considered improper.
• Before introducing oil in the tank, make sure it does not
contain water.
• Pour the oil in the tank up to the max. level indicated by
the special reference notch obtained on the rear wall of
the tank.
• When using solid fat, melt it separately then pour it in the
tank. Do not leave fat in the tank at the end of cooking.
• Restore the oil bath whenever it falls below the min. level,
marked by the special reference notch. (danger of fire);
• Particularly voluminous and non-drained foods can cau-
se splattering of hot oil.
• Place the basket with food to be cooked, slowly in the
boiling oil, making sure that the froth formed does not
spill over the edge of the tank. If this occurs, stop dipping
the basket for a few seconds.
Important
• During operation, watch over the equipment and make
sure not to touch the surfaces near the tank as they are
very hot.
• The frying oil must be changed regularly, because when
used several times it becomes dirty and has a lower
flashpoint and an increased tendency to suddenly boil.
FRYER TEMPERATURE SETTING
TYPE OF FRIED
FOOD:
Foods that do not
disperse pollutant
substances in the oil
Foods dipped in bread
crumbs
Foods dipped in flour
NB! For cooking food dipped in flour, set the temperature to
170°C. A temperature higher will not give better cooking
results, but will cause faster deterioration of the oil (the
residual flour in the oil tends to burn).
SET
THE TEMPERATURE TO:
180/185°C
175/180°C
170°C
INSTRUCTIONS During cooking, manually remove any
cooking residuals in the oil. The prolonged presence of
these residuals alters the taste and odour of the oil,
reducing its useful life.
For a quick and good measurement of the degree of oil
deterioration, use litmus paper (strips) available on the
market.
1.1. GAS MODELS
Switching on (15L & 30L)
The thermostatic valve control knobs have the following
positions:
Knob M:
V
"Off" position
C
"Pilot ignition" position
A
"Pilot on" position
B
"On" position
• Turn knob "M" anticlockwise from position
• Press down knob "M" and turn it to position
pilot. If the pilot does not light, repeat the operation until it
does.
Then, hold knob "M" down for about 20 seconds, release
it and check that the pilot flame remains lit; otherwise,
repeat the entire operation.
In case of emergency the pilot can also be lit manually
by opening the door and bringing a flame to it, keeping
knob "A" pressed in the "pilot ignition" position for the
time necessary.
• Important! If the pilot burner accidentally goes out,
the valve has a safety device that prevents immedia-
te re-lighting. Wait 60 seconds for the release of knob
"M".
• To light the main burner, turn knob "M" anticlockwise from
position
to position
WARNING: THE KNOB "M" MUST REMAIN IN
WHEN OPERATING THE FRYER.
DO NOT OPERATE THE FRYER WITH KNOB "M" IN ANY
OTHER POSITION.
• To adjust the temperature turn knob "N" to the desired value.
Switching off
• Turn knob "M" clockwise from position
• Press the knob down and turn it to position
release it and turn it to the position
Note: if removing knob "N" for cleaning, always turn knob
fully clockwise to the lowest setting and replace the knob
so that the mark on the knob aligns with the lowest tem-
perature marking. Failure to replace the knob correctly
will result in inaccurate fryer temperature.
N
M
to position
to light the
.
POSITION
to position
.
.
.
; then
