6
Mute
Press the Mute button
to toggle Mute on and
off. When Mute is on, the Mute button glows red.
7
Conference
1. From a connected call
(not on hold), press
the Conference button
.
2. Make a new call.
3. Press the Conference button or the Conference
softkey (before or after the party answers).
The conference begins and the phone displays
"Conference" instead of caller ID.
4. Repeat these steps to add more participants.
The conference ends when all participants hang up.
"Conference in" a held call
1. From a connected call
(not on hold), press
the Conference button
.
2. Press the pulsing green session button
the held call that you want to add.
Or, if the held call is on another line, press the
Active Calls softkey, choose a call from the list,
and press the Conference softkey.
The participant is added to the call.
The conference ends when all participants hang up.
View & remove conference participants
During a conference, press the Show Details
softkey. To remove a participant from the
conference, highlight a name and press Remove.
8
Transfer
1. From a connected call
(not on hold), press
the Transfer button
.
2. Call the transfer recipient.
3. Wait for the recipient to answer, or skip to
Step 4 while the call is ringing.
4. Press the Transfer button or the Transfer
softkey.
The transfer is complete. Confirmation
displays on your phone screen.
9
Forward All
1. After selecting the desired line (if necessary),
press the Forward All softkey.
2. Enter a phone number, select a number from
Call History, or press the Messages button
(to forward to voicemail).
3. Look for Forward All icon
4. To cancel call forwarding, press the
Forward Off softkey.
Your system administrator can help you forward
calls remotely from your User Options web pages.
10
Call History
Press the Applications button
Call History.
The last 150 calls display:
for
• Missed calls
• Placed calls
• Received calls
To dial, scroll to a call and press the Select button
in the Navigation pad or the Call softkey.
To view call details, press More > Details.
View new missed calls
Press the session button
next to the Missed
Calls icon
(right side). The Missed Calls icon
displays when you have new (not yet viewed)
missed calls (may include a count of missed calls).
11
Directories
1. Press the Contacts button
directory.
2. Enter search criteria and press Submit.
3. Scroll to the listing and press the Select button.
12
Shared Lines
If you share a line with your boss:
• Either you or your boss can answer a ringing
call on the shared line.
• When your boss has a call on the shared line,
the shared line button
solid red and the call displays on your screen.
• When your boss puts a call on hold, the session
button
on your phone pulses red. You or
your boss can resume the call.
• If your boss enables the Privacy feature, your
on your screen.
boss's calls do not display on your screen.
13
Voicemail
New message indicators:
• A solid red light on your handset.
• A stutter dial tone on the line (if enabled).
• A voicemail icon
and select
session button (may include message count).
Listen to messages
Press the Messages button
voice prompts. Or, select a line and press the
session button
next to the voicemail icon
14
Tips
and select a
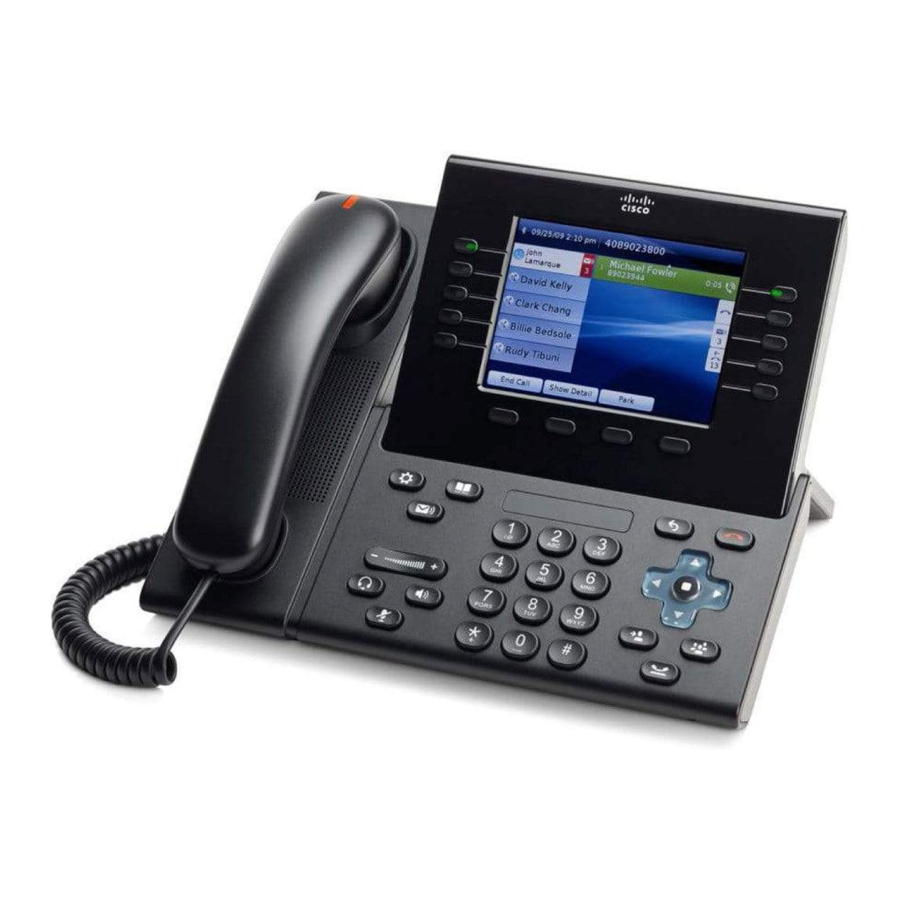
What are the buttons next to my screen?
• The buttons on the left side of your screen are
line (and feature) buttons. Line buttons change
line views but do not affect calls.
• The buttons on the right side of your screen are
session buttons. Each call correlates to a
session button. Use session buttons to answer
and resume calls or to view call details.
How do I silence my ringing phone?
Press the left side of the volume button
one time while the phone is ringing.
on your phone is
How do I change my ringtone per line?
1. Select Applications
Ringtone, then select a line and press Edit.
2. Select a ringtone and press Play, then press Set.
What does the Swap softkey do?
Swap allows you to toggle between calls before
completing a transfer or conference.
What does the Back button do?
Press the Back button
applications and menus.
next to the line label and
How can I get more line buttons?
Ask your system administrator about the
Cisco Unified IP Color Key Expansion Module.
Where can I find a complete User Guide?
http://www.cisco.com/en/US/products/ps10453/pr
oducts_user_guide_list.html
Americas Headquarters
Cisco Systems, Inc.
170 West Tasman Drive
San Jose, CA 95134-1706
USA
http://www.cisco.com
Tel:
408 526-4000
800 553-NETS (6387)
Fax:
408 527-0883
Cisco, Cisco Systems, the Cisco logo, and the Cisco Systems logo are registered trademarks or
trademarks of Cisco Systems, Inc. and/or its affiliates in the United States and certain other countries.
All other trademarks mentioned in this document or Website are the property of their respective
and follow the
owners. The use of the word partner does not imply a partnership relationship between Cisco and any
other company. (0705R)
© 2009 Cisco Systems, Inc. All rights reserved.
.
Published December 2, 2009, OL-20435-01
> Preferences >
to back out of

