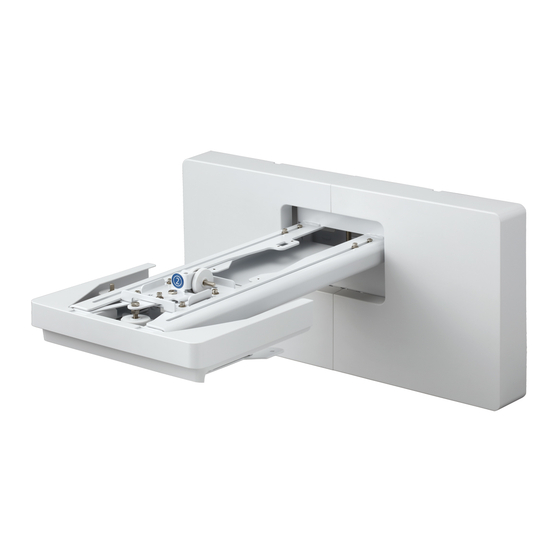
Epson ELPMB62 Руководство пользователя
Просмотреть онлайн или скачать pdf Руководство пользователя для Проектор Epson ELPMB62. Epson ELPMB62 2 страницы.

ELPMB62 User's Guide
Pre-assembly
x 5
(M4 x 12mm)
Installation
A
Stick the template sheet in the installation position. See the "Installation Guide" for more information on how to
A.
determine the installation position.
EN
Drill holes to secure the wall plate in at least four of the points shown above.
B.
Remove the template sheet.
C.
Collez la feuille modèle dans la position d'installation. Consultez le "Guide d'installation" pour plus d'informations sur la
A.
détermination de la position d'installation.
FR
Percez des trous pour fixer la plaque murale sur au moins quatre des points indiqués ci-dessus.
B.
Retirez la feuille modèle.
C.
Kleben Sie die Schablone an die Installationsposition. Weitere Informationen zur Ermittlung der Installationsposition
A.
finden Sie in der „Installationsanleitung".
DE
Bohren Sie Löcher zur Befestigung der Wandplatte an mindestens vier der oben gezeigten Punkte.
B.
Entfernen Sie die Schablone.
C.
Pegue la hoja de la plantilla en la posición de instalación. Consulte la "Guía de instalación" para obtener más información
A.
sobre cómo determinar la posición de instalación.
ES
Perfore orificios para asegurar la placa de pared en al menos cuatro de los puntos que se muestran arriba.
B.
Retire la hoja de la plantilla.
C.
Incollare il foglio del modello nella posizione di installazione. Consultare la "Guida di installazione" per maggiori
A.
informazioni su come stabilire la posizione di installazione.
IT
Praticare i fori per fissare la piastra a muro in almeno quattro dei punti indicati sopra.
B.
Rimuovere il foglio del modello.
C.
Cole a folha de modelo na posição de instalação. Para mais informações sobre a posição de instalação, consulte o
A.
"Manual de instalação".
PT
Perfure orifícios para fixar a placa da parede em pelo menos quatro dos pontos indicados acima.
B.
Retire a folha de modelo.
C.
将模板纸贴在安装位置。更多关于如何确定安装位置的信息,请参见"安装手册" 。
A.
SC
至少在上图所示的四点处钻孔,以固定壁板。
B.
C.
取下模板纸。
A.
將模板貼在安裝位置。請參閱「安裝說明書」進一步瞭解如何決定安裝位置。
TC
鑽孔以將牆板固定在至少四個上方所示的點。
B.
拆下模板。
C.
템플릿 시트를 설치 위치에 부착합니다 . 설치 위치를 확인하는 방법에 대한 자세한 내용은 " 설치 가이드 " 를 참조하십시오 .
A.
KO
위 그림에서처럼 최소 4 개 지점에 구멍을 뚫어 벽면 플레이트를 고정합니다 .
B.
템플릿 시트를 제거합니다 .
C.
設置する位置にテンプレートシートを貼ります。設置位置の決め方は『設置工事説明書』をご覧ください。
A.
JA
上図いずれか 4 箇所以上に、ウォールプレート固定用の穴を開けます。
B.
テンプレートシートを外します。
C.
B
M10 x 60mm
or
3/8 inch x 60mm
(Not included)
C
Pre-assembly
x 4
(M4 x 12mm)
D
10.5mm (M10)
or
10mm (3/8 inch)
45mm
E
F
G
H
x 13
(M4 x 12mm)
x 3
(M6 x 20mm)
x 1
x 3
(M6 x 20mm)
x 4
(M4 x 12mm)
Press the [Menu] button, and then select [Installation] > [Setting Plate Installation Guide]. Adjust the position of the image
EN
according to the screen.
Appuyez sur le bouton [Menu], puis sélectionnez [Installation] >[Guide d'installation de la plaque d'installation]. Ajustez la
FR
position de l'image en fonction de l'écran.
Drücken Sie die [Menu]-Taste und wählen Sie [Installation] > [Einstellungsplatte-Installationsanleitung]. Passen sie die
DE
Bildposition entsprechend dem Bildschirm an.
Presione el botón [Menu] y, a continuación, seleccione [Instalación] > [Guía de instalación de la placa de fijación]. Ajusta la
ES
posición de la imagen conforme a la pantalla.
Premere il tasto [Menu] e quindi selezionare [Installazione] > [Guida all'installazione della piastra di installazione]. Regolare la
IT
posizione dell'immagine in base allo schermo.
Prima o botão [Menu] e seleccione [Instalação] > [Guia de Instalação da placa de montagem]. Ajuste a posição da imagem de
PT
acordo com o ecrã.
SC
按 [Menu] 按钮,然后选择 [ 安装 ] > [ 安装支架安装指南 ]。按照屏幕调整图像位置。
TC
按 [Menu] 按鈕,然後選擇 [ 安裝 ] > [ 安裝支架安裝指南 ]。根據螢幕調整影像的位置。
KO
[Menu] 버튼을 누른 후 [ 설치 ] > [ 고정 플레이트 설치 설명서 ] 를 선택합니다 . 화면에 따라 이미지 위치를 조정합니다 .
【メニュー】ボタンを押して、[ 設置 ] - [ セッティングプレート調整ガイド ] を選択します。画面に従って映像の位置
JA
を調整してください。
x 1
(M6 x 20mm)
x 4
(M3 x 6mm)
〜 79 inch
80 inch 〜
ON
