Digoo DG-AC1 Руководство по эксплуатации - Страница 2
Просмотреть онлайн или скачать pdf Руководство по эксплуатации для Часы Digoo DG-AC1. Digoo DG-AC1 2 страницы. Wooden led digital clock

c. Default time is 12:00 (24H)
d. 3 groups alarm default time is 0:00(24H)and the alarm function default is closed
e. The default display mode is DP-2
f. The SD power saving mode default is close
g. The temperature unit default is °C
h. The LED brightness level default is L1
Operation Specification:
A. Normal setting
a. On the standard mode, press and hold SET(1) button for 2s into setting mode, then press UP(2) or DOWN(3) to
raise or lower the numbers, press and hold UP(2) or DOWN(3) button for fast adjust press SET(1) button to confirm
programming.
b. The setting order as follow: Year→mouth→date→12H/24H→hour→minute→AL1 switch (on/off) →AL1 hour→
AL1 minute→ AL2 switch (on/off)→AL2 hour→AL2 minute→ AL3 switch (on/off) →AL3 hour→AL3 minute→
weekend alarm switch→exit.
c. The setting item will be flashing by 1Hz frequency during programming.
d. The second will make zero when you set the minute.
e. The alarm time format will be changed to 12/24H if you choose 12H/24H when you set the time format.
f. The setting mode will be exit If no any operations within 15s.
Notes:
1. The light level will change in different time period.
During 7:00 -17:59: LED brightness L1 or L2
During 18:00 - 6:59: LED brightness L3
2. The brightness will not change automatically if you set the brightness to L1 or L2 during 18:00 (6:00PM) ~
6:59 (6:59 AM), or you set the brightness to L3 during 7:00 (7:00AM) ~ 17:59 (5:59 PM).
3. P.M. light spot will display during 12:00 PM - 11:59 P.M. (on the 12H format).
B. LED brightness setting
a. On standard mode, press and hold UP(2) or C/F(4) for 3s into the LED brightness setting. then press DOWN(3) to
setting the L1 to L3 and press UP(2) to setting the L3 to L1.
b. There are three light levels you can choose, the L1 is the brightest, the L3 is the darkest.
c. The LED will change with the different brightness level.
d. The setting mode will be exit if no any operation within 3s.
C. Display mode setting
a. On the standard mode, press SET(1) button to switch the display mode (DP-1 / DP-2).
b. The setting order is: DP-1→normal display→DP-2→normal display.
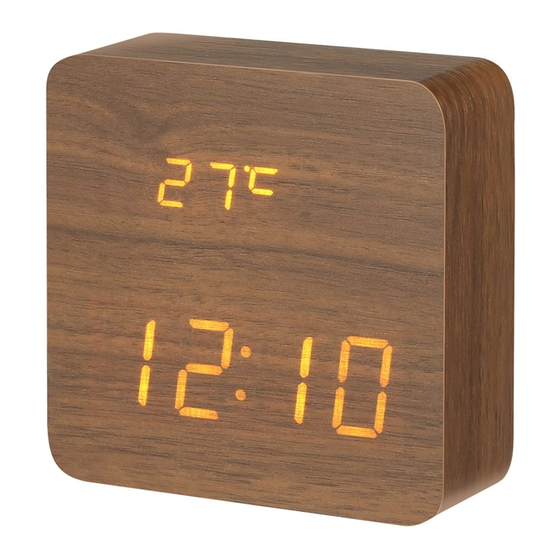
c. DP-1 display mode is showing the time (under) and temperature (upper) for 10s, then change to show the date
(upper) and year(under) for 5s.
d. DP-2 display mode is showing the time (under) and temperature (upper) all the time.
e. The setting mode will exit if no any operations within 3s.
D. Alarm setting
a. You can set the alarm when you are on the normal setting mode. You can set 3 alarms time (AL1, AL2, AL3).
b. Alarm duration is for 1 minute, press any buttons to stop the alarm for one day and it will be alarm again on next day,
if you want to deactivate the alarm you can back to normal setting mode to close the A1 or A2 and A3, when the
screen display like ON: A1、2、3 means that the alarm is been activated,when it display --: A1、2、3 means
that the alarm is deactivate.
Notes: the AL light spot will display on the left of temperature when you activated the alarm.
E. Voice control function & Power saving mode(SD)
a. On the standard mode, press DOWN(3) button to activate the power saving mode, the screen will display ON: SD
when you activate the power saving mode, "-- : SD" means that you have closed the power saving mode.
b. The LED will be not display anything after 15 seconds when you activate the power saving mode, the LED will
display the time and temperature for 15 seconds again when you make sounds up to 65dB. For example, you can
clap your hands or knock at the table close the clock to make the sounds ,but it will not work when the supply
voltage is over 5V.
Notes:
1. When the clock has only the backup battery, the screen will not display anything.
2. When the supply voltage over 5V, the voice control function and power saving function will not work.
F. Indoor temperature
a. Temperature range: from 0°C to 50°C
b. The accuracy is ± 2°C from 0°C to 50°C
c. Resolution is 1°C
d. Detection period is 30s
G. Power source
a. 3*AAA batteries (not included)
b. USB power supply: DC 5V (included)
c. The backup battery(included)
