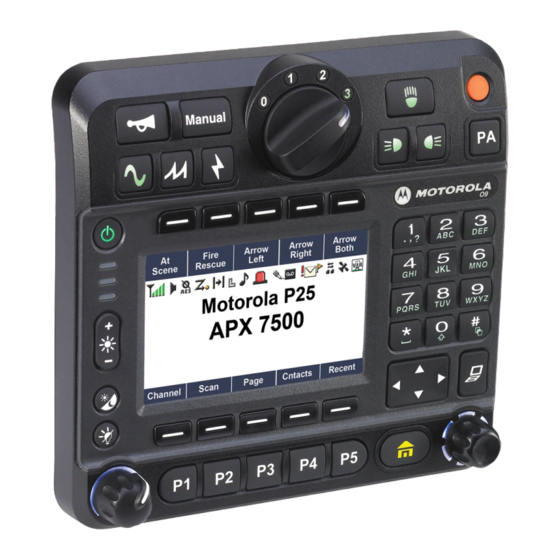
Motorola ASTRO APX O9 Руководство по установке - Страница 10
Просмотреть онлайн или скачать pdf Руководство по установке для Радио Motorola ASTRO APX O9. Motorola ASTRO APX O9 25 страниц. Control head mobile radio
Также для Motorola ASTRO APX O9: Краткое справочное руководство (44 страниц)

viii
Figure 2-2. Remote Mount Radio Control Heads Can Be Located in the Middle Console, on the Transmis-
sion Hump, or Under the Dash ............................................................................................. 2-2
Figure 2-3. Remote Mount of the Radio, O9 Control Head and Universal Relay Controller (URC is
optional) ................................................................................................................................ 2-2
Figure 2-4. Radio Installation (O2 Mid Power Dash Mount).................................................................... 2-3
Figure 2-5. Radio Installation (O3 Mid Power Dash Mount).................................................................... 2-3
Figure 2-6. Radio Installation (O5 Mid Power Dash Mount).................................................................... 2-4
Figure 2-7. Radio Installation (O7 Mid Power Dash Mount).................................................................... 2-4
Figure 2-8. Radio Installation (O2 Mid Power Remote Mount) ............................................................... 2-5
Figure 2-9. Radio Installation (O3 Mid Power Remote Mount) ............................................................... 2-6
Figure 2-10. Radio Installation (O5 Mid Power Remote Mount) ............................................................... 2-6
Figure 2-11. Radio Installation (O7 Mid Power Remote Mount) ............................................................... 2-7
Figure 2-12. Radio Installation of O9 Remote Mount with Transceiver (URC is optional) ........................ 2-7
Figure 2-13. Radio Installation (O9 Remote Mount with Pinouts) ............................................................. 2-8
Figure 2-14. Remote Control Head Pinouts .............................................................................................. 2-8
Figure 2-15. Cabling Interconnect Diagram for Dash Mount..................................................................... 2-9
Figure 2-16. Cabling Interconnect Diagram for Remote Mount .............................................................. 2-10
Figure 2-17. Cabling Interconnect Diagram for 09 Remote Mount (URC is optional) ..............................2-11
Figure 2-18. APX8500 Mid Power Trunnion Orientation ......................................................................... 2-18
Figure 2-19. Transmission Hump Trunnion Mounting ............................................................................. 2-20
Figure 2-20. Below Dash Trunnion Mounting.......................................................................................... 2-20
Figure 2-21. O5 Control Head Installation Exploded View (Also applicable for O2 and O7
Control Heads) ........................................................................................................................................ 2-22
Figure 2-22. O9 Control Head Installation Exploded View...................................................................... 2-23
Figure 2-23. O5 and O9 Control Head Rear View .................................................................................. 2-23
Figure 2-24. Multiple Control Heads Parallel Configurations .................................................................. 2-24
Figure 2-25. Multiple Control Heads Series Configurations .................................................................... 2-25
Figure 2-26. APX Mobile O5 Control Head Front View........................................................................... 2-26
Figure 2-27. Radio Display with Current Control Head ID ...................................................................... 2-26
Figure 2-28. APX Mobile O5 Control Head Front View – Mode Knob .................................................... 2-26
Figure 2-29. O3 Control Head................................................................................................................. 2-27
Figure 2-30. O3 Control Head Rear View ............................................................................................... 2-28
Figure 2-31. Hang-Up Clip Installation Exploded View ........................................................................... 2-28
Figure 2-32. Locking Kit (Optional) ........................................................................................................ 2-29
Figure 2-33. HKN6188_ Power Cable with External Speaker Connector ............................................... 2-30
Figure 2-34. HKN6187_ Power Cable with External Speaker Connector, Record
Audio Output Jack (2.5 mm) and Earphone Jack (2.5 mm)................................................ 2-31
Figure 2-35. Battery Selector Switch....................................................................................................... 2-31
Figure 2-36. Multiple Antennas Separation for locations 1-10 ................................................................ 2-33
Figure 2-37. Multiplexer Views................................................................................................................ 2-34
Figure 2-38. GPS/GLONASS and Wi-Fi Antenna Connector on the Back of the Mid Power Radio ....... 2-34
Figure 2-39. Speaker Mounting............................................................................................................... 2-35
Figure 2-40. Removing the screws on the Control Head ........................................................................ 2-36
Figure 2-41. Removing the Control Head ............................................................................................... 2-36
Figure 2-42. Disconnecting the Speaker Connector ............................................................................... 2-37
Figure 2-43. Reattaching the Control Head ............................................................................................ 2-37
Figure 2-44. RFID Location on Mid Power Radio ................................................................................... 2-38
Figure 2-45. Read Angle for Mid Power Radio........................................................................................ 2-39
Figure 2-46. Tag Angle for Mid Power Radio .......................................................................................... 2-39
Figure 2-47. Examples of Reader and Tag Aligned (Reader Orientation) ............................................... 2-40
Figure 2-48. Example of Reader and Tag Misaligned (Reader Orientation) ........................................... 2-40
Figure 3-1. Universal Relay Controller Orientation ................................................................................. 3-1
Figure 3-2. Universal Relay Controller Installation Exploded View ......................................................... 3-2
Figure 3-3. Power and Ground Cable Glands......................................................................................... 3-3
on Or
on Ori
nion Mounti
nion Mount
Mounting.......... .
Mounting...........
stallation Expl
stallat
oded Vie
ded
.........................................
............................
allation Exploded V
allation Exploded View......
d Rear View ......................
Rear View ...........
allel Configur
Config ations ..........
Con
Configur
ations ................
ont View...........................
View...............
Head ID ...........................
ead ID ..........................
ew – Mode Knob ...........
ew – Mode Knob .............
tion
ons ......
......................................
................................
.............................
.........................
.....................
...............
.....
.......
nne
nne
List of Figures
