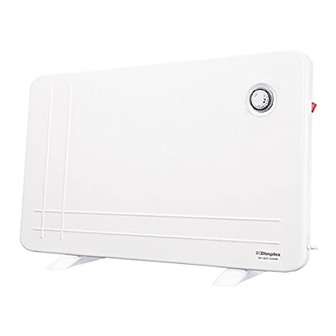
Dimplex ARLWP800TI Инструкции по установке и эксплуатации - Страница 3
Просмотреть онлайн или скачать pdf Инструкции по установке и эксплуатации для Нагреватель Dimplex ARLWP800TI. Dimplex ARLWP800TI 4 страницы. Dimplex low wattage panel heaters installation and operating instructions dxlwp400, dxlwp400ti, dxlwp800, dxlwp800ti n, arlwp800ti
Также для Dimplex ARLWP800TI: Инструкции по установке и эксплуатации (4 страниц)

Setting Current Time
1.
Press the S (Set) button and keep pressed while pressing the
D (Day) button until the actual day is displayed. Continue by
pressing H (Hour) or M (Minute) button until the current hour or
minute is displayed. When resetting, the buttons D, H or M can
be held down for rapid forward counting.
2.
Release both buttons. The day and time will now be set.
3.
To reset incorrect time, repeat previous steps.
Summertime Function
Summertime function is very useful for areas with summertime
system, the timer can quickly and easily be changed to operate
in SUMMER time mode i.e. one hour ahead, and back again as
follows;
1.
Press the S (Set) and I/O (Input/Output) buttons simultaneously.
The LCD will show 'SUMMER'. The clock will switch ahead one
hour.
2.
Press the buttons together again and the clock will switch back
again one hour to standard time & 'SUMMER' will no longer be
displayed .
Setting Programs
Once the correct time is set , a total of 8 ON/OFF time programs can
be set for AUTO operation. These can be set to operate on any of 16
different combinations of individual days or groups of days
depending on your individual choice. To program the timer follow
the following setting instructions;
1.
To select the first of your 8 ON/OFF programs simply press
the P (Program) button once , the program is then input as
follows ;
2.
You first select one of the 16 different combinations of
individual days or groups of days you wish to set this
program for. Continue to press and release the D (Day)
button to go through the choices until the day or blocks of
days you require appears along the top of the timer display
then stop pressing , the 16 different combinations that can
be chosen are as follows;
1)
Mo
2)
Tu
3)
We
4)
Th
5)
Fr
6)
Sa
7)
Su
8)
Mo, Tu, We, Th, Fr, Sa, Su
Fig. 3
9) Mo, Tu, We, Th, Fr
10) Sa, Su
11) Mo, Tu, We, Th, Fr, Sa
12) Mo, We , Fri
13) Tu, Th, Sa
14) Mo, Tu, We
15) Th, Fri, Sa
16) Mo, We, Fr, Su
3.
Now set the time by pressing the H (Hour) button and then
M (Minute) button until the desired time setting is displayed.
4.
Press the P (Program) button again to finish the first ON
setting and enter into the first OFF setting. By repeating
steps '2' & '3' above you can now complete the input of the
first OFF setting.
5.
Press the P (Program) button again to finish the first ON/
OFF program and enter into the 2
steps '2' , '3' and '4' to complete this program , then press
P again and repeat cycle as necessary.
6.
Once you have completed the number of ON/OFF programs
you require (up to a maximum of 8) , press the S (Set)
button to save the settings and the timer is now ready to
operate in Auto mode.
To set Timer ON at 18:15 and Timer OFF at 22:15
EXAMPLE :
everyday
a) Press P and LCD displays
b) Press D until LCD displays
c) Press H until LCD displays
d) Press M until LCD displays
e) Press P and LCD displays
f) Repeat c) and d) until LCD displays '10:15PM or 22:15'
g) Press S and the program is saved and the current time
display returns.
TIP : When verifying your programs ensure that the settings do
not overlap, especially when using the block option.
TIP : To clear a section in a Program, press the C (Clear) button.
To reactivate this section press the C button again.
Notes on switching between Manual ON/Auto/Manual OFF
1.
Pressing I/O (Input/Output) button allows you to change
between
Manual ON / Auto / Manual OFF modes , current mode will
be displayed on the bottom of the LCD display.
2.
In Manual ON or Manual OFF mode, the Timer operates but
the programme settings are inactive.
3.
When the mode is turned from Manual ON to Auto, the
Timer mode will remain ON until the next programmed
timer off setting is reached.
4.
When the mode is turned from Manual OFF to Auto the
timer mode will remain OFF until the next programmed
timer ON setting is reached.
Note - Timer Memory Back Up Batteries - Once the heater has
been left plugged in with the socket switched on for at least 12
hours the timers memory back up batteries will be fully charged.
Once the timer batteries are fully charged , if there is a power
cut or if the heater is disconnected from the mains for less than
100 hours , then the timer will continue to keep time & the
settings in the memory will remain intact.
If however the timer back up batteries have not been charged
fully, or if the heater is deprived of power for longer than 100
hours, then the time and the programme settings are likely to
be lost and you may therefore need to reset the time and the
programme before using the Auto mode again.
Safety - Overheat Protection
For your safety the front panel temperature is regulated by a
thermal limit thermostat.
nd
ON setting. Repeat
'1_ON'
'MO, TU, WE, TH, FR, SA, SU'
'6:00PM' or '18:00'
'6:15PM' or '18:15'
'1_OFF'
