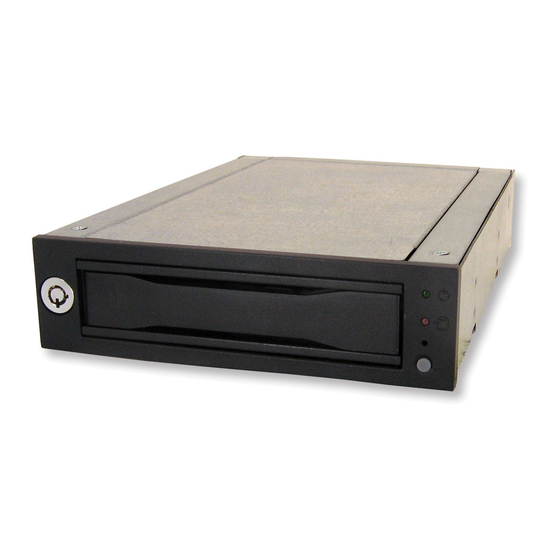
CRU Dataport Data Express DX115 SAS/SATA 6G Краткое руководство по эксплуатации - Страница 2
Просмотреть онлайн или скачать pdf Краткое руководство по эксплуатации для Хранение CRU Dataport Data Express DX115 SAS/SATA 6G. CRU Dataport Data Express DX115 SAS/SATA 6G 3 страницы.
Также для CRU Dataport Data Express DX115 SAS/SATA 6G: Краткое руководство по эксплуатации (2 страниц)

*For 6GB/s operation, a SAS or Si\TA 6GB/s conlroller and SAS or SATA 5GB/shard drive are required.
Product Warranty
!CRU)
CRU-DataPort
warrants this product to b
e
tree
of
si
g
ni
f
i c a nt defects in
and is
CRU"s
wananty 1::
nontrardt�rab!e
lirmted to
tlw
onginal
purchaser.
limitation of liability
·rhe
wanantim> s&t forth
in this aqrm;rn:mt mplace all nthervmrranties.
CRU
purpnss
mntles of merr:harrtability
r.md
fitness
fm
a
IJ?.!tir.ulrlr
and
non-:nhing!Hne!1t
dea l er, agent.
employee is
authonzed
to make any modification, extension, or addition
or
o
f procuremer;t of substitute products
or
services, lost profits. loss of
mformation o
inability
inc;dumal
aris;ng in <.my wav out of
thr; sfllr�
of.
u:w
ot. or
darnag�J:;
CRU's
damages. In no case shall
liability aXC::!ed the actual money paid for the products at ::;sue.
product w
i
t
hout notice or taking on additional l iability
FCC Compliance Statement "Tilis devicFJ r;ornpliss "oJJith Part 15 of
the
c
(2)
p
harmful interference, and
this device must ac
e
t an·t interference received. mr:: l uding interference that �.ay cause
Th;:;
6qwprmmt has besn
tested
and found
to
compl�· v.-ith
th�;�
lirnits
tor a
provide reasonable protection aga1ns!
harmful
intarferencB when the equipment
a
nd can radiate radio
frequency
energy and, if not in
s
t a
l
l e
d
and used in accordance with
::: r . r r:;r::.;nlr;atwn:;.
In
the event that ·rou experience
Radio
Frequency Interference, you should take the following steps to resolve the problerrr
)
i s
!
Ensur�;� that
the
case
of
'fOUr
atti'Jched
dr;ve
grounded.
c
2)
Use a data cable with
RFI r
ed
u
mg
farritas on each end
c
3) Use
a power
s.upp!y vvith
an
R
F
I reducing ferrite appro>:imately
5
i
n
h
es from
4)
�
ReoriHnt cr
rek
catfJ thH
rm::�winq
r.mtr:mna
r
e
of fi v e
m
a
t
r
i
a
l
and '/liorkrr:anship
fo
r a pe
i
o
d
years from
the original date
a
11
exprHssl)• disdairns all other
wanantif:s. including but
net l
ni
t
d
to,
uf
third-party rights with respt1ct to thfJ rJot:urner:tation
ami
hardware.
to
t
h
i
s warranty h no
event
wi
l
l CRU or
its suppliers bs liable for any costs
.
r data, computer malfunction,
or
any other
s
p
e
c
i
a
l
indirect.
consequential.
to
use
any
CRU
product or
st�rvrce, evon if CRU has bofm
advis�1d
of the
CRU
and
reserve:; the right to mako modification�
subjact tc
{1 j
FCC
rulos. Operation
:s
the fnl!owing
twr)
r.onrl;tJons·
This
d�;;" v ice
u
e
d
n d
sir e
operation."
Cf<Jss
B
digital
deVICfJ, pursuant to
Part
15 of the FCC
Rule:>. Thf:lse
l;mit�� ari;l
is op
d
in a home or cornrnercialsnvironrnent. This equipment generates,
erate
re
the
instruction manual. may cause harmful i n
t
e
rf
e
nce
to
the
DC plug.
Data Express
For the full
user manual
Models Covered:
DX1156G
1. Installation Steps
Installation
1.1 Frame
DX115
a. Slide the
b.
Secure the frame to the chassis with the mounting screws provided.
of
purchase
c. Attach a SAS or SATA
Attach the other end to the appropriate SAS or SATA port on the computer's
:
f;
th13
rnp
l i
d \'Jar
1-Jo CRU
d.
Attach a Mol ex power connector to the rear of the receiving frame.
or
pocsibility
of
such
a
t
s
to th is
ddi
ion
1.2 Hard Drive Installation
a. Push in on the ejection handle of
nwy
not cause
from the frame.
designed
to
US!:iS,
b.
Attach a 3.5" or 2.5"
r a
d
i
o
c. With one hand on
the carrier using the mounting screws provided.
O p
ing Your
1.3
at
e r
DX115 carrier
a. Slide the
TM
DX115
SAS/SATA
6G Quick Start Guide
and
information about this product,
more
please
5.25"
frame into an open
drive bay on your computer.
data
data
cable to the SAS/SATA
connector on
the
carrier to pop it out Use
hard
drive to the unified power and data connector inside of the carrier.
the
the hard
top of
drive, turn the carrier over. Then secure the hard drive to
DX115
t
the
in
o the frame, then push
carrier handle in until it
visit
vvvvw.cru·dataport.com
the
rear of the frame.
motherboard.
the
handle to remove the carrier
clicks.
