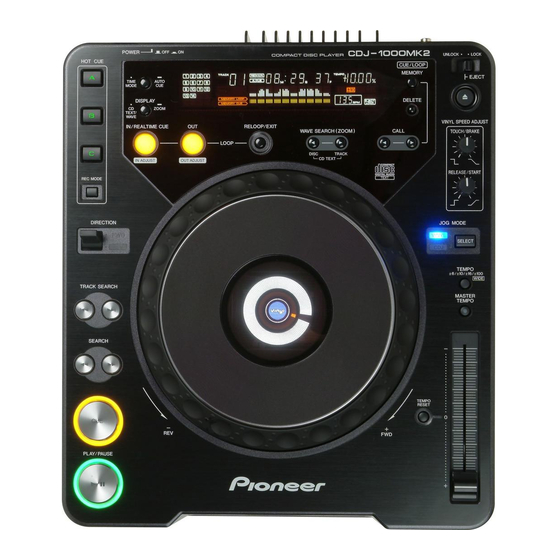
Pioneer CDJ-1000MK2 Руководство по эксплуатации - Страница 16
Просмотреть онлайн или скачать pdf Руководство по эксплуатации для CD-плеер Pioneer CDJ-1000MK2. Pioneer CDJ-1000MK2 20 страниц. Compact disc player

ADVANCED OPERATIONS
USING CUE POINTS/LOOP POINTS MEMORY
This unit can store Cue points and Loop points for each disc in internal or on a
Multimedia Card (MMC).
Using Internal Memory
When a Multimedia Card (MMC) is not inserted in the card slot, the internal memory
is used.
The internal memory can store 10 Cue and Loop points per disc and for a total of
100 discs. When the data exceeds 100 discs worth of data, data items are deleted
starting from the oldest items.
¶ It takes 2 points (IN/OUT) for one loop.
7 Storing Cue points
1. Enter Cue points using the A. CUE function or the CUE
button.
2. Press the CUE/LOOP MEMORY button in Cue point
standby mode (back Cue in play mode).
¶ [MEMORY] is shown in the display indicating that the Cue point has
been stored.
¶ The Cue point lights in red in the calendar display and playback address
display.
7 Storing Loop points
1. Enter the Loop in/out points to perform loop playback.
2. Press the CUE/LOOP MEMORY button during loop
playback.
¶ [MEMORY] is shown in the display indicating that the Loop in/out points
have been stored.
¶ The Loop in point lights in red in the calendar display and playback ad-
dress display.
7 Calling stored Cue/Loop points
When Cue/Loop points are stored, the calendar display and the playback ad-
dress display lights in red.
1. Press the CUE/LOOP CALL button.
¶ When the CALL button (3) is pressed, Cue/Loop points are called in order
from the beginning of the disc and the disc is set to standby at the Cue/Loop
in point.
2. Press the PLAY/PAUSE button (6).
¶ Play or loop play starts.
16
<DRB1339>
En
7 Deleting stored Cue/Loop points
When Cue/Loop points are stored, the calendar display and the playback ad-
dress display lights in red.
1. Press the CUE/LOOP CALL button.
CUE/LOOP
¶ When the CALL button (3) is pressed, Cue/Loop points are called in order
MEMORY
from the beginning of the disc and the disc is set to standby at the cue or
CUE/LOOP
loop in point.
DELETE
2. Press the CUE/LOOP DELETE button when in standby
mode at the called point.
CUE/LOOP
CALL
¶ [DELETE] is shown in the display indicating that the Cue/Loop points
2, 3
have been deleted.
¶ The Cue/Loop in point indication in the calendar display and the playback
address display go off.
Using a Multimedia Card
When a Multimedia Card is inserted in the card insertion slot, the external memory
(MMC) takes precedence. For each disc, 100 CUE/LOOP points, 3 hot start points,
and 20 WAVE tracks can be recorded. An 8Mb MMC can record data for 5,000 discs,
and a 16Mb MMC can record data for 10,000 discs. Using MMCs with capacity above
16Mb will not result in greater disc data storage, however (maximum data record-
able is for 10,000 discs).
¶ It takes 2 points (IN/OUT) for one loop.
7 Insert Multimedia Cards
Insert Multimedia Cards horizontally with the flat surface up and the notch facing
to the right. Push the card gently into the slot until it is seated.
¶ Removing Multimedia Cards
Confirm the [CARD] indicator is off, press the card in the slot once, wait for it
to be ejected and gently pull it out.
NOTE:
¶ The [CARD] indicator is on when the card is being accessed. Do not re-
move the card or turn off the power when this indicator is on. (Otherwise
the data may be corrupted.)
¶ [MMC I/O Err] shows when you insert the Multimedia Card, then take the
card out and try to insert it once more.
¶ The Multimedia Card is a precision electronic instrument. Do not bend it,
apply force or shock or drop it. Do not use or keep it in a place that is
subject to static electricity or electric noise.
¶ Multimedia cards may be damaged when subjected to shock or static
elecricity. Care is needed in their handling. It is recommended that peri-
odical copies be made of important data.
7 Using a Multimedia Card for the first time
A Multimedia Card that is used for the first time must be formatted.
1. Insert the Multimedia Card (MMC) in the card insertion
slot.
¶ [FORMAT?PUSH MEMORY] is displayed.
2. Press the MEMORY button when the disc is to be
formatted.
¶ [FORMAT] is displayed and formatting starts.
¶ Remove the card if it is not to be formatted.
¶ Formatting a card deletes any data previously recorded on it.
[CARD] Indicator
Level surface
Multimedia Card
P. 17
