Pioneer PDP-S34-LR Руководство по эксплуатации - Страница 3
Просмотреть онлайн или скачать pdf Руководство по эксплуатации для Акустическая система Pioneer PDP-S34-LR. Pioneer PDP-S34-LR 20 страниц.
Также для Pioneer PDP-S34-LR: Руководство по эксплуатации (9 страниц)
INSTALLATION ON THE PLASMA
DISPLAY
Flush mount
Perform installation according to the following steps 1 to 2.
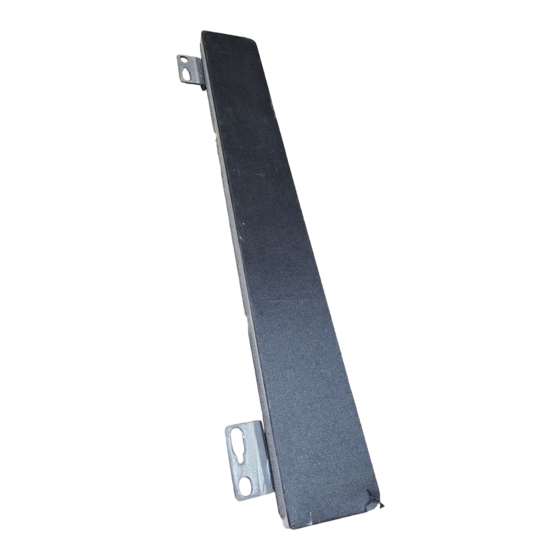
1 Attach the mounting fittings to the
speakers.
The illustration below shows the right speaker. Attach the left
side mounting fitting in the same way.
1 Attach a bracket for flush mounting (RIGHT) to the top of
the right speaker, as shown.
2 Attach another bracket for flush mounting (RIGHT) to the
bottom of the speaker in the same way.
Padding
strip
1
2 Attach the speakers to the display.
The illustration below shows how to attach of the right speaker.
Attach the left speaker in the same way.
1 Fix the upper screw temporarily in
advance to hang the speaker on the
display (In this case, leave a space
of about 5 mm between the head
of the screw and the display).
2 Hang the speaker on the upper screw.
3 Fix the lower screw temporarily.
4 Adjust the position of the speaker and then fix the upper
and lower screws firmly.
2
2
The display
5 mm
4
3
Set back mount
Perform installation according to the following steps 1 to 2.
1 Attach the mounting fittings to the
speakers.
The illustration below shows the right speaker. Attach the left
side mounting fitting in the same way.
1 Attach a bracket for set back mounting (RIGHT) to the
top of the right speaker, as shown.
2 Attach another bracket for set back mounting (RIGHT) to
the bottom of the speaker in the same way.
Padding
strip
1
2 Attach the speakers to the display.
The illustration below shows how to attach
of the right speaker. Attach the left speaker
in the same way.
1 Fix the upper screw temporarily in
advance to hang the speaker on the
display (In this case, leave a space
of about 5 mm between the head of
the screw and the display).
2 Hang the speaker on the upper screw.
3 Fix the lower screw temporarily.
4 Adjust the position of the speaker and then fix the upper
and lower screws firmly.
2
English
2
The display
5 mm
4
3
3