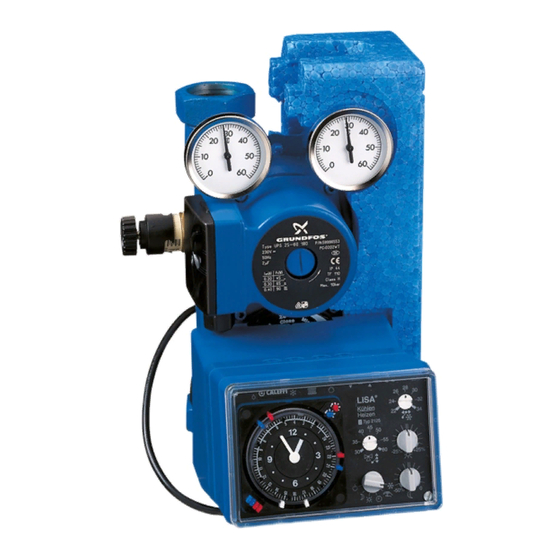
CALEFFI 152 Series Краткое руководство по эксплуатации - Страница 3
Просмотреть онлайн или скачать pdf Краткое руководство по эксплуатации для Контроллер CALEFFI 152 Series. CALEFFI 152 Series 8 страниц. Temperature regulating unit for heating and cooling

The front panel of the controller shows the following functions:
1)
The LED is lit when there is a risk of condensation forming
in the cooling function (the mixing valve is closed).
In the heating function, this lights up intermittently during the
screed drying phase.
2)
The LED is lit in the cooling function.
3)
The LED is lit in the heating function.
4)
Pump operating (ON): LED lit continuously.
5)
Mixing valve closing: LED lit. The LED is lit continuously
when the controller is in the non-operative phase of
regulation, for example with T
(see characteristic curve).
6)
Mixing valve opening: LED lit.
7)
Sensor malfunction: LED lit.
8) Function selector, 6 different functions possible:
a)
Main controller off. In models where clock fitted, clock
remains on. The frost protection function remains active.
b)
Controller operating in set-back mode.
Has no effect on the cooling function.
c)
Controller operating in comfort mode.
Has no effect on the cooling function.
d)
Controller in operation according to the cycles of the
comfort or set-back modes, determined by the two-channel
analogue clock, red indicator for heating times, blue indicator
for cooling times (item 13).
e)
Controller de-activated (pump ON - mixing valve ON).
This function guarantees heating to the maximum
temperature value set on the printed circuit board (PCB).
Has no effect on the cooling function.
f)
Summer function. Cooling is activated if required by the
ambient conditions (T
point 10) and dependant on the clock settings.This activation
takes place after ten minute if the outside temperature is more
than 1°C above the set value. With the exclusion of heating, the
frost protection function remains active.
Note: Normally, with the clock programme, the changeover from
heating to cooling takes place after the outside temperature has
been higher than the set value for at least half an hour. This
selector position can therefore be used to effect a changeover
to cooling.
9)
Temperature and characteristic curve selector. This
selector enables the user to input the maximum required
flow
temperature,
outside design temperature. Also enables optimisation of the
standard configuration set at the factory, allowing personal
control of the operation of the system.
If this value matches the setting on the main printed circuit
board (item 6 PCB), the regulation complies with the calculation
criteria given by the characteristic curve.
If this value is different from the setting on the main printed
circuit board (item 6 PCB) the controller will recalculate the new
characteristic curve. The maximum set temperature, however,
remains active. This selector also determines the characteristic
cooling curve, as it uses the inclination of the first line of the
curve, constructed for the heating (see characteristic curve graph).
between 18°C and 24°C
Outside
greater than the value set at
Outside
corresponding
to
the
10) Start or stop cooling selector. If the outside temperature
is higher than the set value, the cooling function is activated.
Factory setting: 24°C.
Characteristic curve
The characteristic curve is determined taking into account the
following parameters:
a)
b)
c)
d)
The characteristic curve has a straight line format.
In the example shown below, it has been calculated using the
factory set values.
Example of calculation of characteristic curve
X Axis - Outside temperature - TX
Y Axis - Flow temperature - TY
Calculation of minimum and maximum points
Point A: given by the intersection of Tmax X (18°C) and Tmin Y (20°C).
Point B: given by the intersection of Tmin X (-10°C) and Tmax Y (45°C).
Calculation of slope change points
Calculate the difference ∆X between Tmax X and Tmin X.
Thus: ∆X = 18 - (-10) = 28°C.
Calculate the difference ∆Y between Tmax Y and Tmin Y.
Thus: ∆Y = 45 - 20 = 25°C.
Points of change C and D of the curve are identified as follows:
Point C given by the intersection between:
X = Tmax X - 25% ∆X = 18 - 0,25 · 28 = 11°C
Y = Tmin Y + 55% ∆Y = 20 + 0,55 · 25 = 33,75°C
Point D given by the intersection between:
X = Tmax X - 50% ∆X = 18 - 0,5 · 28 = 4°C
Y = Tmin Y + 80% ∆Y = 20 + 0,8 · 25 = 40°C
Point E is the cooling starting point, whose characteristic curve has
the same slope as section A-C.
Point E given by the intersection between: TX = value set in item 10
(24°C) and TY = Tmin Y (20°C).
Characteristic curve
60
55
50
45
minimum
40
35
30
25
20
15
10
5
35
Max flow temperature set on controller (item 9 PCB).
Factory setting: 45°C.
Min flow temperature set on printed circuit board (item 5
PCB). Factory setting: 20°C.
Min outside temperature set on printed circuit board (item
1 PCB). Factory setting: -10°C.
Outside temperature limit for heating start in summer,
set on printed circuit board (item 3 PCB).
Factory setting: 18°C.
D (4;40)
80%
C (11;33,75)
55%
E (24;20)
A (18;20)
30
25
20
15
10
Passive band
B (-10;45)
5
0
-5
-10
-15
T
(°C)
OUTSIDE
