Blain Hydraulics EV100 Series Руководство по эксплуатации - Страница 8
Просмотреть онлайн или скачать pdf Руководство по эксплуатации для Блок управления Blain Hydraulics EV100 Series. Blain Hydraulics EV100 Series 16 страниц. Elevator valve
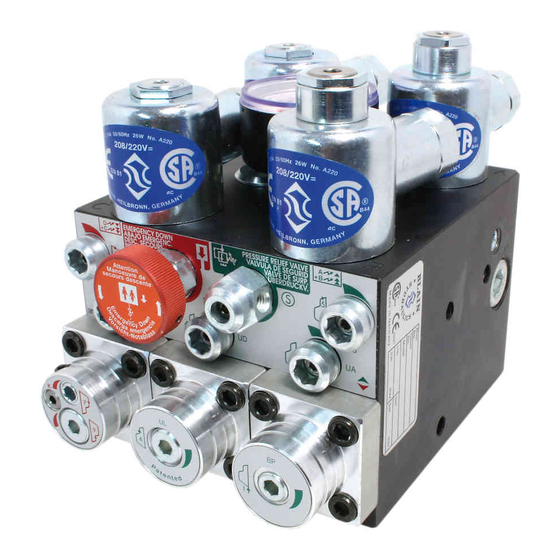
EV 100 Service Manual
For checking the operation of the solenoids, remove the top nuts. By lifting the solenoids a few millimeters, the magnetic pull of the
solenoid can be felt. For testing, the operation of the elevator car, can also be controlled by lifting and replacing the coil.
Valves are fully adjusted and tested in the factory. Check electrical operation before changing valve setting.
Problem
No Up-Start
(Elevator
remains at floor)
Up-Start, but
no Full Speed
Up-Start
too hard
No deceleration
into leveling
speed
Aufzug bremst
ab, fährt jedoch
über die Halte-
stelle
Aufzug bleibt
vor der Haltstelle
stehen (keine
Schleichfahrt)
Down Leak
Releveling
Oct 02
BLAIN HYDRAULICS GmbH Boellinger Hoefe D-74078 Heilbronn Tel. +49 7131 28 21-0 Fax +49 7131 485216 www.blain.de [email protected]
Printed in Germany
Trouble Shooting
Possible cause
Test: Turn adjustment 5 all the way in. If the elevator now starts upwards the problem is at solenoid A.
Solenoid A not energised or voltage too low.
Solenoid A tube not screwed down tight.
Solenoid valve A - dirt or damage between needle AN and
seat AS.
Adjustment 2 not far enough open.
Adjustment 1 too far back (open). Not enough pilot pressure.
Relief valve is set too low.
Adjustment 8 turned in too far (car sits on the buffer).
Bypass flow guide is too large.
Pump running in the wrong direction.
The pump connection flange is leaking excessively.
The pump is undersize or worn.
Test: If by turning adjustment 1 with the pump running the pressure does not rise above 5 bar, even with a
smaller bypass valve inserted, the problem should be sought at the pump.
Test: Turn adjustment 3 all the way in. If the elevator now travels upwards at full speed the problem is at solenoid B.
Solenoid B not energised or voltage too low.
Solenoid B tube not screwed down tight.
Solenoid valve B - dirt or damage between needle AN and
seat AS.
The pump connection flange is leaking excessively.
The pump is undersize or worn.
Test: If by turning adjustment 1 with the pump running the pressure does not rise above 5 bar, even with a
smaller bypass valve inserted, the problem should be sought at the pump.
Adjustment 1 turned in too far.
Adjustment 2 turned out too far.
O-Ring UO on Bypass Valve U is leaking.
Star to Delta motor switch period is too long.
Excessive friction on the guide rails or in the cylinder head.
Solenoid B does not de-energise.
Adjustment 3 turned in too far.
O-Ring UO on Bypass Valve U is leaking.
Magnetventil A (Halt oben) zu spät stromlos.
Drossel 5 (Weich-Halt) nicht weit genug geöffent.
Einstellung 1 nicht weit genug geöffnet.
Schleichfahrt aufwärts zu schnell (zu weit geöffnet).
Solenoid A and B reversed.
Up leveling speed too slow.
Middle O-Ring FO of flange 4F is leaking.
Relief valve is set too low.
For possible down leakage points, see EV Parts List, page 5.
Releveling may also occur as hot oil cools down and contracts.
UP Travel
Recommended
Lift coil to check magnetic pull (see above).
Tighten Solenoid A tube.
Clean or change needle and seat.
Turn out adjustment 2.
Turn in adjustment 1 with the pump running.
Set relief valve higher.
Turn out adjustment 8.
Insert smaller bypass flow guide (see flow guide charts
at EV catalogue).
Install the pump correct.
Seal the pump connection.
Select bigger pump or replace pump.
Lift coil to check magnetic pull (see above).
Tighten Solenoid B tube.
Clean or change needle and seat.
Seal the pump connection.
Select bigger pump or replace pump.
Turn out adjustment 1.
Turn in adjustment 2.
Change O-Ring
0.2-0.3 sec. is sufficient.
Can not be eliminated thru valve adjustment.
Lift coil to check magnetic pull (see above).
Slow down switch possibly set to high (late).
Turn out adjustment 3. Turn in adjustment 2.
Change O-Ring → see EV Spare Parts List.
Magnetspule anheben (siehe Vermerk ).
Drossel 5 weiter aufdrehen.
Einstellung 1 zwei Umdrehungen weiter öffnen.
Einstellung 4 auf 6 - 10 cm/sek. hineindrehen
Lift coil to check magnetic pull (see above).
Turn out adjustment 4.
Change O-Ring → see EV Spare Parts List.
Set relief valve higher.
Replace one seal point and test before proceeding to
the next point of possible leakage, if still necessary.
EN ISO 9001
→
see EV Spare Parts List.
6