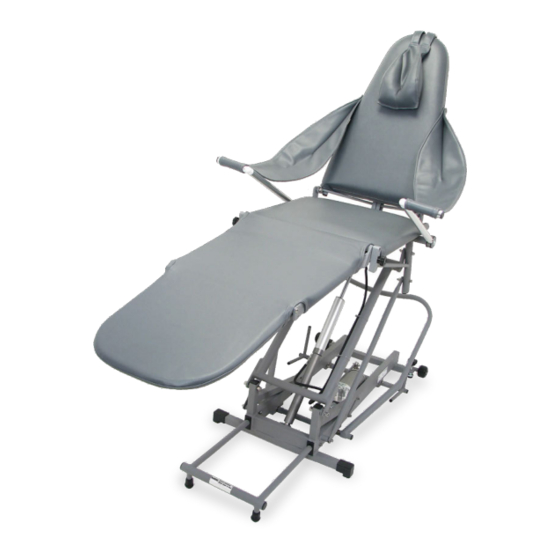
Aseptico ADC-02 Руководство по эксплуатации и список деталей - Страница 8
Просмотреть онлайн или скачать pdf Руководство по эксплуатации и список деталей для Внутренняя отделка Aseptico ADC-02. Aseptico ADC-02 16 страниц. Portable hydraulic dental chair

REPACKING THE CHAIR
In the event that your chair requires service or repair, please call the
Aseptico customer service department at (800) 426-5913 –or– (425)
487-3157 to arrange for shipment and obtain a Return Authorization
number. If you do not have the original shipping container and pack-
aging materials, please request these items from customer service
before attempting to repackage chair.
1.
Remove the arm slings from
the ends of the arm posts,
then tuck the arm slings into
the frame on the rear of the
backrest.
2.
Rotate the arm posts down
just below the seat frame,
then fold in the hand grips
(Fig. 12 A).
Make sure the hand grips are
positioned below the seat
frame before proceeding or damage to the upholstery may
occur when folding the leg and foot panels closed.
3.
Place a piece of foam (Fig. 13
A) overlapping the seat and
backrest panels. Tie two small
pieces of foam (Fig. 13 B)
around the arm post pivots.
Fold the foot and leg panels
closed onto the seat panel.
4.
Flip the pillow (Fig. 14 A)
over to the rear side of the
backrest. Detach the backrest
latch from the cylinder, then
fold the backrest down onto
the seat panel.
5.
Retract selector levers (if extended) then press and hold
selector lever in the SEAT LOWER position until the seat frame
touches the floor. If the seat frame won't lower all the way,
press down on the lift lever and selector lever simultaneously.
6.
Tuck
the
pillow
between the chair frame‑
work. Guide the backrest
strap (Fig. 15 A) under the
main lever frame and over
the top of the backrest, then
fasten the strap securely. Fully
retract the stabilizer bar.
8
Fig. 12
Fig. 12
A
Fig. 13
Fig. 13
A
B
Fig. 14
Fig. 14
A
down
Fig. 15
Fig. 15
A
ADC-02
7.
Place the box base (with
yellow straps) on the floor,
then place the two cardboard
cushion strips (Fig. 16 A)
in the base in line with the
yellow straps.
8.
Position the chair (Fig. 17 A)
in the box base.
9.
Strap both ends of the chair
frame to the box base using
the yellow straps (Fig. 18 A) .
10. Install the box walls (Fig. 19
A) inside the box base, then
lay the nylon chair cover (Fig.
19 B) on top of the chair.
11. Install the box top around the
box walls, then then secure
the box with two shipping
straps (Fig. 20 A) .
12. Write the Return Authorization number (RA#) clearly on the
outside of the cardboard shipping box, then ship to:
• WHEN TRANSPORTING CHAIR, DO NOT PLACE HEAVY OBJECTS ON
• WHEN TRANSPORTING CHAIR, DO NOT PLACE HEAVY OBJECTS ON
TOP OF THE BOX.
TOP OF THE BOX.
Fig. 16
Fig. 16
Fig. 17
Fig. 17
Fig. 18
Fig. 18
Fig. 19
Fig. 19
A
B
Fig. 20
Fig. 20
Aseptico Inc
8333 216th Street S E
Woodinville, WA 98072
CAUTION
A
A
A
A
