Amcrest IP4M-1062EW-AI Hızlı Başlangıç Kılavuzu - Sayfa 4
Güvenlik Kamerası Amcrest IP4M-1062EW-AI için çevrimiçi göz atın veya pdf Hızlı Başlangıç Kılavuzu indirin. Amcrest IP4M-1062EW-AI 13 sayfaları.
Camera Installation
Included with your camera is an installation bracket that can be used to mount your camera to an
installation surface such as a wall or pole. As stated, please make sure the installation surface
can support at least 3 times the weight of the bracket and camera. For more information, please
refer to the installation guide included with this device.
Note: When installing the camera, please make sure to set the viewing angle in a manner that is
optimal for capturing license plate data in the area such as in the front of the road, street, or at an
angle that can easily capture license plate information.
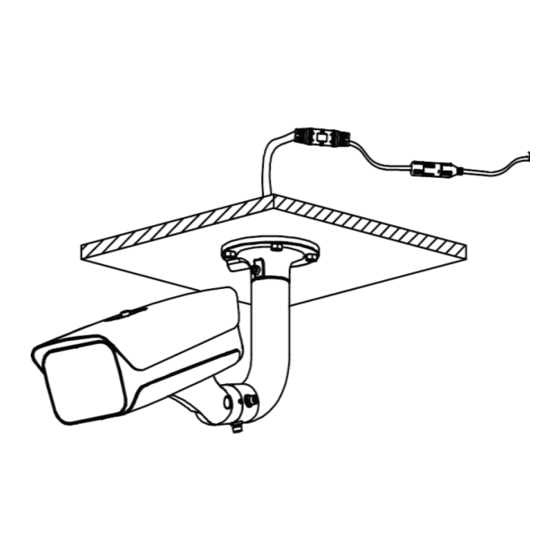
Ceiling/Wall Mounting
A drill with an 8mm diameter head as well as a wrench will be required to complete this process.
The same concept can be applied as well if mounting to side wall or other similar mounting
surface.
Insert the bottom bracket of the camera into
the top of the installation bracket and secure it
using the included Allen wrench. Run the
wiring through the tube of the installation
bracket.
Insert the installation bolts into the installation
bracket into the holes. Use a wrench to secure
the installation bracket to the mounting surface
and connect all wiring.
Apply the installation sticker to the mounting
surface. Use a 8mm diameter drill head to drill
the holes provided on the sticker.
Ensure all screws are tightened and all wiring
is properly connected to complete the
installation process.
4