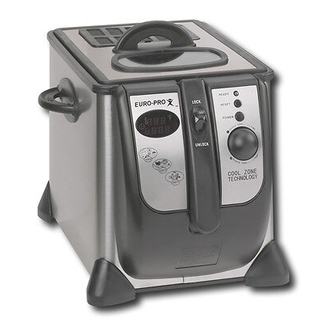
Euro-Pro F1075H Kullanıcı El Kitabı - Sayfa 5
Fryer Euro-Pro F1075H için çevrimiçi göz atın veya pdf Kullanıcı El Kitabı indirin. Euro-Pro F1075H 6 sayfaları. Auto-lift deep fryer 120v., 60hz., 1800 watts

OPERATING INSTRUCTIONS
• Use the tongs to remove the frying
basket cover from the frying basket.
(Fig. 11)
Fig. 11
• Press the power button to turn the deep
fryer "Off".
• Unplug the power cord from the electrical
wall outlet.
Frying Basket with Cover
The basket cover may be used when
making donuts, hush puppies or other deep
fried foods where the food being cooked
needs to be held immersed in the oil.
To attach the basket lid to the fryer basket:
• Place the food that is to be deep fried
into the basket.
• Snap the basket lid
onto the fryer
basket..
Fig. 12
(Fig. 12)
Note:
Always let the deep fryer cool
completely (approximately 2 hours)
before cleaning or storing. Never carry
or move the deep fryer with hot oil inside.
Frying Tips
• Do not mix different oils or new and old
oil together.
• Replace oil regularly. In general, oil will
be tainted fast when frying food containing
a lot of protein, (such as poultry, meat and
fish). When oil is used mainly to fry
potatoes and is filtered after each use, it
can be used up to 8 to 10 times, but do
not use the same oil for more than 6
months.
• Always replace all oil as soon as it starts
foaming when heated, when color
becomes dark, when it has a rancid smell
or taste or becomes syrupy.
• Make sure that the food to be fried is dry.
• Remove loose ice from frozen food before
frying.
• To cook evenly, pieces should be the
same size and thickness.
• Thicker pieces will take longer to cook.
Cleaning Instructions
• Follow the cleaning instructions on
page 3. (Before Using for the First Time)
• Never immerse the control panel, cord
or plug in water or any other liquid.
• Do not place the control panel, cord or
plug in the dishwasher.
• Clean the control panel only with a damp
cloth.
• The oil container, frying basket, and lid
cover can be washed in the dishwasher.
• The filter can only be rinsed, do NOT
place in dishwasher.
• The body of the deep fryer can be
washed in warm soapy water. Do not put
the body of the deep fryer in the
dishwasher.
Filtering & Changing The Oil
• Make sure the deep fryer is unplugged
and the oil has cooled completely before
cleaning or storing the deep fryer.
• The oil does not need to be changed
after each use. In general, the oil will
be tainted rather quickly when frying
food containing a lot of protein (such
as poultry, meat or fish). When oil is
mainly used to fry potatoes and is
filtered after each use, it can be used 8
to 10 times. However, do not use the
same oil for periods longer than six ( 6)
months.
• To filter the oil, first make sure the oil
has cooled and then empty the oil from
the oil container into another container
or bottle. (Fig. 13)
• Wash and dry the oil container and
basket.
• Refill the oil container with the oil,
pouring the oil through a wire strainer or
paper filter. (Fig. 14)
Fig. 14
Fig. 13
7
OPERATING INSTRUCTIONS
Filling the Oil Container
Never plug in the Deep Fryer before filling
with oil to specified level. Always make
sure control panel is securely in place in
the body and the heating element is
inside the oil in the container before
plugging in.
• Use blended vegetable oil, pure corn oil
or canola oil. Do not use olive oil,
margarine, lard or drippings.
• The oil level must always be maintained
between the minimum and the maximum
levels marked inside the oil container.
Check the oil level before each use. For
best results, keep the oil close to the
maximum level. (Fig. 4)
• Never mix different oils and fats together.
Do not mix old and new oil.
Fig. 4
Using Solid Fat
Warning:
Do Not put solid shortening in
the oil container or the frying basket.
• If using solid vegetable shortening, melt
it first in a separate pan and then very
carefully pour the melted fat into the oil
container.
• Previously used solid vegetable shortening
which has curdled and hardened in the oil
container should be removed from the oil
container and melted in a separate pan
before reusing.
Installing the "Control Panel With
the Heating Element" Into Place
• Hold the control panel with the heating
element in your hand.
• Slide the control panel down making
sure that the control panel is fully
seated into the power junction module.
(Fig. 5)
Important Notice:
The Automatic
Safety Switch ensures that the unit will
not operate unless the Control Panel has
been seated properly into the power
junction module. This is not a defect. This
product is fitted with a safety switch to
prevent the unit from turning on
accidentally.
Heating Element
Control Panel
Fig. 5
Power Junction
Module
4
