Astralpool 23670 Kurulum ve Bakım Kılavuzu - Sayfa 2
Aydınlatma Ekipmanları Astralpool 23670 için çevrimiçi göz atın veya pdf Kurulum ve Bakım Kılavuzu indirin. Astralpool 23670 16 sayfaları. Standard niche

ENGLISH
IMPORTANT: The instruction manual you are holding includes essential information on the safety measures to be
implemented for installation and start-up. Therefore, the installer as well as the user must read the instructions before
beginning installation and start-up.
Keep this manual for future reference.
To achieve optimum performance of the Housing body, follow the instructions provided below:
1. VERIFY THE CONTENTS OF THE PACKING:
The following accessories are included inside the box:
Code 00349 / 00349I
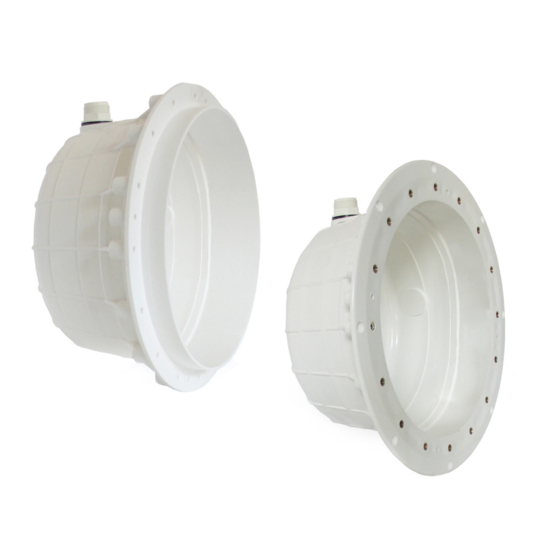
• Niche
• Bag of components
2. INSTALLATION:
• In order to clearly light a pool it is recommended lo install a niche every 20 m² of water surface. In swimming pools which
are especially deep, niche is required for every 25 m³ of water volume.
• In order to prevent glare, the niches should be installed so that they face away from the residence or usual view of the
swimming pool.
• In the event that lighting is used in training or competition pools, the niches should be installed on the sides to prevent
glare on the swimmers.
• To avoid the need to empty the pool to change the lamp, we recommend that the floodlamp be installed in areas which
are accessible from the upper edge of the pool, at approximately 400-700 mm from the water surface (Fig. 1).
The method of fastening the housing to the pool wall varies depending on whether it is a floodlamp for concrete pools,
prefabricated pools or panel pools.
Concrete swimming pool
To install a floodlamp in a concrete swimming pool the housing should be fixed in the wall of the swimming pool (Fig. 2).
Make sure that the cable outlet of the housing remains on the upper part.
Concrete Pool with liner
Embed the niche (00364 or 28887) into the wall of the pool (Fig. 3), concrete well around the niche.
Protect gasket (A) during the concreting and when this is completely dry position Liner (B).
Once the Liner has been positioned attach the flange (C) and screw it into the niche using 16 screws (D). Make sure that
the cable outlet of the niche stays in the upper part.
Prefabricated Pool
To attach the niche in a prefabricated pool first a circular Ø230 mm hole must be made (Fig. 4).
Position the niche (00364 or 28887) on the outside of the pool. Depending on the niche, an adhesive gasket must be
incorporated, or not, to make it watertight.
• If the niche incorporates the gasket, position the niche on the outside of the pool and screw it in at the
bottom with the two screws (B).
• If the niche does NOT incorporate the gasket, stick to the adhesive gasket (A) to the niche, position the niche
on the outside of the pool and screw it in on the inside with the two screws (B).
Make sure that the cable outlet of the niche stays in the upper part. Position the adhesive gasket on the inside of the pool
and then attach the flange (C), making sure that the heads of the screws (B) previously positioned coincide with the gap
reserved for them in the back of the flange. Secure the clamp (C) to the pool wall, to the inner side of the pool, and secure
it to the housing body using 16 screws (D).
Panelled swimming pool with Liner
The pool can be of metal or plastic, using the template, and making a circular hole of 277 mm. diameter and 8 holes
Ø4mm (Fig. 5). Place the recess, through the inside of the pool and bolt the 8 screws (A). Make sure that the cable outlet
from the recess is on the upper side. Place the liner (B). Place the clamp (C) through the inside of the pool, fasten it to
the recess with 16 screws (D). Cut the Liner which is inside the clamp, so that the recess is free and proceed to assemble
the projector.
3. ASSEMBLY AND FUNCTIONING WARNINGS:
• The persons who are in charge of assembly should have the required qualifications for
this type of work.
• The manufacturer is not responsible in any circumstances for assembly, installation or
start-up of any electric components which have been inserted or handled at locations
other than its own premises.
• This niche is resistant to pool treatments, always that the concentration values do not exceed these levels.
• Attention: Please note that the Ph of pool water always must be between 7.2 and 7.6.
• Attention: It is advisable to connect with accessories Fig. 6.
Code 00364 / 00364I / 17805
28887 / 23671 / 23670 / 72261
• Niche
• 2 watertight joint
2
• Bag of components
• Clamp
TYPE OF
CONCENTRATION
TREATMENT
Chlorine
Bromine
IN WATER
2 mg/l
5 mg/l
