ASTRO-PHYSICS 900RPA Hızlı Başlangıç Kılavuzu - Sayfa 2
Adaptör ASTRO-PHYSICS 900RPA için çevrimiçi göz atın veya pdf Hızlı Başlangıç Kılavuzu indirin. ASTRO-PHYSICS 900RPA 2 sayfaları. Precision-adjust rotating pier adapter with azimuth bearing
Step by Step Instructions – 900 Precision-Adjust Rotating Pier Adapter
1.
Line your pier or tripod up so that the adapter can point to the pole. To accomplish this, one of the
screw holes for attaching the Pier Adapter must face as close to north or south as possible. With
an Astro-Physics Pier, this can be accomplished with one of the legs pointing either straight north
or south as you prefer.
2.
Securely attach the 900 Rotating Pier Adapter to your pier or tripod using the six 5/16 -18 x 5/8
button head screws and washers.
3.
Rotate the top plate so that the Azimuth Adjuster Block is centered in the top plate's adjustment
slot.
(You may wish to "eyeball" your pier and adapter to be sure you are pointing as near as
you can tell toward the pole. If you are going to need to move the pier, it's much easier to
move it now before you've added the weight of the mount to the assembly.)
4.
Remove the four Pier Adapter Knobs if you haven't already done so.
5.
Make sure that the Azimuth Adjuster Knobs of your 900GTO are spread far enough apart to easily
fit the Azimuth Adjuster Block between them.
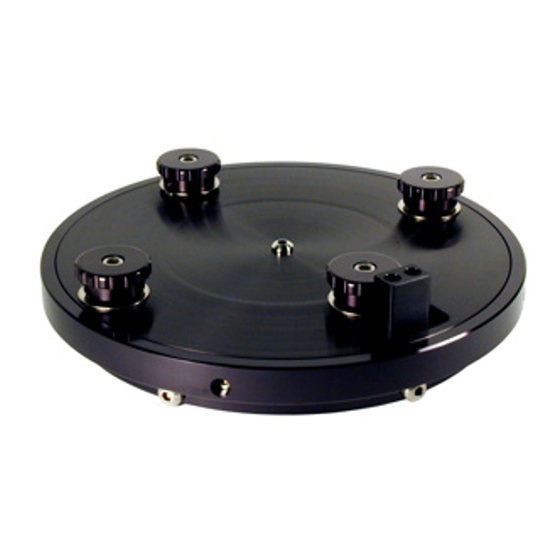
6.
Carefully set your R.A. axis onto the Rotating
Pier Adapter. Use the adapter's Center Pivot
Screw and Bottom Plate Alignment Screws to
help line up the mount on the adapter. The
alignment screws fit perfectly in the slot for the
rear Pier Adapter Knob. The mount should sit
flat on the adapter. The mount's Azimuth
Adjuster should be centered over the adapter's
Azimuth Adjuster Block. The slot in the
adapter's flat plate should also still be centered
over the Azimuth Adjuster Block
7.
Attach the four Pier Adapter Knobs and secure
them tightly.
8.
Start your favorite polar alignment routine.
you started with everything pretty well centered,
you will have about 7 ½ degrees of azimuth
adjustment in either direction. As you adjust the
azimuth with the mount's Azimuth Adjuster
Knobs, the mount and adapter top plate will
rotate together.
(Remember to back off the opposite
Adjuster Knob to the one you are using
to rotate the mount.)
9.
When aligned you must snug down the opposite
Azimuth Adjuster Knob to the one you were
adjusting to polar align. The two opposing
Azimuth Adjuster Knobs are what will actually
secure the mount's azimuth position when polar aligned. If you leave the adjuster loose, the
mount could be knocked out of alignment.
www.astro-physics.com, tel. (815) 282-1513, fax (815) 282-9847
If
This page was last modified on March 30, 2006
ASTRO-PHYSICS, INC.
11250 Forest Hills Road
Machesney Park, IL 61115