Asus DSL-N10E Hızlı Başlangıç Kılavuzu - Sayfa 2
Kablosuz Yönlendirici Asus DSL-N10E için çevrimiçi göz atın veya pdf Hızlı Başlangıç Kılavuzu indirin. Asus DSL-N10E 2 sayfaları. 11n wireless adsl modem router
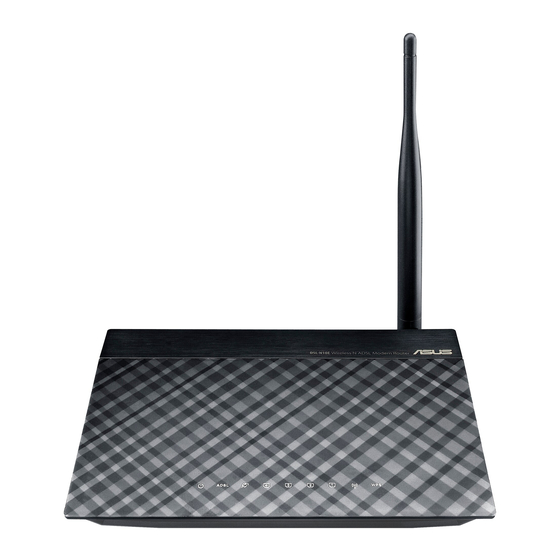
Ayrıca Asus DSL-N10E için: Hızlı Başlangıç Kılavuzu (2 sayfalar)
Polski
1. Podłącz swoje urządzenia.
2. Przed uruchomieniem procedury ustawień ADSL należy się upewnić, że wskaźnik ADSL na
górnym panelu DSL-N10E świeci stałym światłem.
3. W przeglądarce sieci web, wprowadź http://192.168.1.1. W pomocniczym oknie, wprowadź
nazwę użytkownika i hasło (nazwa użytkownika/hasło: admin/admin). Pojawi się kreator QIS
(Szybkie ustawienia Internetu).
* J eżeli strona sieciowa QIS nie jest wyświetlana po uruchomieniu przeglądarki sieciowej,
należy wyłączyć ustawienia proxy przeglądarki sieciowej.
4. W czynnościach 1 do 4 kreatora QIS (Szybkie ustawienia Internetu), wypełnij na każdej stronie
niezbędne informacje i kliknij Next (Dalej).
5. W czynności 5: strona Configuration Saving (Zapisywanie konfiguracji), kliknij Finish (Zakończ),
aby zapisać ustawienia konfiguracji i dokończyć.
Español
1. Conecte sus dispositivos.
2. Antes de iniciar el procedimiento de configuración de la conexión ADSL, asegúrese de que el
indicador ADSL situado en el panel superior del router DSL-N10E se encuentre encendido.
3. En el explorador web, escriba http://192.168.1.1. En la ventana emergente, escriba el nombre
de usuario y la contraseña (ambos son admin). Aparecerá el asistente Configuración rápida
de Internet (QIS).
* S i la página web de QIS no aparece tras abrir el explorador web, deshabilite la
configuración proxy del explorador web.
4. En los pasos 1 a 4 del asistente Configuración rápida de Internet (QIS), rellene la información
necesaria de cada página y haga clic en Siguiente.
5. En el paso 5: página Guardar configuración, haga clic en Finalizar para guardar la configuración
y completar la configuración.
Bahasa Indonesia
1. Sambungkan perangkat.
2. Sebelum menjalankan prosedur pengaturan ADSL, pastikan indikator ADSL pada panel atas
DSL-N10E menyala pekat.
3. Di browser Web, masukkan http://192.168.1.1. Pada halaman yang muncul, masukkan nama
pengguna dan sandi (nama pengguna/sandi: admin/admin). W izard QIS (Konfigurasi Internet
Cepat) muncul di layar.
* J ika halaman Web QIS tidak muncul di layar setelah Anda mengaktifkan browser Web,
nonaktifkan pengaturan proxy browser Web Anda.
4. Pada langkah 1 hingga 4 QIS (Konfigurasi Internet Cepat), masukkan informasi yang diperlukan
di setiap halaman, lalu klik Berikutnya.
5. Pada Langkah 5: Halaman Penyimpanan Konfigurasi, klik Selesai untuk menyimpan
pengaturan konfigurasi dan menyelesaikan konfigurasi.
ไทย
1. เชื ่ อ มต่ อ อุ ป กรณ์ ข องคุ ณ
2. ก่ อ นที ่ จ ะเริ ่ ม กระบวนการตั ้ ง ค่ า ADSL, ให้ แ น่ ใ จว่ า ไฟแสดงสถานะ ADSL บนแผงด้ า นบนของ DSL-N10E
ติ ด ต่ อ เนื ่ อ ง
3. ในเว็ บ เบราเซอร์ ข องคุ ณ , ป้ อ น http://192.168.1.1 ในหน้ า ต่ า งที ่ แ สดงขึ ้ น
ให้ ป ้ อ นชื ่ อ ผู ้ ใ ช้ และรหั ส ผ่ า น (ชื ่ อ ผู ้ ใ ช้ / รหั ส ผ่ า น: admin/admin) ตั ว ช่ ว ยสร้ า ง
การตั ้ ง ค่ า อิ น เทอร์ เ น็ ต ด่ ว น (QIS) จะปรากฏขึ ้ น
* ถ ้ า เว็ บ เพจ QIS ไม่ ป รากฏขึ ้ น หลั ง จากที ่ ค ุ ณ เปิ ด เว็ บ เบราเซอร์ ให้ ป ิ ด การทำงานการตั ้ ง ค่ า proxy
ของเว็ บ เบราเซอร.
4. ในขั ้ น ตอนที ่ 1 ถึ ง 4 ของ การตั ้ ง ค่ า อิ น เทอร์ เ น็ ต ด่ ว น (QIS),ให้ ก รอกข้ อ มู ล ที ่ จ ำเป็ น ใน
แต่ ล ะหน้ า และคลิ ก Next (ถั ด ไป)
5. ในขั ้ น ตอนที ่ 5: หน้ า การบั น ทึ ก การตั ้ ง ค่ า , คลิ ก Finish (เสร็ จ ) เพื ่ อ บั น ทึ ก การตั ้ ง ค่ า การ
กำหนดค่ า และเสร็ จ สิ ้ น กระบวนการตั ้ ง ค่ า
Português do Brasil
1. Conecte seus dispositivos.
2. Antes de iniciar o procedimento de configuração do ADSL, assegure-se de que o indicador
do ADSL no painél superior DSL-N10E está constante.
3. No seu navegador de web, digite http://192.168.1.1. Na janela emergente, digite o nome do
usuário e a senha (nome do usuário/senha: admin/admin). O assistente de Instalação Rápida
da Internet (QIS) aparecerá.
* S e a página de web QIS não aparecer depois de iniciado o navegador de web, desative as
configurações proxy no navegador de web.
4. N os passos 1 a 4 da Instalação Rápida da Internet (QIS), preencha a informação necessária em
cada página e clique Seguinte.
5. E m Passo 5: página de Salvamento da Configuração, clique Concluir para salvar as
configurações e completar a instalação.
Українська
1. Підключіть пристрої.
2. Перш ніж починати процедуру налаштування ADSL, будь ласка, переконайтеся, що індикатор
ADSL на верхня панелі DSL-N10E не блимає.
3. Введіть у браузер http://192.168.1.1. У тимчасовому вікні введіть ім'я користувача і пароль (ім'я
користувача/пароль: admin/admin). З'являється програма-помічник швидкого налаштування
Інтернет (QIS).
* Я кщо веб-сторінка QIS не з'являється після того, як Ви запустили веб-браузер, вимкніть
налаштування proxy веб-браузера.
4. У кроках від 1 до 4 програми-помічника швидкого налаштування Інтернет (QIS) введіть необхідну
інформацію на кожній сторінці, а потім клацніть по Next (Далі).
5. На кроці 5: Сторінка Configuration Saving (Збереження конфігурація). Клацніть по (Завершити),
щоб зберегти налаштування конфігурації і виконайте налаштування.
Français
1. Connectez vos périphériques.
2. Avant de lancer la procédure de configuration ADSL, assurez-vous que l'indicateur
lumineux ADSL situé sur le dessus du DSL-N10E est allumé.
3. Dans la barre d'adresse de votre navigateur Internet, entrez http://192.168.1.1. Dans
la fenêtre contextuelle apparaissant à l'écran, entrez le nom d'utilisateur et le mot de
passe de connexion (admin/admin). L'assistant de configuration rapide s'exécute.
* S i l'Assistant de configuration Internet ne s'exécute pas au démarrage de votre
explorateur Web, désactivez le serveur proxy.
4. Étape 1 à 4 : configurez les paramètres de connexion nécessaires puis cliquez sur Next
(Suivant).
5. Étape 5 : cliquez sur Finish (Terminé) pour enregistrer les paramètres et compléter la
configuration de votre connexion.
Eesti
1. Ühendage seadmed.
2. Enne ADSL-i häälestusprotseduuri käivitamist veenduge, et ADSL-i indikaator DSL-N10E
ülapaneelil helendab pidevalt.
3. Veebibrauseris sisestage aadressiribale http://192.168.1.1. Hüpikaknas sisestage kasutajanimi
ja parool (kasutajanimi/parool: admin/admin). Ilmub viisard Quick Internet Setup
(Kiirhäälestus Interneti kaudu, QIS).
* K ui pärast veebibrauseri käivitamist QIS'i veebileht ei ilmu, siis keelake veebibrauseri
puhvrisätted.
4. Viisardis Quick Internet Setup (QIS) läbige sammud 1 kuni 4, sisestades igal lehel vajalikud
andmed, ja klõpsake nuppu Next (Edasi).
5. Sammus 5: Lehel Configuration Saving (Konfiguratsiooni salvestamine) salvestage
konfigureerimissätted ja lõpetage häälestus.
Notices
ASUS Recycling/Takeback Services
ASUS recycling and takeback programs come from our commitment to the highest
standards for protecting our environment. We believe in providing solutions for you to
be able to responsibly recycle our products, batteries, other components, as well as
the packaging materials. Please go to http://csr.asus.com/english/Takeback.htm
for the detailed recycling information in different regions.
REACH
Complying with the REACH (Registration, Evaluation, Authorisation, and Restriction
of Chemicals) regulatory framework, we published the chemical substances in our
products at ASUS REACH website at http://csr.asus.com/english/REACH.htm
Federal Communications Commission Statement
This device complies with Part 15 of the FCC Rules. Operation is subject to the
following two conditions:
•
This device may not cause harmful interference.
•
This device must accept any interference received, including interference that
may cause undesired operation.
This equipment has been tested and found to comply with the limits for a class
B digital device, pursuant to part 15 of the FCC Rules. These limits are designed
to provide reasonable protection against harmful interference in a residential
installation.
This equipment generates, uses and can radiate radio frequency energy and, if
not installed and used in accordance with the instructions, may cause harmful
interference to radio communications. However, there is no guarantee that
interference will not occur in a particular installation. If this equipment does cause
harmful interference to radio or television reception, which can be determined
by turning the equipment off and on, the user is encouraged to try to correct the
interference by one or more of the following measures:
•
Reorient or relocate the receiving antenna.
•
Increase the separation between the equipment and receiver.
•
Connect the equipment into an outlet on a circuit different from that to which the
receiver is connected.
•
Consult the dealer or an experienced radio/TV technician for help.
WARNING: Any changes or modifications not expressly approved by the party
responsible for compliance could void the user's authority to operate the equipment.
FCC REQUIREMENTS
This equipment complies with Part 68 of the FCC rules and the requirements
adopted by the ACTA. On the bass unit of this equipment is a label that contains,
among other information, a product identifier in the format US: ASUDL01BDSLN10E.
If requested, this number must be provided to the telephone company.
The REN is used to determine the number of devices that may be connected to a
telephone line. Excessive RENs on a telephone line may result in the devices not
ringing in response to an incoming call. In most but not all areas, the sum of RENs
should not exceed five (5.0). To be certain of the number of devices that may be
connected to a line, as determined by the total RENs, contact the local telephone
company. For products approved after July 23, 2001, the REN for this product is part
of the product identifier that has the format US: ASUDL01BDSLN10E. The digits
represented by 01 are the REN without a decimal point (e.g., 03 is a REN of 0.3). For
earlier products, the REN is separately shown on the label.
If your equipment causes harm to the telephone network, the telephone company
may discontinue your service temporarily. If possible, they will notify you in advance.
But if advance notice is not practical, you will be notified as soon as possible. You will
be informed of your right to file a complaint with the FCC. Your telephone company
may make changes in its facilities, equipment, operations or procedures that could
affect the proper functioning of your equipment. If they do, you will be notified in
advance to give you an opportunity to maintain uninterrupted telephone service.
If you experience trouble with this telephone equipment, please contact the following
address and phone number for information on obtaining service or repairs. The
telephone company may ask that you disconnect this equipment from the network
until the problem has been corrected or until you are sure that the equipment is not
malfunctioning. This equipment may not be used on coin service provided by the
telephone company. Connection to party lines is subject to state tariffs.
Company: ASUS Computer International
Address: 800 Corporate Way, Fremont, California 94539, USA
!
Tel no.: +1-510-739-3777
A plug and jack used to connect this equipment to the premises wiring and telephone
network must comply with the applicable FCC Part 68 rules and requirements adopted
by the ACTA. A compliant telephone cord and modular plug is provided with this product.
It is designed to be connected to a compatible modular jack that is also compliant. See
installation instructions for details.
Declaration of Conformity for R&TTE directive 1999/5/EC
Essential requirements – Article 3
Protection requirements for health and safety – Article 3.1a
Testing for electric safety according to EN 60950-1 has been conducted. These are
considered relevant and sufficient.
Protection requirements for electromagnetic compatibility – Article 3.1b
Testing for electromagnetic compatibility according to EN 301 489-1 and
EN 301 489-17 has been conducted. These are considered relevant and sufficient.
Effective use of the radio spectrum – Article 3.2
Testing for radio test suites according to EN 300 328- 2 has been conducted. These are
considered relevant and sufficient.
CE Mark Warning
This is a Class B product, in a domestic environment, this product may cause radio
interference, in which case the user may be required to take adequate measures.
Operation Channels: Ch1~11 for N. America, Ch1~14 Japan, Ch1~13 Europe (ETSI)
Networks Global Hotline Information
Support
Area
Hotline Number
Working Hour
Languages
Australia
1300-2787-88
English
8:00-20:00
Austria
0043-820240513
German
9:00-18:00
Belgium
0032-78150231
Dutch /French
9:00-17:00
China
400-620-6655
Simplified Chinese
9:00-18:00
Denmark
0045-3832-2943
Denish/English
9:00-17:00
Finland
00358-9693-7969
Finnish/English/Swedish
10:00-18:00
France
0033-170949400
France
9:00-17:45
9:00-13:00;
Greece
00800-44-14-20-44
Greek
14:00-18:00
10:00-20:00
Hong Kong
3582-4770
Cantonese/Chinese/English
10:00-17:00
Ireland
0035-31890719918
English
9:00-17:00
9:00-13:00
Italy
199-400089
Italian
14:00-18:00
9:00-18:00
Japan
0800-123-2787
Japanese
9:00-17:00
+603 2148 0827 (Check Repair Detail
Bahasa Melayu/English
10:00-19:00
Malaysia
Status Only)
+603-6279-5077
Netherlands
0031-591-570290
Dutch / English
9:00-17:00
/ Luxembourg
New Zealand
0800-278-788 / 0800-278-778
English
9:00-17:00
Norwegian
Norway
0047-2316-2682
9:00-17:00
/English
Philippine
+632-636 8504; 180014410573
English
9:00-18:00
9:00-17:00
Poland
00225-718-033; 00225-718-040
Polish
8:30-17:30
Portugal
707-500-310
Portuguese
9:00-17:00
Russia
+8-800-100-ASUS; +7-495-231-1999
Russian/ English
9:00-18:00
+65-6720-3835
Singapore
11:00-19:00
(Check Repair Detail Status Only)
English
-66221701
Slovak
00421-232-162-621
Czech
8:00-17:00
Spain
902-88-96-88
Spanish
9:00-18:00
Sweden
0046-8587-6940
Swedish/ English
9:00-17:00
0041-848111010
German/French
9:00-18:00
Switzerland
0041-848111014
French
9:00-17:45
0041-848111012
Italian
9:00-17:00
Taiwan
0800-093-456; 02-81439000
Traditional Chinese
9:00-12:00; 13:30-18:00
Thailand
+662-679-8367 -70; 001 800 852 5201
Thai/English
9:00-18:00
Turkey
+90-216-524-3000
Turkish
09:00-18:00
United Kingdom 0044-870-1208340; 0035-31890719918
English
9:00-17:00
8:30am-12:00am EST
(5:30am-9:00pm PST)
USA/Canada
1-812-282-2787
English
9:00am-6:00pm EST
(6:00am-3:00pm PST)
Visit ASUS website for more information: http://support.asus.com
Manufacturer
ASUSTeK Computer Inc.
Tel: +886-2-2894-3447
Address: No. 150, LI-TE RD., PEITOU, TAIPEI 112, TAIWAN
Authorised representative in Europe
ASUS Computer GmbH
Address: HARKORT STR. 21-23, 40880 RATINGEN, GERMANY
Authorised distributors in Turkey
BOGAZICI BIL GISAYAR SAN. VE TIC. A.S.
Tel: +90 212 3311000
Address: AYAZAGA MAH. KEMERBURGAZ CAD. NO.10 AYAZAGA/ISTANBUL
CIZGI Elektronik San. Tic. Ltd. Sti.
Tel: 0090 2123567070
Address: CEMAL SURURI CD. HALIM MERIC IS MERKEZI No:15/C D: 5-6 34394
MECIDIYEKOY/ISTANBUL
EEE Yönetmeliğine Uygundur.
Working Day
Mon. to Fri.
Mon. to Fri.
Mon. to Fri.
Mon. to Sun.
Mon. to Fri.
Mon. to Fri.
Mon. to Fri.
Mon. to Fri.
Mon. to Fri.
Sat.
Mon. to Fri.
Mon. to Fri.
Mon. to Fri.
Sat. to Sun.
Mon. to Fri.
Mon. to Fri.
Mon. to Fri.
Mon. to Fri.
Mon. to Fri.
Mon. to Fri.
Mon. to Fri.
Mon. to Fri.
Mon. to Fri.
Mon. to Fri.
Mon. to Fri.
Mon. to Fri.
Mon. to Fri.
Mon. to Fri.
Mon. to Fri.
Mon. to Fri.
Mon. to Fri.
Mon. to Fri
Mon. to Fri.
Mon. to Fri.
Sat .to Sun.