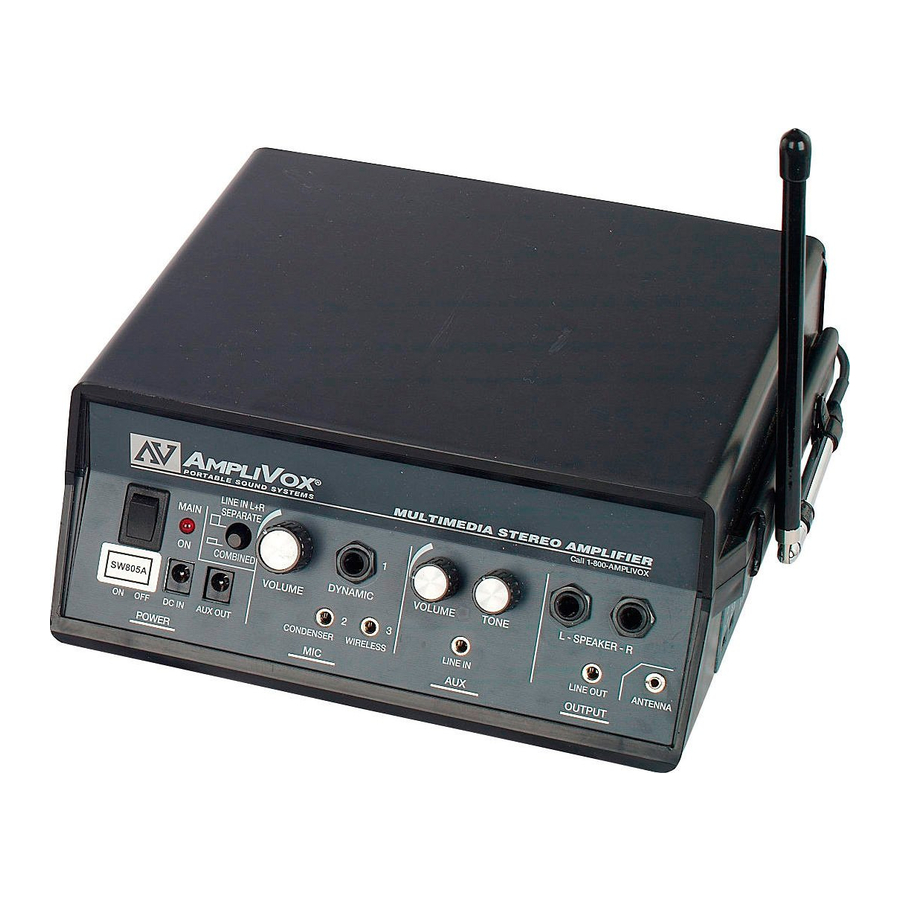
AmpliVox SW805A Kullanıcı Kılavuzu - Sayfa 3
Amplifikatör AmpliVox SW805A için çevrimiçi göz atın veya pdf Kullanıcı Kılavuzu indirin. AmpliVox SW805A 4 sayfaları. 50 watt stereo amplifier pa system
Ayrıca AmpliVox SW805A için: Kullanıcı Kılavuzu (7 sayfalar)

S-805A
SW-805A
MODELS
It's so easy, you won't even break a sweat!
Tuck
this
handy
reference
guide
with the amp, in case
you need to refresh
your memory.
4. Mic Volume—
controls all 3 mic
inputs
3. Line in L+R—
Separate-combined
switch
2. Power
Indicator
Light
1. Power
Switch
9. DC In Jack—
plug
in optional Universal AC
Adapter/ Recharger for
power.
10. Aux Out - for
optional 12-15 volt
accessory.
It's Easy! There are no complicated amplifier
controls to distract you from what is really impor-
tant. As a quick overview, after your microphone is
plugged into the matching mic jack and the speak-
er connected to the speaker jack, turn on the
power switch. Then turn on the mic volume so that
your sound reaches everyone in the room. By
reading all the easy-to-follow instructions on this
page and guide on the backside, you will be able
to enjoy and expand the use of your system and
the accessories.
Toll-Free Number. If you have any questions,
problems or comments, call 1-800-267-5486.
It's a toll-free call. Of course, if you want to order
accessories to complement your new sound sys-
tem, we'll be happy to take your order, too.
1. Power Switch. See, you knew this one
already!
2. Power Indicator Light. A red light means
you have power.
3. Line in L+R— Separate-combined switch.
Combines the separate left and right AUX LINE IN
channels. This combined signal will be amplified
and appear on both the LEFT and RIGHT channels
of the SPEAKER and LINE OUT OUTPUTS.
4. Mic Volume Control. This knob controls all 3
mic inputs equally. You can actually use all 3 mics
at the same time.
5. Dynamic Mic Jack. Dynamic is one kind of
mic. AmpliVox's wired, hand-held mic is this type,
so this would be a good place to plug it in.
to Amplifier Controls
in
5. Dynamic Mic
Jack—for
hand-held mic
11.
Condenser
Mic Jack - for
lapel or headset
mic
6. Auxiliary Volume Control. Another volume
knob! This volume knob controls the auxiliary vol-
ume separately from the mic volume. This is a very
handy feature if you want your voice to be heard
over your background music or if you want the
music to fade in and out.
7. Tone Control. This knob controls the tone of
the auxiliary input. Turn counter-clockwise for
more bass or clockwise for more treble. (The mic
jacks don't need a tone control because they have
been pre-optimized for the human voice.)
8. Left & Right Speaker Jacks. If you only
have one speaker, plug it into the right jack, unless
you feel like plugging it into the left jack. If you
have 2 speakers, I recommend plugging one into
each jack. You can even have 4 speakers, if you
use Y-connectors. A Y-connecter is a nifty, little
device that turns one jack into 2 jacks. Why would
you want to do that? To amplify to a bigger audi-
ence or around corners. You can even amplify in
true stereo using 2 or 4 speakers.
9. DC In Jack. If you have the optional
International AC Adapter/Recharger, plug it in
here. However, if you actually want to use AC
power, you'll have to plug the other end into a wall
outlet; a floor outlet will also work. There is also
an optional DC car cigarette lighter adapter.
10. Aux Out. For optional 12-15 volt accessory.
Guide
6.
Auxiliary
Volume—
controls
the
auxiliary
input
separately from the mic volume
7. Tone Control—for
wired,
auxiliary input; counter-
clockwise for more bass;
clockwise for more treble
12. Wireless Mic
Jack - for optional
wireless receiver
TOLL-FREE
Just call if you
need help for any
If you have any questions at all,
just call us. We really mean it. We
put the number on the amp, so you
won't ever lose it!
1-800-267-5486
ANTENNA
13. Auxiliary Line In—
add music with a tape play-
er, CD player or computer
sound card
11. Condenser Mic Jack—with phantom power.
If you don't know what phantom power is, then
you don't need to know, but a condenser mic won't
work without it. If you have AmpliVox's lapel or
headset mic, plug it in here, unless you're using it
with the wireless unit, then read no. 12.
12. Wireless Mic Jack. The optional wireless
receiver goes here; that's the one with the anten-
na. Then plug AmpliVox's lapel or headset mic into
the transmitter; that's the one with the belt clip.
Now you are hands-free anywhere within a 300-
foot radius of the receiver.
13. Auxiliary Line In Jack. This is how you can
really impress your audience. You can add pre-
recorded music or sound effects to your presenta-
tion. Use the Auxiliary Line In for a tape player, a
CD player, or a computer sound card. If your music
was recorded in stereo, you need 2 (or 4) speakers
to hear all of it. The mic sound comes out of both
speaker jacks equally, so if you only have one
speaker the audience will still hear everything.
14. Line Out Jack. Record your presentation
with a tape recorder (not the same one plugged
into Auxiliary Line In) or a computer sound card.
The Line Out Jack outputs all the sound from the 3
mic inputs and the auxiliary input.
15.
Antenna.
Built-in wireless receiver in
SW805A series amplifier. Dual wireless capability.
A & B Frequencies - 2 Wireless presenters - up to
4 presenters simultaneously.
NUMBER
reason.
8. Left & Right
Speaker Jacks—
connect up to 4
speakers
using
Y-connectors
to
amplify in stereo
15. Antenna—
Built-in wireless
receiver.
14. Line
Out—
record your presen-
tation with a tape
recorder or a com-
puter sound card
Published\SpecSheets\SW805-S805A-Guide 9/01/00
