DRAKE EH24 Kullanım Kılavuzu - Sayfa 11
Medya Dönüştürücü DRAKE EH24 için çevrimiçi göz atın veya pdf Kullanım Kılavuzu indirin. DRAKE EH24 18 sayfaları. Encoder host with sde24 encoders

Operating Instructions (From the Front Panel)
OPERATING INSTRUCTIONS – FROM THE FRONT PANEL
1) Connect video and audio inputs to desired encoder
modules. Note, as viewed from the rear, the number 1
program will be on the left, the one closest to the RF output
connector. The number 2 program will be the next input to
the right.
2) Connect the outputs as desired.
3) Plug the EH24 into AC power. Allow 30 to 90 seconds for
boot-up.
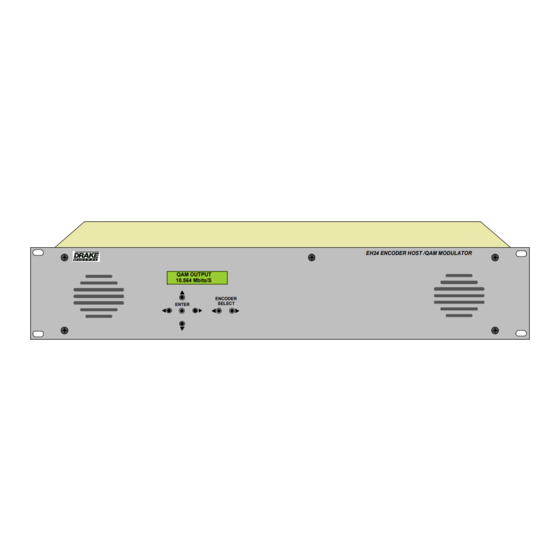
4) From the front panel, use the ENCODER SELECT buttons
to choose among EH24 settings and settings for each
encoder. Use the ENTER button to enter program mode and
to save settings in memory. Use left and right arrows to
select a parameter and then use the up or down arrows to
change its value. Parameters values can only be changed
when the unit is in the program mode as indicated by slow
flashing of the front panel display. To enter program mode,
press the ENTER key and hold for 2 to 3 seconds.
5) Press ENTER for 3 seconds to enter program mode.
6) Repeatedly press the ENCODER SELECT right or left
arrow until the display shows: SETUP EH24.
7) Repeatedly press the left or right arrows (on either side of
the enter button) until the display reads ENCODER1. Press
up or down arrows to select which output or both outputs that
this encoder is to output to. Then press the right arrow once
to advance to ENCODER 2. Choose output for this one.
Proceed in this manner until all encoders have been directed
to the desired outputs. ENCODERs 1 and 2 will be the first
module, 3 and 4 the second module, 11 and 12 the sixth
module, etc. If an encoder is installed but you don't plan to
use it, be sure to choose the DISABLED choice for any such
encoders.
8) Press the right arrow again after setting the 12 th encoder.
This should produce the QAM MGT/VCT screen. Usually
select TVCT by using up or down arrows.
9) Press right arrow again and observe the QAM MODE
screen. Use up or down arrows to select QAM mode. For
example, QAM-256B would select 256 QAM with annex B
FEC (DigiCipher FEC).
10) Press right arrow again and observe QAM SYMRATE.
Set to PRESET. PRESET will be 5.057 MS/S for QAM-64B or
5.3606 MS/S for QAM-256B, etc. If a nonstandard rate is
desired, choose MANUAL.
11) Press right arrow again and observe INTERLEAVER.
Select I128,J1 unless you have a special requirement.
12) Press right arrow again and move to the OUTPUT
FORMAT. Choose NORMAL. For testing/level setup –
temporarily choose CW to produce a CW carrier in the center
of the channel. Other PRBS choices are for testing only.
13) Press right arrow again and observe OUTPUT
CHANMAP. Select the desired plan, usually CATV.
14) Press right arrow and observe OUTPUT CHANNEL.
Select desired channel. The RF channel number being set
will be used as the major channel number in the output
stream.
15) Press right arrow and observe RF OUT. Choose desired
RF out level.
16) Press right arrow and observe UNIT ID. If not using
RS232 remote control, choose 0.
17) Press the right arrow and observe RS232 BAUDRATE.
Set to 4800 unless otherwise directed.
18) Press the right arrow and observe that you are back to
the ENCODER 1 screen.
At this point, you can press ENTER to store all of the above
choices. Actually, you could store after setting just one item
or after two items, etc. But once you store a parameter(s),
you must renter the program mode to make any additional
adjustments.
All of the above settings can be set using a PC connected via
the RS232 port or through an Ethernet connection via the
DRAKE model SCTeci unit.
Having completed EH24 settings, above, you are now ready
to setup each individual encoder.
19) Press ENTER for 3 seconds to enter program mode.
Observe flashing display.
20) Use left or right ENCODER SELECT buttons to choose
one of the installed encoders.
21) To set the encoder to typical default settings, press the
up arrow, down arrow, and ENTER all at the same time. Hold
the three buttons in for several seconds and release.
22) If any of the encoder settings need changed from the
default values, re-enter program mode and adjust each
encoder parameter as required.
23) Repeat from step 19 for each enabled encoder.
24) Press ENTER to store any unsaved changes.
11
