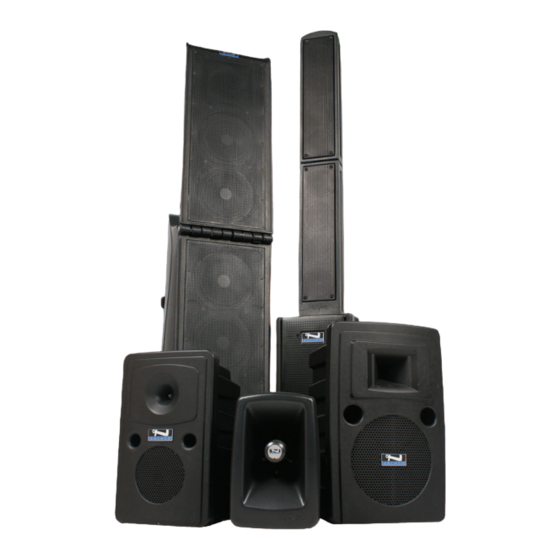
BAsic sYstem oPerAtion
note: Fully charge Batteries Before First use!
1. Remove Travel Dolly (page 3) and open Line Array (below)
2. Set all Input Levels to minimum & Tone Controls to flat (middle) setting
3. Plug wired microphone into the MIC 1 or MIC 2 jacks and/or any audio
source into the LINE-IN jacks
4. Switch POWER to "ON", Power ON LED will light
5. Slowly increase Level Controls for active Input Jacks to desired volume
6. Adjust Tone Controls for desired sound quality
imPortAnt: make all connections w/ shielded
cables to avoid hum, buzzing or interference.
need more heLP? visit our Website:
www.anchoraudio.com
Line ArrAY toWer
oPeninG BeAcon Line ArrAY
1. Open Array latches
2. Grasp handle and remove Array from base
3. Turn Array over and place on top of base
4. Close Array latches
5. Slowly flip Array Tower up until locked
securely into place
imPortAnt: Latches must
be locked and grill must
face forward for system to
work!
cLosinG BeAcon Line ArrAY
1. Turn POWER to "OFF"
2. Fold Array in half (apply slight pres-
sure)
3. Open latches and remove folded Array
4. Turn Array over grasp handle and slide
into base
5. Close Array latches
4
BeAcon sound sYstem
controL PAneL
model shown: BeA-7500mu2
mP3 PLAYer
WireLess receivers
Line out – outPut JAcK
Balanced 1/4" & Dual RCA provide a combined
output of all active system inputs.
Record your presentation or connnect to another
powered sound system.
universAL mic – inPut JAcKs
Balanced XLR – low impedance, for balanced mic,
powers condenser-type mics.
Unbalanced 1/4" – high impedance, for unbalanced
mics, no phantom power.
usB dc out -
To charge/power external device
dc out - 5V 500 mA
To charge/power external device
BuiLt-in BAtterY mAintenAnce
To preserve battery life the built-in batteries MUST be FULLY charged before the first
use. Regardless of length of operation, it is recommended that batteries be fully
charged as soon as possible after each use.
Ac oPerAtion & BAtterY chArGinG
Beacon Sound Systems include an automatic charging system designed to properly
charge and maintain the systems built-in batteries. To charge batteries plug the system
into an AC outlet and operate as normal while built-in batteries are charging. The
CHARGE STATUS LED will light when charging. Bright red indicates charge process has
begun. Amber indicates the charge process is almost complete, and green indicates
full battery. It takes approximately 7 hours to charge the completely drained Beacon
batteries.
BAtterY service time
Fully charged batteries will yield approximately 6 – 8 hours of continuous music at
medium volume level (2 – 4 hours at full volume or longer for speech only) . However
service times vary depending on control settings and use of accessories.
TRACK +
ALBUM +
TRACK -
ALBUM -
MP3 PLAYER
(see page 6)
SD CARD
(see page 6)
LINE IN
WIRELESS 1
WIRELESS 2
9
9
LINE OUT
VOLUME
VOLUME
Beacon
®
MADE IN THE USA
Anchor Audio, Inc.
800/ANCHOR1
www.anchoraudio.com
5V 500mA
DC OUT
12V 500mA
CHARGE STATUS
BATTERY EMPTY
WARNING: TO REDUCE THE RISK OF FIRE
12V 500 mA
OR ELECTRIC SHOCK, DO NOT EXPOSE
THIS EQUIPMENT TO RAIN OR MOISTURE.
POWER INLET
POWER
100-240 VAC / 47-63 HZ
(250 WATTS MAX)
OFF
Ac PoWer cord inLet
PoWer sWitch
BAtterY rePLAcement
The batteries must be replaced every 2 – 3 years depending on usage over time. Call Anchor
Audio at 800.262.4671 to order batteries.
To replace your batteries you will need a Phillips screwdriver and follow these procedures:
1. Be sure the power switch is in the OFF position.
2. Remove the screws in the lower cover panel of the Beacon.
3. Gently slide the cover panel with the battery tray out of the case.
4. Unclip each battery connection cable and remove the batteries from the tray.
5. Connect each new battery to the connection cable, attach plate to the tray and slide
the tray into the Beacon.
6 Replace each screw in the cover panel.
sYstem storAGe & BAtteries
Fully charge batteries before storage. For extended periods of storage either leave system
plugged into an AC outlet or charge the system at least once each month for a minimum
of 24 hours.
note: system can Be used during charging!
Line in – inPut JAcKs
The 1/8 (3.5mm) jack is used to hook up
a portable CD player, iPod, laptop or other
external audio source.
REPEAT
MUTE
The 1/4" unbalanced and dual RCA inputs
MODE
POWER
can be used for daisy-chaining together
AUX IN
multiple Beacon speakers.
Line in LeveL controL
LINE IN
MP3
VOLUME
tone controLs – BAss/treBLe
BALANCED
microPhone LeveL controLs
TREBLE
BASS
voice over Button
MIC 1
VOLUME
Reduce Line and CD Input levels by 12dB when
MIC 1
using microphones allowing speakers to be heard
MIC 2
over background music.
VOLUME
ON = Button In OFF = Button Out
MIC 2
VOICE
OVER
chArGe stAtus Leds
Green - Charge complete
Amber - Charge nearly complete
Red - Charging has begun
POWER ON
Battery empty Led
Red - charge battery immediately
ON
Power on Led
Green - power on
5

