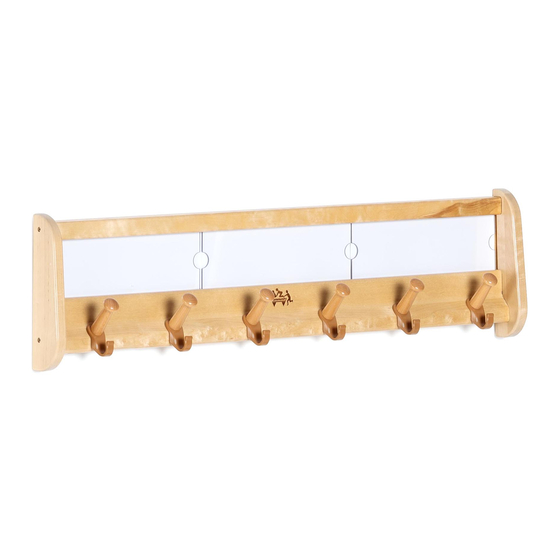
Community Playthings A747 Hızlı Başlangıç Kılavuzu
Bebek & Yürümeye Başlayan Çocuk Mobilyaları Community Playthings A747 için çevrimiçi göz atın veya pdf Hızlı Başlangıç Kılavuzu indirin. Community Playthings A747 2 sayfaları. Wall pegs with labels. peg strips

Wall Pegs with labels
Peg strips
Recommended Use
These wall-mounted units are designed for situations
where a full-size freestanding unit would be impractical
because of limited floor space or budget. The name
holders provide an easy way to personalize the space
for each child.
Products consist of the following:
A737 Wall pegs with labels 6 – including:
Three clear plastic name covers.
A747 Peg strip 6
A738 Wall pegs with labels 8 – including:
Four clear plastic name covers.
A748 Peg strip 8
A721 Four extra name covers
If your shipment is incomplete, please contact Cus-
tomer Service.
WARNING
c This product is intended for use by children of immature
judgment, therefore supervision is required at all times.
Never install these units with children nearby.
CAUTION
c For indoor use only. This product is not weather proof.
Maintenance
Periodically inspect for cracks, breaks, and loose or missing
parts. Check that the unit remains securely mounted to the
wall. Remove the product from service when any condition
develops that might make operation unsafe.
Cleaning
Wipe with a damp cloth and mild detergent. Dry immediately.
Leaving water or cleaning agent on the surface may damage
the finish.
Construction
The wooden components are manufactured from solid hard-
woods and birch plywood protected with a child-safe finish.
The hooks and name covers are plastic.
User Modifications
We cannot be responsible for modifications made by custom-
ers to our products in the field without our supervision, test-
ing, or evaluation.
IMPORTANT
Retain these instructions for future reference.
© 2013 by Community Products (UK) Ltd
VA86 Eu 0369 Revision 00
Installation
A competent carpenter or maintenance person should do
the installation.
Drill and screw through peg
bar between the pegs.
Figure A
Wall pegs with labels and Peg strip
1. Position Wall pegs or Peg strip at the desired place on the
wall.
2. Locate the fasteners (not included) to suit the wall con-
struction, with at least one fastener near each end of the
unit as shown in Figure B.
3. Predrill the piece of wood with the pegs in at these loca-
tions.
4. Attach the Wall pegs or Peg strip to the wall with fasten-
ers appropriate to the wall construction and the weight of
the fully loaded unit.
WARNING
Wall pegs must be properly mounted before use. It is
the customer's responsibility that it will be secure.
Operation
Removal of name covers
To remove the name cover push it up into the
top slot and pull the bottom edge forward.
To install a name cover push it up into the top
slot and push the bottom edge in, and then
slide the name cover down into the bottom
slot. See Figure B.
Ordering Parts
To order replacement parts, contact Customer Service with a
description of the part(s) needed and the ID Code from the
product.
Use only replacement parts supplied by
Community Playthings.
Brightling Road, Robertsbridge, TN32 5DR UK
www.communityplaythings.co.uk [email protected]
Figure B
Community Playthings
Phone: 0800 387 457
