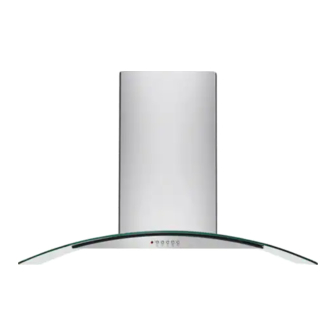
Electrolux FHWC3660LSA Kullanım ve Bakım Kılavuzu - Sayfa 7
Havalandırma Davlumbazı Electrolux FHWC3660LSA için çevrimiçi göz atın veya pdf Kullanım ve Bakım Kılavuzu indirin. Electrolux FHWC3660LSA 13 sayfaları. 30” and 36” range hood
Ayrıca Electrolux FHWC3660LSA için: Kullanım ve Bakım Kılavuzu (13 sayfalar)

Installing the hood
,,!!!"7
•
Flexible metal round ducts should only be used
/_g.
when no other duct fitting exists
Limit use to
iiiiiiiiiiiiiiiiiiiiiiiiiiiiiiiiiiiiiiiiiiiiiiiiii
"
_
iiiiiiiiiiiiiiiiiiiiiiiiiiiiiiiiiiiiiiiiiiiiiiiiiiiiiiiiiiii
short lengths and do not crush when making
:::_-- _:
opening for ductwork
iiiiiiiiiiiiiiiiiiiiiiiiiiiiiiiiiiiiiiiiiiiiiiiiii
corners.
.--:---f
_
__
_'_---_:
iiiiiiiiiiiiiiiiiiiiiiiiiiiiiiiiiiiiiiiiiiiiiiiiiiiiiiiiiiii
-\::_-:
iiiiiiiiiiiiiiiiiiiiiiiiiiiiiiiiiiiiiiiiiiiiiiiiii
ViewFrom
Rear
iiiiiiiiiiiiiiiiiiiiiiiiiiiiiiiiiiiiiiiiiiiiiiiiiiiiiiiiiiii
Examples
of possible ducting
or air
IC_ats'
iiiiiiiiiiiiiiiiiiiiiiiiiiiiiiiiiiiiiiiiiiiii
reoirou_ation
_
iiiiiiiiii
iiiiiiiiiiiiiiiiiiiiiiiiiiiiiiiiiiii
"°®
iiiiiiiiiiiiiiiiiiiiiii
Rodpitch with
Sidewall cap
Recirculator
1"x6"Min.
iiiiiiiiiiiiiiiiiiiiiiiiiiiiiiiiiiiiiiii
flashing and cap
Mounting
iiiiiiiiiiiiiiiiiiiiiiiiiiiiiiiiiiiiiiii
_...i..(_
/.
....
.'
j_.
::
Support
iiiiiiiiiiiiiiiiiii
....
..... .....
--- . .....
..... "_-
_---_:_
iiiiiiiiiiiiiiiiiiiiiiiiiii
_
_
_
iiiiiiiiiiiiiiiiiiiiiiiiiiiiiiiiiiiiiiiiiiiiiiiiiiiiiiiiiiii
i_
"
...............
:-..:-)
;i'/_
)"1
!!!!!!!!!!!!!!!!!!!!!!!!
_-
iiiiiiiiiiiiiiiiiiiiiiiiiiiiiiiiiiiiiiiiiiiiiiiiii
Pi
Pipe
Pipe
iiiiiiiiiiiiiiiiiiiiiiiiiiiiiiiiiiiiiiiiiiiiiiiiiiiiiiiiiiii
r_
L
Centerline
iiiiiiiiiiiiiiiiiiiiiiiiiiiiiiiiiiiiiiiiiiiiiiiiii
co,_rL
co,_
co,_
iiiiiiiiiiiiiiiiiiiiiiiiiiiiiiiiiiiiiiiii
2_
Space
iiiiiiiiiiiiiiiiiiiiiiiiiiiiiiiiiiiiiiiiiiiiiiiiiiiiiiiiiiii
iiiiiiiiiiiiiiiiiiiiiiiiiii
iiiiiiiiiiiiiiiiiiii
iiiiiiiiiiiiiiiiiiiiiiiiiiiiii
Installing range hood to the wall
(Exhaust operation)
Install
framing
for hood support
•
If drywall
is present,
mark the
screw
hole
locations.
•
Cut away enough drywall to expose 2 vertical
studs at the holes location
indicated
by the
template. Install two horizontal supports at least
1" x 6" between two wall studs at the bottom and
top mounting holes installation location (fig. (_)).
•
The horizontal support
must be flush with the
room side of the studs. Use cleats behind both
sides of the support to secure to wall studs.
•
Reinstall drywall and refinish.
Step 1:
"
Make sure that no cables or pipes will become
__,
damaged(e.g,
electric, gas, water;testtheareas
inquestionwithacabledetector),
iiiiiiiiiiiiiiiiiiiiiiiiiiiiiiiiiiiiiiiiiiiiiiiiii
•
Using supplied template
(17), mark and drill 8
holes in the wall. Drill the holes according tothe
measureddistancesfromthediagram(fig.
Q).
iiiiiiiiiiiiiiiiiiiiiiiiiiiiiiiiiiiiiiiiiiiiiiiiii
•
Upper/Lower
bracket (4, 5): Insert 4 wall plugs
(11) intothe4drilled
holes,
iiiiiiiiiiiiiiiiiiiiiiiiiiiiiiiiiiiiiiiiiiiiiiiiii
•
Rangehood(1):lnstallationisdependingonwall
iiiiiiiiiiiiiiiiiiiiiiiiiiiiiiiiiiiiiiiiiiiiiiiiii
type:
iiiiiiiiiiiiiiiiiiiiiiiiiiiiiiiiiiiiiiiiiiiiiiiiii
w_,_,pe
_e_o_ed_te,,e_
iii
Wood
Nowall plugs(11)
iiiiiiiiiiiiiiiiiiiiiiiiiiiiiiiiiiiiiiiiiiiiiiiiii
required
iiiiiiiiiiiiiiiiiiiiiiiiiiiiiiiiiiiiiiiiiiiiiiiiii
Brick/Concrete
4wallplugs(11)
iiiiiiiiiiiiiiiiiiiiiiiiiiiiiiiiiiiiiiiiiiiiiiiiii
