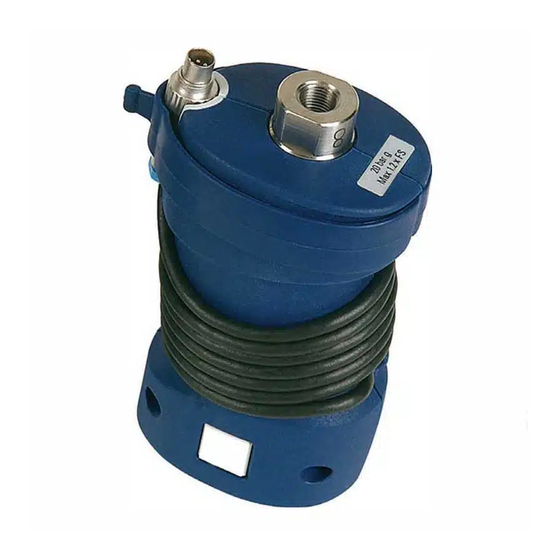
Druck IDOS UPM Kullanım Kılavuzu - Sayfa 8
Ölçüm Cihazları Druck IDOS UPM için çevrimiçi göz atın veya pdf Kullanım Kılavuzu indirin. Druck IDOS UPM 12 sayfaları. Intelligent digital output sensor universal pressure module

2. NPT pressure connector.
3. ISO 228/1 G1/8 pressure connector.
Pressure port connection to the UPM reference port is
shown in Figure C4.
1. UPM 1/8 reference port pressure connector. M5 or
10-32 UNF, refer to Table 3.
2. Pressure connector.
Electrical Connection
The equipment has a single electrical cable, item 5 in
Figure A1. This is for connecting to a Druck DPI 8xx series,
DPI 620G or PACE.
Pressure Safety
This equipment meets the requirements of the European
Pressure Equipment Directive 2014/68/EU for pressure
safety.
Maintenance
Clean the case with a moist, lint-free cloth and a weak
detergent. Do not use solvents or abrasive materials.
Return Goods/Material Procedure
If the unit requires calibration or is unserviceable, return it
to the nearest Druck Service Centre listed at: Druck.com
Contact the Service Department to obtain a Return
Goods/Material Authorization (RGA or RMA). Provide the
following information for a RGA or RMA:
•
Product (i.e. UPM)
•
Serial number.
•
Details of defect/work to be undertaken.
•
Calibration traceability requirements.
•
Operating conditions.
Operation
Connect the UPM pressure sensor to the IDOS port of the
IDOS compatible test instrument.
The power can be on or off when you attach the UPM cable
to the test instrument.
To measure the pressure, refer to the user manual of IDOS
compatible instrument.
Calibration
Note: Druck can provide a calibration service that is
traceable to international standards.
We recommend that you return the UPM to the
manufacturer or an approved service agent for calibration.
If you use an alternative calibration facility, make sure that
it uses these standards.
Equipment and Conditions
To do an accurate calibration, you must have:
•
An IDOS compatible instrument, for example: Druck
DPI 8xx series, DPI 620G or PACE.
•
An suitable pressure standard (primary or secondary)
with a total uncertainty of 0.01% reading or better.
•
A stable temperature environment: 21 ± 1°C
(70 ± 2°F).
Procedure
1. Connect the UPM to the IDOS instrument and to the
pressure standard, see Figure B1.
2. Allow the equipment to achieve a stable temperature.
Leave powered on for a minimum of 30 minutes.
Copyright 2004 Baker Hughes Company.
2 | IDOS UPM Instruction Manual–English
3. Use the calibration menu on the IDOS instrument to do
a two-point calibration (Zero and +FS) or a three-point
calibration (-FS, Zero and +FS). Refer to Table 1.
Table 1: Calibration Pressures
Nominal applied pressure
Type
Pressure
psi (mbar)
-FS
g/d
≤ 10.0 psi
-FS
(700 mbar)
g/d
> 10.0 psi
-13.1
(700 mbar)
(-900)
a
5.00 psi
n/a
(350 mbar)
a
30.0 psi
n/a
(2 bar)
a
100.0 psi
n/a
(7 bar)
a
300.0 psi
n/a
(20 bar)
sg
≥ 5000 psi
n/a
(350 bar)
a. For a three-point calibration, do not apply more than
-90% of the specified FS for the unit.
b. For sg sensors, use atmospheric pressure as zero.
4. The display shows the applicable instructions to
complete the calibration.
5. To make sure that the calibration is correct, apply these
pressures to the UPM and record the results:
•
Ranges g/d or sg: 0, 20, 40, 60, 80, 100 (%FS)
a. Then: Go back to 0 in the same steps.
b. Then (three-point calibration only): -20, -40,
-60, -80, -100 (%FS)
c. Then: Go back to 0 in the same steps.
•
Ranges a: 0, 20, 40, 60, 80, 100 (%FS)
a. Then: Go back to 0 in the same steps.
Standard Accuracy
The specified accuracy (refer to Specification data)
includes an allowance for temperature changes, reading
stability for one year, and the uncertainty of the standard
used for calibration.
In step 5, make sure that the error between the applied
pressure and the reading on the unit is not more than
0.015% FS.
Premier Precision
The specified precision (refer to Specification data)
includes an allowance for temperature changes and the
uncertainty of the standard used for calibration. In step 5,
make sure that the error between the applied pressure and
the reading on the unit is not more than the specified value
for Premier precision.
Specification
Pressure Measurement
All accuracy statements are for one year. The % full scale
(FS) statements for Standard accuracy and Premier
precision are only applicable if there is a regular zero
correction by the IDOS instrument.
Zero
+FS
a
0
+FS
0
+FS
< 0.02
+FS
(1.0)
< 0.07
+FS
(5.0)
< 0.29
+FS
(20.0)
< 0.73
+FS
(50.0)
+FS
0
b
