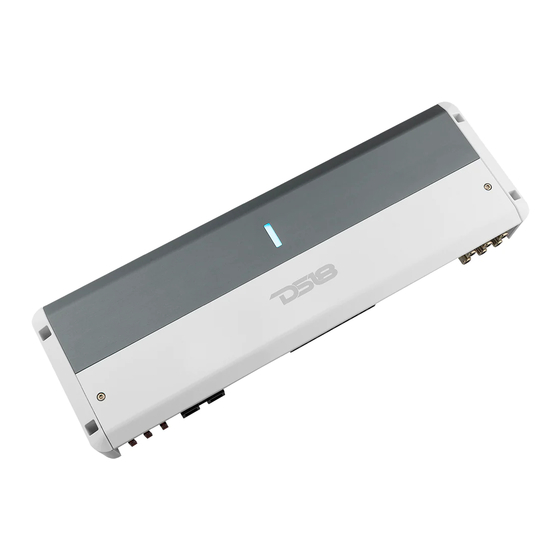
DS18 NXL-M5 Kullanıcı El Kitabı - Sayfa 6
Amplifikatör DS18 NXL-M5 için çevrimiçi göz atın veya pdf Kullanıcı El Kitabı indirin. DS18 NXL-M5 15 sayfaları. Ipx5 grade marine/boat amplifier

NXL-m5
ELEMENTS DESCRIPTION /
10. Power Terminal(+12V) - This is the main power
input for the amplifier and must be connected
directly to the positive terminal of the watercraft's
battery for proper operation. Use caution when
installing(+12) power cable in the Boat. Avoid
running this cable parallel with RCA cables,
antennas, or other sensitive equipment due to
massive currents that can induce noise into the
audio system It is also very important to have a
tight, secure connection for maximum performance.
We recommends using 4AWG Tinned OFC wire with
the 4 ch amplifier.
11. Remote Terminal - The Amplifier can be turned
on by applying 12 volts to this terminal Typically
this voltage is supplied by a wire from the source
unit marked "remote" or "power antenna".
12. Ground Terminal - This is the main negative (-)
input for the amplifier and must be connected
directly to the negative terminal of the watercraft's
battery for proper operation. Avoid running this
cable parallel with RCA cables, antennas, or other
sensitive equipment due to massive currents that
can induce noise into the audio system It is also
very important to have a tight, secure connection
for maximum performance. We recommends using
4AWG Tinned OFC wire with the 4 ch amplifier.
13. Speaker Terminals(+/-) - Connect speakers
to these terminals, Observe speaker polarity
throughout the system. Improper phase can
result in loss of bass response and/or poor overall
sound quality.
AMPLIFIER INSTALLATION /
Amplifiers are generally mounted in closed
compartments of the vehicle or watercrafts. Select
a location that will provide adequate ventilation for
the amplifier. Avoid mounting the amplifier in
exposed areas.
Before securing the amplifier, inspect the
mounting location carefully to ensure that you do
not drill into or damage any electrical, hydraulic,
fluid, or fuel lines. Secure the amplifier with the
screws provided.
1. Before you start, disconnect the negative cable
from the battery, tape up the end so it is isolated
from the battery.
5
DESCRIPCIÓN DE LOS ELEMENTOS
10. Terminal de alimentación (+12 V) - Esta es la
entrada de alimentación principal del amplificador y
debe conectarse directamente al terminal positivo de la
batería de la embarcación para que funcione
correctamente. Tenga cuidado al instalar el cable de
alimentación (+12) en la embarcación. Evite tender este
cable en paralelo con cables RCA, antenas u otros
equipos sensibles debido a las corrientes masivas que
pueden inducir ruido en el sistema de audio. También
es muy importante tener una conexión firme y segura
para obtener el máximo rendimiento. Recomendamos
usar cable OFC estañado 4AWG con el amplificador de
4 canales.
11. Terminal Remoto - El amplificador se puede
encender aplicando 12 voltios a este terminal. Por lo
general, este voltaje lo suministra un cable de la unidad
fuente marcado como "remoto" o "antena eléctrica".
12. Terminal de Tierra - Esta es la entrada principal
negativa (-) del amplificador y debe conectarse
directamente a la terminal negativa de la batería de la
embarcación para que funcione correctamente. Evite
tender este cable en paralelo con cables RCA, antenas u
otros equipos sensibles debido a las corrientes masivas
que pueden inducir ruido en el sistema de audio.
También es muy importante tener una conexión firme y
segura para obtener el máximo rendimiento.
Recomendamos usar cable OFC estañado 4AWG con el
amplificador de 4 canales.
13. Terminales de altavoces (+/-) - Conecte los
altavoces a estos terminales. Observe la polaridad de
los altavoces en todo el sistema. Una fase incorrecta
puede provocar la pérdida de la respuesta de graves y/o
una mala calidad general del sonido.
INSTALACIÓN DE AMPLIFICADOR
Los amplificadores generalmente se montan en
compartimentos cerrados del vehículo o embarcaciones.
Seleccione una ubicación que proporcione una ventilación
adecuada para el amplificador. Evite montar el amplificador
en áreas expuestas.
Asegure el amplificador con los tornillos proporcionados.
Antes de asegurar el amplificador, inspeccione
cuidadosamente
asegurarse de no perforar ni dañar ninguna línea
eléctrica, hidráulica, de fluido o de combustible.
1. Antes de comenzar, desconecte el cable negativo de la
batería, pegue el extremo con cinta adhesiva para que
quede aislado de la batería.
la
ubicación
de
montaje
para
