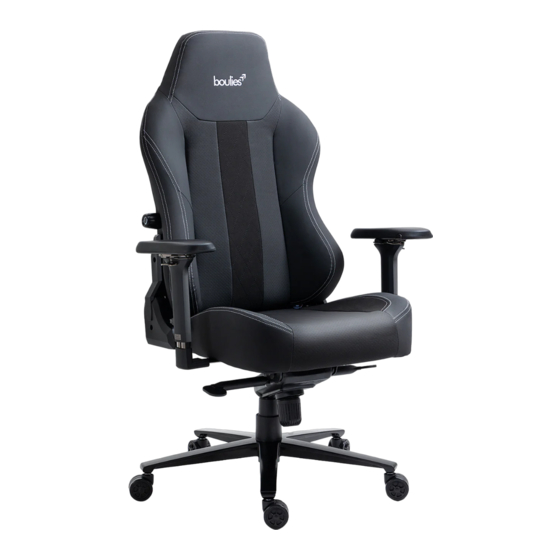
boulies Master Series Montaj Talimatları Kılavuzu - Sayfa 3
İç Mekan Mobilyaları boulies Master Series için çevrimiçi göz atın veya pdf Montaj Talimatları Kılavuzu indirin. boulies Master Series 6 sayfaları.

Step 1:
Remove the screws from the chair base.
Step 2:
Install the chair armrests.
Step 3-4:
Position the Tilt Mechanism and the
Cushion Gaskets in the correct direction.
Install the Tilt Mechanism by diagonally
tightening the screws into the Chair Base
with the Allen Key.
Step 5:
Insert the 5 Casters into the Wheel Base.
Push firmly to lock them into place.
Step 6:
Position the Hydraulics into the Wheel
Base and place the Hydraulic Sleeve over
it.
Step 7:
Align the top of the Hydraulics into the
bottom of the Tilt Mechanism, push to lock
it into place.
Step 1:
Rimuovi tutte le viti preinstallate sul cuscino
del sedile.
Step 2:
Installa il bracciolo della sedia. Si prega di
prestare attenzione alla distinzione sinistra
e destra del bracciolo.
Step 3-4:
Posiziona il telaio multifunzionale e i
distanziatori in plastica nella posizione
corretta. Utilizza una chiave esagonale e
quattro viti per serrare il telaio.
Step 5:
Installa le cinque ruote nella base a cinque
stelle e conferma se sono salde.
Step 6:
Metti l'asta di pressione dell'aria nella
base a cinque stelle, in seguito inserirsci il
manicotto dell'asta di pressione dell'aria.
Step 7:
Allinea il foro del telaio multifunzionale con
la parte superiore dell'asta di pressione
dell'aria e posiziona il sedile sull'asta
di pressione dell'aria per completare
l'installazione.
Step 1:
Desatornille todos los tornillos
preinstalados en el cojín.
Step 2:
Instale el reposabrazos de la silla de
acuerdo con el lado izquierdo y derecho.
Ponga el chasis multifuncional y el
Step 3-4:
arandela de plástico en las posiciones
correctas. Apriete el chasis usando llave
hexagonal y cuatro tornillos.
Instale por separado las cinco ruedas
Step 5:
en las bases de pata pentagonales y
compruebe que están firme.
Step 6:
Instale el muelle de gas en las bases de
pata pentagonales, enfunde el casquillo
del muelle de gas.
Step 7:
Alinee los orificios del chasis multifuncional
con la parte superior del muelle de gas,
ponga la silla por encima del muelle de gas
para completar la instalación.
Step 8-10:
Using the ALLEN KEY, unscrew the 4 M8
pre-mounted screws, attach the backrest to
the seat.
Starting with the right side, attach the
backrest to the metal
brackets with the 4 M8 screws using the
ALLEN KEY. (Note that do not tighten
the screws until the four screws are
fully installed in the hole.)
While firmly pushing SIDE COVERS into
Step 11:
place, use the ALLEN KEY to secure
the SIDE COVERS with the 2 PHILLIPS
SCREWS.
Step 8-10:
Utilizza una chiave esagonale per
rimuovere le viti preinstallate sullo
schienale della sedia, allinea lo schienale
della sedia con il supporto metallico sul
sedile e posizionalo sullo schienale della
sedia, blocca lo schienale della sedia con
il supporto metallico per l'installazione.
Partendo dal lato destro, utilizza una
chiave esagonale per inserire due viti M8
nei fori e ripetere l'installazione sull'altro
lato. (Nota, non serrare le viti prima di
aver installato completamente le quattro
viti nei fori.)
Posiziona il coperchio laterale sul supporto
Step 11:
metallico, premi saldamente il coperchio
laterale e installalo sul supporto con una
chiave esagonale e una vite a croce.
Step 8-10:
Desatornille los tornillos preinstalados
en el respaldo de la silla usando la llave
hexagonal, alinee el respaldo de la silla
con el soporte metálico del asiento y
colóquelo, sujete el respaldo de la silla
usando el soporte metálico para facilitar la
instalación. Instale dos tornillos M8 en los
orificios usando llave hexagonal desde el
lado derecho, repita estos pasos en el otro
lado. (Atención, no apriete demasiado
los tornillos antes de instalar
completamente los cuatro tornillos en
los orificios.)
Ponga la cubierta lateral en el soporte
Step 11:
metálico, presione la cubierta lateral con
fuerza, instálela en el soporte usando llave
hexagonal y los tornillos Phillips.
EN
IT
ES
