Dan D'Agostino PROGRESSION Kullanıcı El Kitabı - Sayfa 8
Amplifikatör Dan D'Agostino PROGRESSION için çevrimiçi göz atın veya pdf Kullanıcı El Kitabı indirin. Dan D'Agostino PROGRESSION 14 sayfaları.

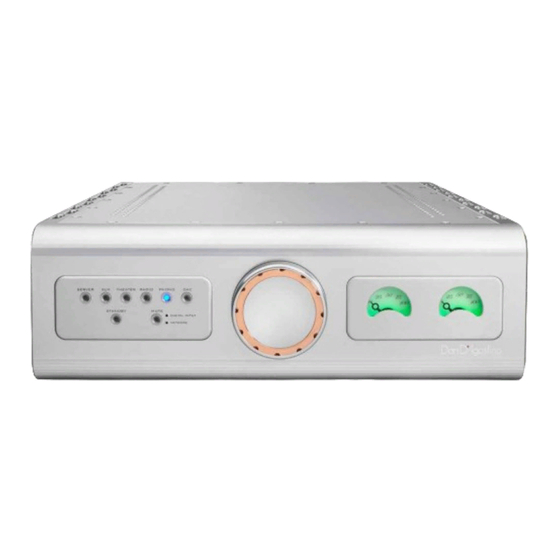
Polarity (remote control and RS-232 only): The Polarity control inverts the polarity of the
entire system. While the Progression Integrated Amplifier does not invert polarity, many source
devices do, and many recordings are produced with inverted polarity. Because you have no way
of knowing what the proper polarity is, you must set this control by ear. Push the Polarity button
on the remote control to invert the polarity. The multi-function meters will turn from green to
red when the polarity is inverted. Try listening with the polarity normal or inverted, and use
whichever setting sounds better. Depending on the recording, the effects of polarity inversion are
often subtle and sometimes even inaudible. The multi-function meters are illuminated in red when
the amplifier polarity is inverted.
Mute: The Mute control mutes the volume temporarily. Press it once to mute, and again to
restore the volume. When muted, the multi-function meters will alternate between green and
green/white; and the Mute button LED will flash on/off. If the polarity of the amplifier is inverted,
the multi-function meters will alternate between white and red.
Balance (remote control and RS-232 only): The Balance control lets you shift the stereo balance
to the right or left. The Progression Integrated Amplifier Balance mode is unique as it uses the
two multi-function meter needles. To adjust balance, press the Balance button on the remote.
The multi-function meters will swing to center and dim, indicating the balance setting. Use the
volume +/- buttons on the remote to change the balance setting. As you move the balance to
toward the LEFT side, the left meter will rise (move to the right) and the right meter will fall
(move to the left). This operation is reversed when moving the balance to the RIGHT side. To
return the balance to the center, press and hold the Balance button on the remote. The meters
will dim and after the button is held for a few seconds the meter needles will point to center.
The LED on the remote will also blink.
Factory Reset: The Progression Integrated Amplifier can be returned to its factory default
settings by turning the main power switch from OFF to ON with the Standby and Mute
buttons depressed.
Basic setup for use with digital module
While you can use the Progression Integrated Amplifier on its own for use with analog sources,
an iOS device is required to take advantage of the digital functionality. Download the free
Dan D'Agostino app from the Apple Store.
Once the app is installed, you can launch it from the phone or tablet by tapping on the
Dan D'Agostino Master Audio System's icon.
Press the gear button on the upper left to access the settings page. If using a WiFi connection, it
will only be normally only be necessary to select the network and enter a password. This step is
not required if using a hard wired Ethernet connection.
12
The settings page is accessed via the upper left gear icon. Network, cloud, and app setup are
available in this area. In the upper right corner is the C (for control) icon which opens the control
page to select source inputs and additional preamplifier functions.
Using the Progression Integrated Amplifier with Roon
The Progression Integrated Amplifier is Roon ready. You will need a Roon account and the Roon
Core installed on your NAS or connected computer. The Roon remote can now be used to manage
your network, Tidal, and Qobuz music playback. See Roonlabs.com for more information.
CONNECTIONS
Network connection
The Progression Integrated Amplifier needs to be connected to a router with internet connectivity
using a wired or wireless connection in order to take advantage of all the features of the
Dan D'Agostino app. Through the app, access to your NAS stored music files and streaming
services including Spotify, Tidal, and Qobuz may be accessed.
To link the Progression Integrated Amplifier to a network, connect the network cables from
the router to the RJ45 connector on the back of the Progression Integrated Amplifier. The
Dan D'Agostino App will now recognize the Progression Integrated Amplifier and provide access
to all network-connected drives as well as the included online streaming services. We recommend
using the hard-wired Ethernet connection, however it is not required.
For systems that do not have access to a wired connection, WiFi operation is available. To connect,
insure the WiFi antenna included in the Progression Integrated Amplifier shipping case is connected.
Press and hold the Mute button on the front panel of the unit for 5 seconds to activate the WiFi
setup mode.
The WiFi network "CDMCM210_XXX" will be visible in the WiFi network list of the iOS device
being used. Select the "CDMCM210_XXX" network to connect. The password is password.
Open the Dan D'Agostino app on the iOS device. Click the setup gear icon (
corner of the app.
From here, click the Device Setup and select 210 EVB from the list. Click the WiFi network
selection and choose the network that the Progression Integrated Amplifier is using.
The Dan D'Agostino app will now recognize your Progression Integrated Amplifier and connect
wirelessly to provide access to all network-connected drives and online streaming services.
) in the upper left
13
