DAPAudio PA240 Kullanıcı El Kitabı - Sayfa 6
Amplifikatör DAPAudio PA240 için çevrimiçi göz atın veya pdf Kullanıcı El Kitabı indirin. DAPAudio PA240 18 sayfaları. Public address amplifier

Description of the device
Features
The
PA240 is an amplifier from DAP
• 4 combination Jacks inputs (XLR and 6.3mm)
• Line/micro switchable sensitivity with 24VDC phantom supply.
• 1 stereo RCA input, three stage sensitivity selectable.
• 600 signal (Tel. Paging) input
• 1 PREAMP OUT output.
• 1 MAIN IN input
• 1 MONITOR OUTPUT 1W/8 slave output for monitor music signal.
Input 1 priority on the other inputs with vocal activation.
Input 1 priority on the other inputs, activation with contact.
Outputs for speakers with constant impedance (4-8-16 ) and constant voltage (25-70-100 V).
• Individual bass and treble tone controls
• VU-meter with LEDs.
• Protection against short-circuiting between output terminals.
• Option zone paging selectable function, 4 zone paging and ALL zone paging.
• Signal LED, Peak LED, Output Port LED
Overview
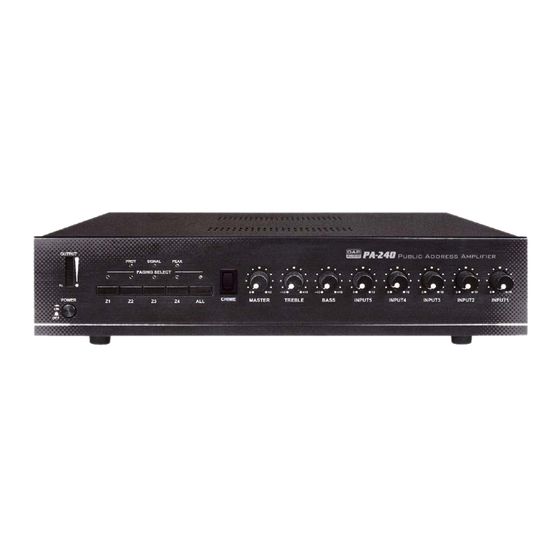
1) Ouput Level meter: For proper operation of the amplifier keep the correct volume setting
2) AC Power On/Off
3) Zone paging selection switch: Speaker lines (Z1-Z4) of each zone can be connected/disconnected
4) Peak LED
5) Signal LED
6) Output-prot LED
7) Chime Button
8) Master Volume Control: Adjust the overall gain of the amplifier.
9+10) Bass + Trebble : These are used to adjust equalization level for this amplifier. Turning the knobs in
11) Input Level Control: These controls let you individually set the volume of the sound source that are
Audio.
independently. To connect the speaker lines, press the ALL button. When
pressing the ALL-button, allows you to make announcements to the entire
zone regardless of the setting of the individual zone selection button.
clockwise direction will increase LOW (HIGH)-frequencies, turning the knobs in a
counter-clockwise direction will decrease LOW (HIGH)-frequencies.
connected to the INPUT1, INPUT 2, INPUT 3, INPUT 4, INPUT 5. We recommend
to leave the control of the momentarily not used inputs at their minimal setting "0".
4
Fig. 1
