Data Harvest SmartQ 3266 Hızlı Başlangıç Kılavuzu - Sayfa 3
Ölçüm Cihazları Data Harvest SmartQ 3266 için çevrimiçi göz atın veya pdf Hızlı Başlangıç Kılavuzu indirin. Data Harvest SmartQ 3266 12 sayfaları. Drop / bubble counter

The stored calibration for the selected range will be automatically loaded into the
EASYSENSE unit when the Drop / Bubble Counter is connected
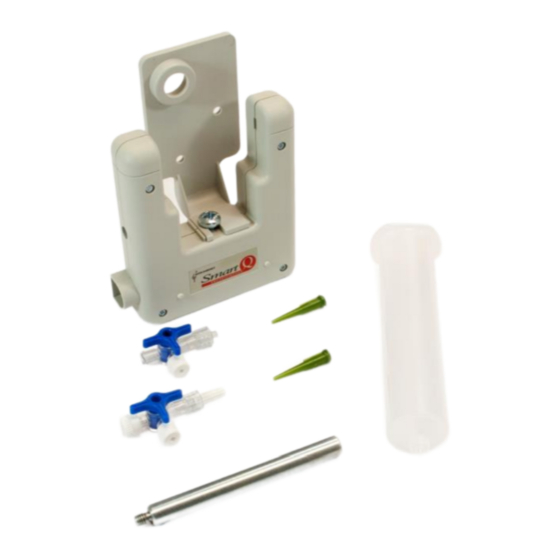
The Drop / Bubble Counter is supplied with:
A steel support rod (80 mm long x 10 mm diameter with a M6 thread). This support rod
can be screwed into the mounting threads, which are found at the base and sides of the
Sensor. The rod can be used for clamping into a suitable holding device.
A plastic reagent reservoir (syringe body), two 3-way stopcock fittings and two plastic
tips (all with twist fittings).
An alignment adapter with securing screw. This adapter is used to align drops from the
reagent reservoir into the Sensors light beam.
Connecting
The EASYSENSE unit will detect that the Drop / Bubble Counter is connected and
display values using the currently selected range. If the range is not suitable for your
investigation, set to the correct range.
Connect one end of the sensor cable (supplied with the EASYSENSE unit) into the
hooded socket on the Counter housing.
Connect the other end of the sensor cable to an input socket on the EASYSENSE unit.
The red LED will light.
The EASYSENSE unit will detect that the Counter is connected and display values using
the currently selected range. If the range is not suitable for your investigation, set to the
correct range.
Press the button next to the LED indicator to reset the Counter to zero.
To set the range
With some EASYSENSE units it is possible to set the range from the unit. Please refer to the
EASYSENSE unit's user manual.
To alter the range in the EasySense software:
1. Select EasyLog from the Home screen.
2. Select the New recording wizard icon.
3. Click on the sensor's name (it will be
listed using its current range).
4. A set sensor range window will open.
Select the required range, then OK.
5. Select Finish to exit the wizard.
Or
1.
Select Sensor Config from the Settings menu.
2.
Select the Drop Counter from the list and click on the Change
Range button.
3.
The current range will be highlighted. Select the required range
and click on OK.
4.
Close Sensor Config.
The range setting will be retained until changed by the user.
Drop / Bubble Counter
3
