DuTCH audio IM2.3 Manuel - Sayfa 3
Kayıt Ekipmanları DuTCH audio IM2.3 için çevrimiçi göz atın veya pdf Manuel indirin. DuTCH audio IM2.3 7 sayfaları. Insert machine

Operation:
Inputs:
Input switches:
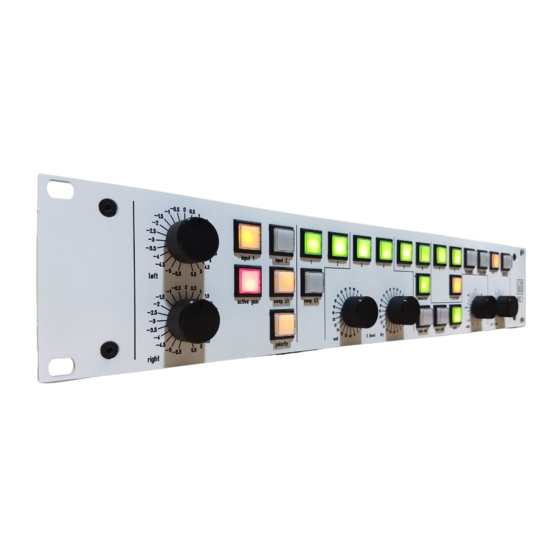
On the frontpanel you can choose between the 2 inputs by pushing the corresponding
switch. It's also possible to use both inputs at the same time, but keep in mind that this will
cause some impedance changes.
Polarity:
Above the 2 input selector switches you will find the 'polarity switch' which will swap the
polarity of the balanced inputs on both Left and Right. Sometimes swapping polarity will
give a better impulse response, mostly in the low frequencies. In most cases swapping
polarity is not needed, but in the cases where you want to, this button comes in very handy.
Active gain:
Both inputs are totally passive with just relays, but by pushing the 'active gain' switch you
will enable the active gain stage which enables you to change the input gain to your liking.
In the mid position, so at the 12 o' clock position, there is no gain applied though it passes
the active gain circuit. You can change the gain in 23 x0.5dB steps from +5.5dB to -5.5dB
with stepped switches.
Inserts:
Insert 1 and 2:
This is a 100% passive insert section with just relays. When disabled, it will directly pass
the signal internally to the next stage. When you enable the insert (1 and/or 2), it will pass
the signal to the corresponding send/return. It will first pass insert 1 and then it goes into
insert 2. When you push the 'swap 1 /2 button, it will swap the order of the inserts. So
instead of 1>2 it will be 2>1.
Insert 3 and 4:
Insert 3 and 4 are the same as insert 1 and 2.
Insert 5 and 6 (mid/side):
Insert 5 and 6 are more special, they can be used for Mid/Side processing.
When set to stereo, it will be 100% passive and it will not pass the active MS circuit at all.
Mid Side:
When the MS button is engaged, both inserts 5 and 6 will work in MS mode. Left channel is
Mid (sum), Right channel is Side (diff). When the width switch is disabled, no gain changes
are done on mid or side.
Width:
When you enable the width button, the width circuit becomes active and you can change
the gain of the side channel, making it more wide or narrow. I choose to take it out of the
circuit because of the extra stage needed to take care of the width control and also for
AB'ing. I picked a default gain range of +3.5dB untill - 6.5dB up with 23 steps. In practice
you don't need more, so I thought it was better to have a more precise and recallable range,
then going for a wide but less precise range.
Mid / Side mute:
