Hiboy VE1 PRO Kullanıcı Kılavuzu - Sayfa 5
Scooter Hiboy VE1 PRO için çevrimiçi göz atın veya pdf Kullanıcı Kılavuzu indirin. Hiboy VE1 PRO 14 sayfaları. 16" electric scooter
Ayrıca Hiboy VE1 PRO için: Kullanıcı Kılavuzu (10 sayfalar)
Attaching the Front Wheel
Attaching the Front Fender
Required Tools: 5 mm Allen Wrench, 10 mm Wrench (included)
1. Loosen the screw on Top of T-tube
2. Align the hole on the front fender with the hole in the middle of front fork
3. Tighten the Screw
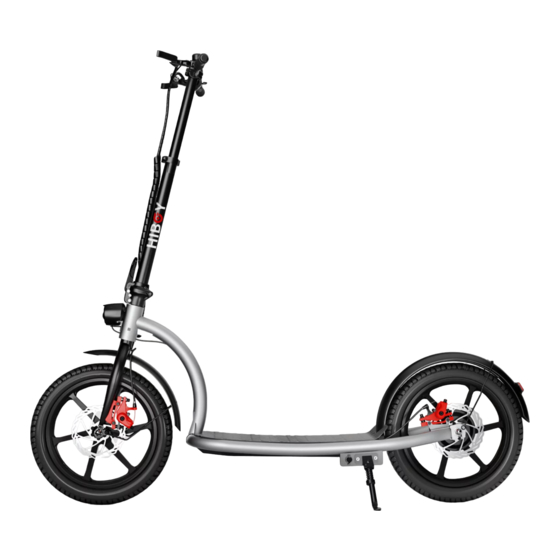
Attaching the Front Wheel (See Image A1,A2)
Required Tools: Two(2) 16 mm Wrenches (included)
1. Put the bearing into the front wheel
2. Put the short bearing bush on the wheel side(with Disc Brake Pads)
3. Put the long bearing bush on the other wheel side(without Disc Brake Pads)
4. Attaching the front wheel under the front fork, the Disc Brake pads should
be inserted into the Disc Brake device
5. Put the mousing-hook on the each side of bearing(The hook part
should hook the corresponding holes on the two sides of the front fork)
6. Put the flat washer on the each side of bearing
7. Tighten the nut of each side
Tighten the Rod of Front Fender
Required Tools: 3 mm Allen Wrench (included)
1. Loosen the screw on front wheel (See image A3)
2. Align the rod with the hole
3. Tighten the screw
Need Help? Please search "Hiboy us" on Youtube website to find our Channel. You can watch the Installation video
of VE1 PRO. Or contact Hiboy after-sale team by email: support @hiboy.com.
A1
A2
A3
6
5. Charging
Open the rubber cover
Your scooter will be fully charged when the LED light on the charger changes from red (charging) to green (fully charged).
After a period of full charge, it will automatically cut off the charging.
Even so, we still don't recommend to charge your scooter for a long time.
Do not connect the charger if the charging port is wet. Cover the charging port when not use.
Insert the charger plug in
Fill and fix the rubber
plug after the charging
7