HID VertX EVO Series Hızlı Başlangıç Kılavuzu
Kontrolör HID VertX EVO Series için çevrimiçi göz atın veya pdf Hızlı Başlangıç Kılavuzu indirin. HID VertX EVO Series 2 sayfaları.
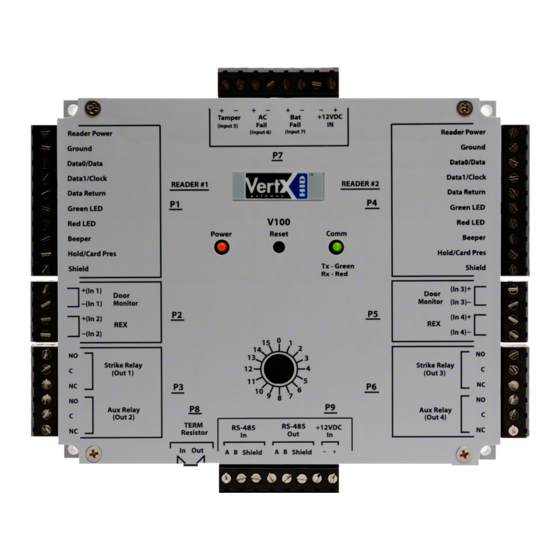
VertX EVO series
Before being able to directly connect the device to CredoID software, network and user settings of the HID devices have to be configured through
their graphical user interface. Have the device powered up and Ethernet cable connected to the network/system.
1.
Open a web browser and enter the HID devices IP. By default, every HID controller is configured to respond to a fixed IP address, that is
169.254.242.121. Be sure that your network settings are configured correctly to be able to connect to the controller.
2.
You should be greeted with a login screen. If connecting to the controller for the first time, in the User name field, enter "admin" and leave
the password field empty. If not, enter a configured password.
3.
After authentication is done, you should be presented with Basic setup information window, where network and other settings can be
configured. It is highly recommended to configure a static IP address, for more stable connection. After configuring network settings, set up a
password, if you haven't yet done that and set "Here I am interval" to 120 seconds. After all settings have been configured and saved, closed
down the window.
Tamper, AC Fail, Batt Fail values
To change default HID values of monitoring inputs follow these steps:
1.
After logging into the controller, click "Supplemental Configuration".
2.
Click device or module of which default input state needs to be changed
3.
Use the table below for default ADC values or adjust according to installation requirements.
Device
Default
state
V1000
N/C
128
N/O
255
HRUL
HRLL
LRUL
0
128
128
255
LRLL
0
128