decorflame DS502-SL Manuel - Sayfa 2
Isıtıcı decorflame DS502-SL için çevrimiçi göz atın veya pdf Manuel indirin. decorflame DS502-SL 9 sayfaları. Oscillating fireplace heater
This heater is for use on 120 volts. The cord has a plug, as shown at A in illustration below.
An adapter, as shown at C, is available for connecting three-blade grounding-type plugs
to two-slot receptacles. The green grounding plug extending from the adapter must be
connected to a permanent ground such as a properly grounded outlet box. The adapter
should not be used if a three-slot grounded receptacle
is available.
After completely reading instructions, confirm that all controls on the heater are in
the OFF position. Plug the unit into a 15 amp, 120 volt outlet. his heater is for use on
120 volts.
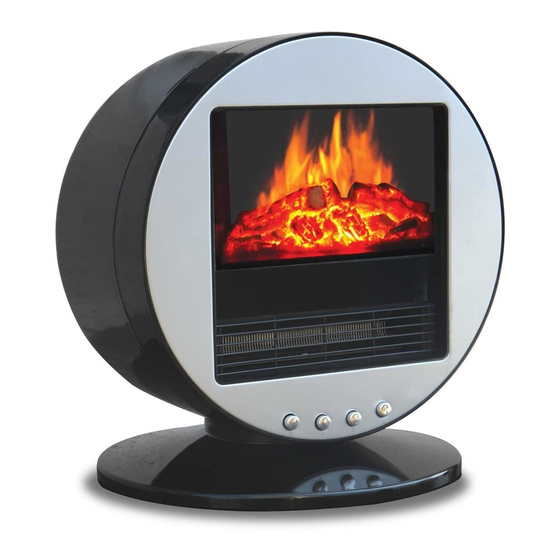
OPERATION
The controls and switches are located on the front panel.
0/i
Press this button for main power and flame effect. Press again to turn off the
unit. When 0/I switch is OFF, all functions will be stopped even though the
switches are in the ON position.
lOw heat: For low heat function, press this switch while the 0/I switch is in
the "I" position for low heat.
high heat: For high heat function, press this switch while the LOW HEAT and
0/I switch are in the ON position for high heat.
OscillatiOn: Press this switch to turn on the oscillating function. Press again
to stop the unit oscillating. This switch will operate when the 0/I switch is in the
ON position.
O/ I
O/ I
caUtiOn: this heater is eqUippeD with tip-OVer switch that will cUt Off the Main
pOwer when the Unit is Being trippeD OVer Or tilteD Up. Make sUre Up that the
Unit is placeD On a flat sUppOrting sUrface.
warning: DO nOt MODify Or Bypass the tip-OVer switch.
caUtiOn: if yOU Use this heater in cOnJUnctiOn with a therMal cOntrOl, a
prOgraMMaBle cOntrOller, a tiMer Or any Other DeVice that switches On the
heater aUtOMatically, reMeMBer tO OBserVe all safety warnings at all tiMes.
the heater has a safety OVerheat prOtectiOn. if the OVerheat prOtectiOn trips,
tUrn Off all the switches anD UnplUg the pOwer cOrD frOM the receptacle.
it shOUlD reset aUtOMatically after 5 MinUtes.
warning: DiscOnnect pOwer anD UnplUg the pOwer cOrD BefOre atteMpting
any Maintenance Or cleaning tO reDUce the risk Of fire, electric shOck Or
persOnal inJUry. the BUlB(s) in yOUr Unit can BecOMe extreMely hOt. allOw at
least 10 MinUtes Between tUrning Off the Unit anD reMOVing the light BUlBs tO
aVOiD acciDental BUrning Of the skin.
FLAME EFFECT
The fire effect is created with the use of a 40 watts B-10 candelabra light bulb with an
E12 (small) socket base. The light bulb will have to be replaced from time to time when
they burn out.
During normal operation, the heater will always give you simulated flame function. If the
intensity of flame suddenly increases, it means that the light bulb is going to burn out.
Replace the light bulbs immediately, according to the instructions. Do not operate the
heater when the light bulb burns out or without the light bulb.
REPLACING THE LIGHT BULB
Step 1: Open rear cover by loosening 6 screws at the back of heater. See Fig. 1.
Step 2: Remove the flame petal by pulling it to the left. See Fig. 2.
Step 3: Remove the plastic cover inside by loosening 6 screws. See Fig. 3.
Step 4: You will find the light bulb. Replace the burnt out light bulb with a new 40 watt
type B-10 candelabra light bulb. See Fig. 4.
Step 5: Reinstall the plastic cover and tighten all 6 screws.
Step 6: Reinstall the flame petal.
Step 7: Close the rear cover and tighten all 6 screws.
Step 8: Plug in the unit.
2