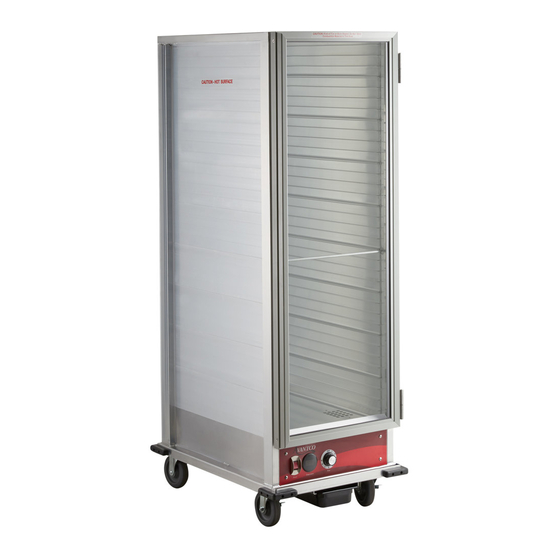
Avantco 177HEAT1836 Kullanıcı Kılavuzu - Sayfa 4
Yiyecek Isıtıcı Avantco 177HEAT1836 için çevrimiçi göz atın veya pdf Kullanıcı Kılavuzu indirin. Avantco 177HEAT1836 20 sayfaları. Heater/proofer cabinets

- 1. Table of Contents
- 2. Identifying Your Cabinet
- 3. General Information
- 4. Product Specifications
- 5. Installation
- 6. Care & Maintenance
- 7. Operating Instructions
- 8. Service Specifications
- 9. Recommended Temperature Guidelines-Food Holding Chart
- 10. Drawer Assembly
- 11. Cabinet Assembly
- 12. Electric Schematic Power Supply
- 13. Troubleshooting
- 14. Limited Replacement Warranty
User Manual
Installation
1. Upon delivery of the unit, check for shipping damage. Check the packaging and cabinet for shipping damage after
unloading the unit, and after removing all packaging. Notify freight company immediately of shipping damage with
pictures and description.
2. After unpacking the cabinet, set on a stable ground and put casters in the lock position where applicable.
3. Remove all tape and packing material from the outside and inside of the unit.
4. Remove any protective covers on the door and corners of the unit.
NOTE: Use of scrapers (plastic/metal or other material) to remove the protective film on the door may cause
scratches and impair see-through visibility.
5. After all packaging is removed, plug the cabinet into a dedicated grounded 120V 15 or 20 Amp outlet.
6. Turn the unit on by using the power switch, flip the unit to "heat" mode and adjust dial to maximum
setting 9.
7. Allow the unit to run for at least 1 hour to burn-in the elements and remove any odors evident from
the manufacturing process.
Care & Maintenance
WARNING:
Unplug the cabinet before cleaning or servicing. Do not wash the cabinet with high-pressured
water or a water jet.
WARNING:
Allow the unit to completely cool before cleaning. Not allowing the unit to cool causes risk of
burn injury from the cabinet surfaces.
CAUTION:
Do not spray or pour water into the heated control drawer module. Excess water may cause
the heated control drawer module to short-circuit or cease working.
CLEANING THE CABINET INTERIOR & EXTERIOR (EXCLUDING DOOR PANEL)
1. Ensure the power cord is not plugged in and the cord is off the ground.
2. Open the door and remove the water pan.
3. Remove the heated control drawer module by lifting the front up enough to clear the detent,
then pull the module away from the cabinet with the power cord through the rear clearance hole.
4. Using a mild detergent diluted to the manufacturers specification and a clean cloth, wipe down
all interior and exterior surfaces excluding the polycarbonate door panel.
5. Using a clean cloth, wipe down all surfaces and then let air-dry.
6. After air-drying, replace the heated control drawer module by slipping the power cord through
the rear clearance hole and sliding the drawer module into the bottom of the unit until it sits on
its detent.
DOOR PANEL
1. Ensure the power cord is not plugged in and the cord is off the ground.
2. Using a cleaner recommended for polycarbonate plastics and a clean cloth, wipe down both sides of the door panel.
NOTE: Use of synthetic cloths or cleaners not intended for polycarbonate plastics may scratch or dull the door panel
3. Isopropyl Rubbing Alcohol or a small amount of liquid dish detergent diluted with water may help remove tough
grease smudges, dirt, or fingerprints as well as help make the panel antistatic and less likely to attract dust.
4. Paste-wax recommended for polycarbonate plastics and approved for food service equipment can be used to help
hide small scratches and return luster and clarity to the door panel as well as help make the panel antistatic and less
likely to attract dust.
4
INSTALLATION
Position your unit on a stable, leve
AC, 15 amps power supply dedica
cord supplied. Use of a dedicated
unit with an extension cord.
15Amp Outlet
For Cabinet rated 120V 1500Watt
MAINTENANCE
The equipment has been designe
meet National Sanitation Foundat
cleaners or mild detergents are re
any kind. Steel wool particles wil
particles can cause a health haza
not use caustic solutions on your e
these fixtures clean and sanitary.
components. Never Power wash o
CAUTION
Be sure to disconnect power sour
PREFERRED
careless use is the responsibility o
CLEANER
authorized service agent.
Attack tough
grease, oil, and
carbon with this
ready to use
cleaner and
degreaser.
5/20
www.AvantcoEquipment.com
