CORNING Centrix Talimatlar Kılavuzu
Ağ Donanımı CORNING Centrix için çevrimiçi göz atın veya pdf Talimatlar Kılavuzu indirin. CORNING Centrix 8 sayfaları. System splitter/cwdm cassette installation
Ayrıca CORNING Centrix için: Jumper Yönlendirme (20 sayfalar), Hızlı Başlangıç Kılavuzu (2 sayfalar)
Centrix™ System Patch Panel Cassette
P/N 003-1017-AEN
Issue 2
related literature | Search www.corning.com/opcomm. Click on "Resources."
003-948
1.
General
This document describes the installation of the Centrix™ System patch panel cassette into both rear- and front-
access Centrix System frames, 19-in racks, and 23-in frames. The 4U housing is shown in this instruction, but the
procedure applies to Centrix System housings of all sizes (1U, 2U, and 4U).
It is assumed that the Centrix housing has already been installed into the rack/frame according to the instructions
provided with the housing.
2.
Carton Contents
• Patch panel cassette
• Right-hand jumper routing waterfall and retainer clip kit (P/N CTX-KIT-RT-DH)
3.
Tools and Materials
• (Optional) Strain-relief bracket (P/N CTX-KIT-SR-SA)
4.
Installation of Rear-Access Cassettes into Rear-Access Frame
Rear-access cassettes can be installed into Centrix rear-access frames, 19-in racks, and 23-in frames.
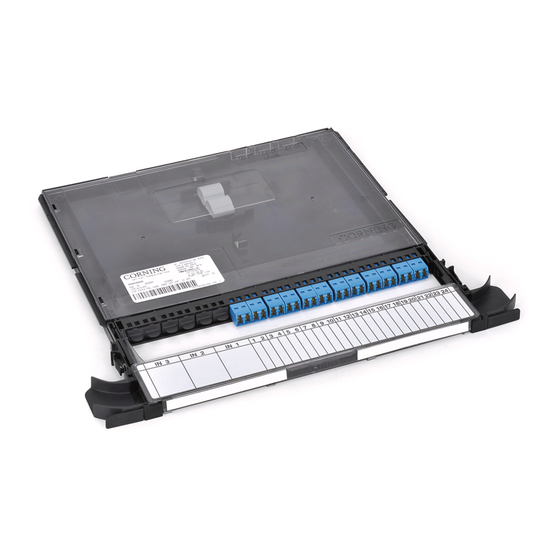
Step 1:
Take note of the locations etched into the cover for the jumper inputs (Figure 1). Open the cover.
Step 2:
Feed the input jumpers into the cutouts in the back of the cassette in groups of 12 according to the
number of jumpers being installed - up to 24 SC connectors or 36 LC connectors. For example, install
jumpers 1-12 into the first cutout on the right, as viewed from the back of the cassette.
3
2
1
TPA-5490
Instruction, Centrix™ System Housing Installation
Standard Recommended Procedure 003-1017-AEN | Issue 2 | April 2017 | Page 1 of 8
Figure 1