Gardena 885 Kullanım Talimatları Kılavuzu - Sayfa 5
Boya Püskürtücü Gardena 885 için çevrimiçi göz atın veya pdf Kullanım Talimatları Kılavuzu indirin. Gardena 885 9 sayfaları. Backpack sprayer 12
Ayrıca Gardena 885 için: Kullanım Talimatları Kılavuzu (6 sayfalar), Kullanım Talimatları Kılavuzu (9 sayfalar), Kullanım Talimatları Kılavuzu (10 sayfalar)
Spraying :
H
4
Adjusting the spray lance :
J I
Adjusting the spray jet :
K
5. Maintenance
Cleaning the
Backpack Sprayer :
H
G
L
M
Thorough inspection :
12
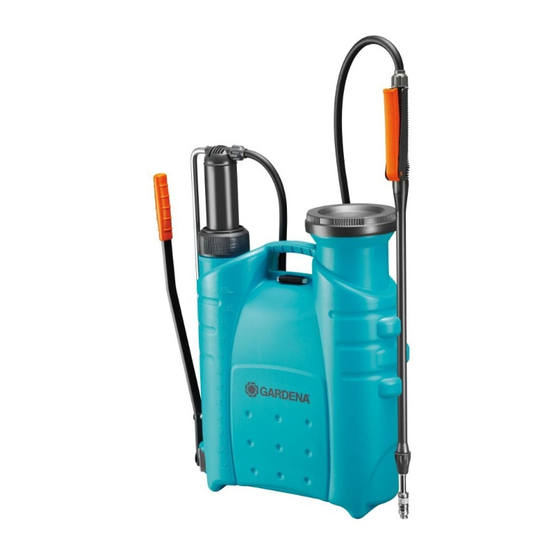
1. Strap the Backpack Sprayer to your back.
2. Adjust the length of the carrying
1
straps
as required using the strap
7
adjusters
.
The stitched end of the carrying
strap is threaded through the strap
7
adjusters
at the factory.
3. Press down the pump lever
until it becomes more difficult to press the lever and you feel
resistance.
H
4. Press the button
The Backpack Sprayer starts spraying.
5. Release the button
The Backpack Sprayer stops spraying.
1. Loosen the union nut
2. Pull out the spray lance
3. Tighten the union nut
You can adjust the spray jet from full jet (nozzle open) to a
fine mist (nozzle closed).
v Open or close the nozzle
required.
You must clean your Backpack Sprayer after each use.
H
1. Press the button
pressure through the spray lance.
G
2. Unscrew tank cap
ly clean the area around the thread and thread O-ring
3. Clean the inlet filter
4. Empty the tank and fill with clean water (with detergent added
to the water if necessary).
5. Spray the water out of the Backpack Sprayer until the tank
is empty.
This cleans the nozzle and valves.
6. Leave the Backpack Sprayer open and allow it to dry.
Do not dispose of residual products by pouring them into the
sewerage system. Please contact your local disposal centre
and ask about proper disposal of the products you have used.
We recommend that you have your Backpack Sprayer thorough-
ly inspected (preferably at a GARDENA Service Centre) after
using it for 5 years.
4
repeatedly (approx. 7 - 9 times)
on the sprayer handle.
H
on the sprayer handle.
I
.
J
to the desired length.
I
again.
K
to adjust the spray jet as
on the sprayer handle and release the
. If the outside of the cap is dirty, thorough-
M
G
and tank cap
in clean water.
7
1
L
.