Gardena 9334-20 Kullanım Talimatları Kılavuzu - Sayfa 5
Üfleyici Gardena 9334-20 için çevrimiçi göz atın veya pdf Kullanım Talimatları Kılavuzu indirin. Gardena 9334-20 9 sayfaları. Electric blower/vac
– before checking, cleaning or working on the appliance;
– if the product starts to vibrate abnormally. Check immediately. Excessive
vibration can cause injury.
– before passing to another person.
e) Store idle power tools out of the reach of children and do not allow
persons unfamiliar with the power tool or these instructions to operate
the power tool. Power tools are dangerous in the hands of untrained users.
f) Maintain power tools. Check for misalignment or binding of moving
parts, breakage of parts and any other condition that may affect the
power tool's operation. If damaged, have the power tool repaired
before use. Keep all cooling air inlets clear of debris.
Many accidents are caused by poorly maintained power tools.
g) Use the power tool and accessories in accordance with these instruc-
tions, taking into account the working conditions and the work to be
performed. Use the product only in daylight or good artificial light.
Use of the power tool for operations different from those intended could result
in a hazardous situation.
5) Maintenance and storage
Have your power tool serviced by a qualified repair person using only
identical replacement parts.
This will ensure that the safety of the power tool is maintained.
– Keep all nuts, bolts and screws tight to be sure the product is in a safe working
condition.
– Replace worn or damaged parts for safety.
– Use only genuine replacement parts and accessories.
– Inspect the debris bag regularly. If the debris bag becomes worn or damaged,
replace.
– Store in a cool dry place and out of reach of children. Do not store outdoors.
Blower safety warnings
•
Inspect the area before using the unit.
Remove all debris and hard objects such as rocks, glass, wire, etc., that can
ricochet, be thrown, or otherwise cause injury or damage during operation.
•
Never run the unit without the proper equipment attached.
When used as a blower, always install a blower tube. Use only recommended
attachments to prevent personal injury.
•
Do not use blower near leaf or brush fires, fireplaces, barbecue pits,
ashtrays, etc. Proper use of the blower will help avoid spreading fire.
•
Never place objects inside the blower tubes; always direct the blow-
ing debris away from people, animals, glass, and solid objects such
as trees, automobiles, walls, etc.
The force of air can cause rocks, dirt, or sticks to be thrown or to ricochet
which can hurt people or animals, break glass, or cause other damage.
•
Never use for spreading chemicals, fertil izers, or any other substances.
This will prevent the spreading of toxic materials.
Vacuum safety warnings
•
Stop the motor and disconnect the extension cord before opening the
air inlet door or attempting to insert or remove the vacuum tubes.
The motor must be stopped and the impeller blades no longer turning to avoid
serious injury from the rotating blades.
•
Inspect the area before using the unit. Hard objects can be thrown
through the collection bag or the housing and become dangerous missiles
which can cause serious injury to the operator or others.
•
Do not vacuum stones, gravel, metal, broken glass, etc. Proper use of
the unit will reduce possible personal injury and/or damage to the unit.
•
Do not attempt to vacuum water or other liquids. Water or other liquids
entering a power tool will increase the risk of electric shock.
•
Never run the unit without the proper equipment attached.
When used as a vacuum, always install vacuum tubes and collection bag
assembly. Make sure the collection bag assembly is completely zipped when
unit is running to avoid flying debris. Use only recommended attachments.
•
Do not vacuum discarded matches, cigars, cigarettes, or ash from
fireplaces, barbecue pits, brush piles, etc. Avoid situations which could
set the collection bag on fire. To avoid spreading fire, do not use blower near
leaf or brush fires, fireplaces, barbecue pits, ashtrays, etc.
•
Always use the shoulder strap when vacuuming. This will help maintain
control of the power tool.
•
Check air intake openings, elbow tube, and vacuum tubes frequently,
always with the unit stopped and the power source disconnected.
Keep vents and tubes free of debris which can accumulate and restrict proper
air flow. Do not use with any opening blocked. Keep free of dust, lint, hair and
anything that may reduce air flow.
Additional safety warnings
DANGER! Small parts can be easily swallowed. There is also a risk that
the polybag can suffocate toddlers. Keep toddlers away when you
assemble the product.
DANGER! This product makes an electromagnetic field while it operates.
This field may under some conditions interfere with active or passive
medical implants. To decrease the risk of conditions that can possibly
injure or kill, we recommend persons with medical implants to speak
with their physician and the medical implant manufacturer before you
operate the product.
18
2. ASSEMBLY
WARNING! Stop the unit and unplug the extension cord
before opening the inlet cover or attempting to install or
remove the blower tube or vacuum tubes.
The motor must be stopped and the impeller blades no longer turning to
avoid serious injury from the rotating blades.
Assembling for blower use:
Fitting the blower tube [ Fig. A1 ]:
NOTE: A safety switch will prevent the unit from starting if the blower
1
tube
is not installed correctly.
1. Align the grooves on the blower tube
outlet
2
.
1
2. Push the blower tube
onto the blower outlet
place.
The blower tube is secured to the blower outlet with the tube release
button
3
.
1
To remove the blower tube
, press the tube release button
out the blower tube
1
at the same time.
Fitting the intake cover [ Fig. A2 ]:
NOTE: A safety switch will prevent the unit from starting if the intake
cover
4
is not latched closed.
1. Place the intake cover
4
on the lower opening of the garden
blower and turn the intake cover
(bayonet fastening).
2. Tighten the fastening screw
5
4
To remove the intake cover
, loosen the fastening screw
intake cover
4
anti-clockwise and remove it.
Assembling for vacuum use:
Fitting the vacuum tube [ Fig. A3 / A4 ]:
CAUTION! Do not use the vacuum
ß
the upper tube
.
6b
1. Align the seams of the lower tube
ß
ß
2. Press the tubes
/
together until they are fully engaged.
6b
6 a
NOTE: A safety switch will prevent the unit from starting if the vacuum
tube
6
is not installed correctly.
3. Place the vacuum tube
6
on the lower opening of the garden vacuum
6
and turn the vacuum tube
clockwise up to the stop (bayonet fastening).
5
4. Tighten the fastening screw
To remove the vacuum tube
6
, loosen the fastening screw
6
vacuum tube
anti-clockwise and remove it.
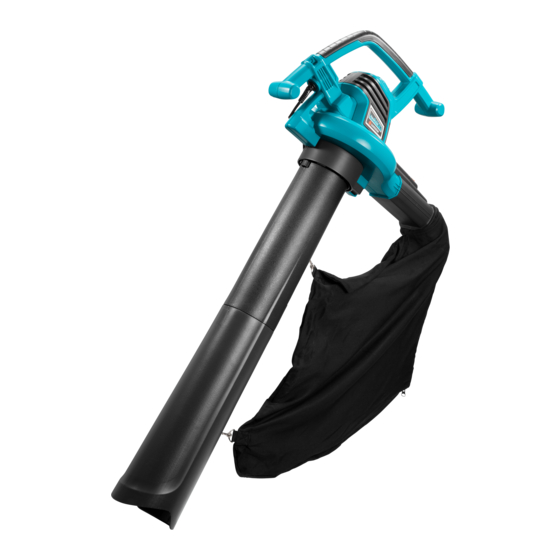
Attaching the collection bag [ Fig. A5 ]:
NOTE: A safety switch will prevent the unit from starting if the elbow
tube
7
is not installed correctly.
1. Align the grooves on the elbow tube
outlet
2
.
2. Press the elbow tube
7
onto the blower outlet
place.
The collection bag is secured to the blower outlet with the tube release
button
8
.
3. Clip the collection bag
9
into both loops
To remove the collection bag
9
, press the tube release button
out the elbow tube
7
at the same time.
Attaching the shoulder strap [ Fig. A6 ]:
For extra support when using your unit as a vacuum, a shoulder strap is
included with your unit. Attach the strap to the unit before operation. Snap
q
the hook onto the retainer
.
3. OPERATION
WARNING! Do not use the unit without the tubes or collec-
tion bag properly attached to avoid flying debris and/or
impeller contact which can cause serious injury.
Always wear gloves and use eye protection to prevent rocks or debris
from being blown or ricocheting into the eyes and face which can result
in blindness or serious injury.
1
with the grooves on the blower
2
until it snaps into
3
and pull
4
clockwise up to the stop
.
5
, turn the
ß
6
unless the lower tube
to fitted to
6 a
ß
ß
and upper tube
.
6 a
6b
.
5
, turn the
7
with the grooves on the blower
2
until it snaps into
0
on the vacuum tube
8
6
.
and pull